Read on to learn about using MultiLine's Call Handling Settings. You can set multiple numbers to receive incoming calls sequentially.
Overview
You can use Call Handling in the MultiLine Settings menu to
- Set Simultaneous or Sequential Dial
- Set Call Forwarding
- Set a Business Hours Schedule
- Turn on Do Not Disturb
Before you start
- You need to be connected to the Internet to change your Call Handling settings.
- An organization can choose to turn this feature off. If so, you won't see Call Handling in the Settings menu.
- If you're using the Microsoft Teams integration, Sequential Ring will not work.
Set Simultaneous or Sequential Dial
Use the Call Handling setting to designate multiple numbers for receiving incoming calls all at once (simultaneous), or one at a time in order (sequentially).
- Select Call Settings.
- Select Call Handling.
- Choose your desired Call Handling setting.
- Sequential Ring: Rings the primary MultiLine application and then ring each number one after the other listed in the Add Number list.
- Simultaneous Ring: Simultaneously rings all telephone numbers listed in the Add Number list, including your MultiLine number. The first phone to pick up receives the call.
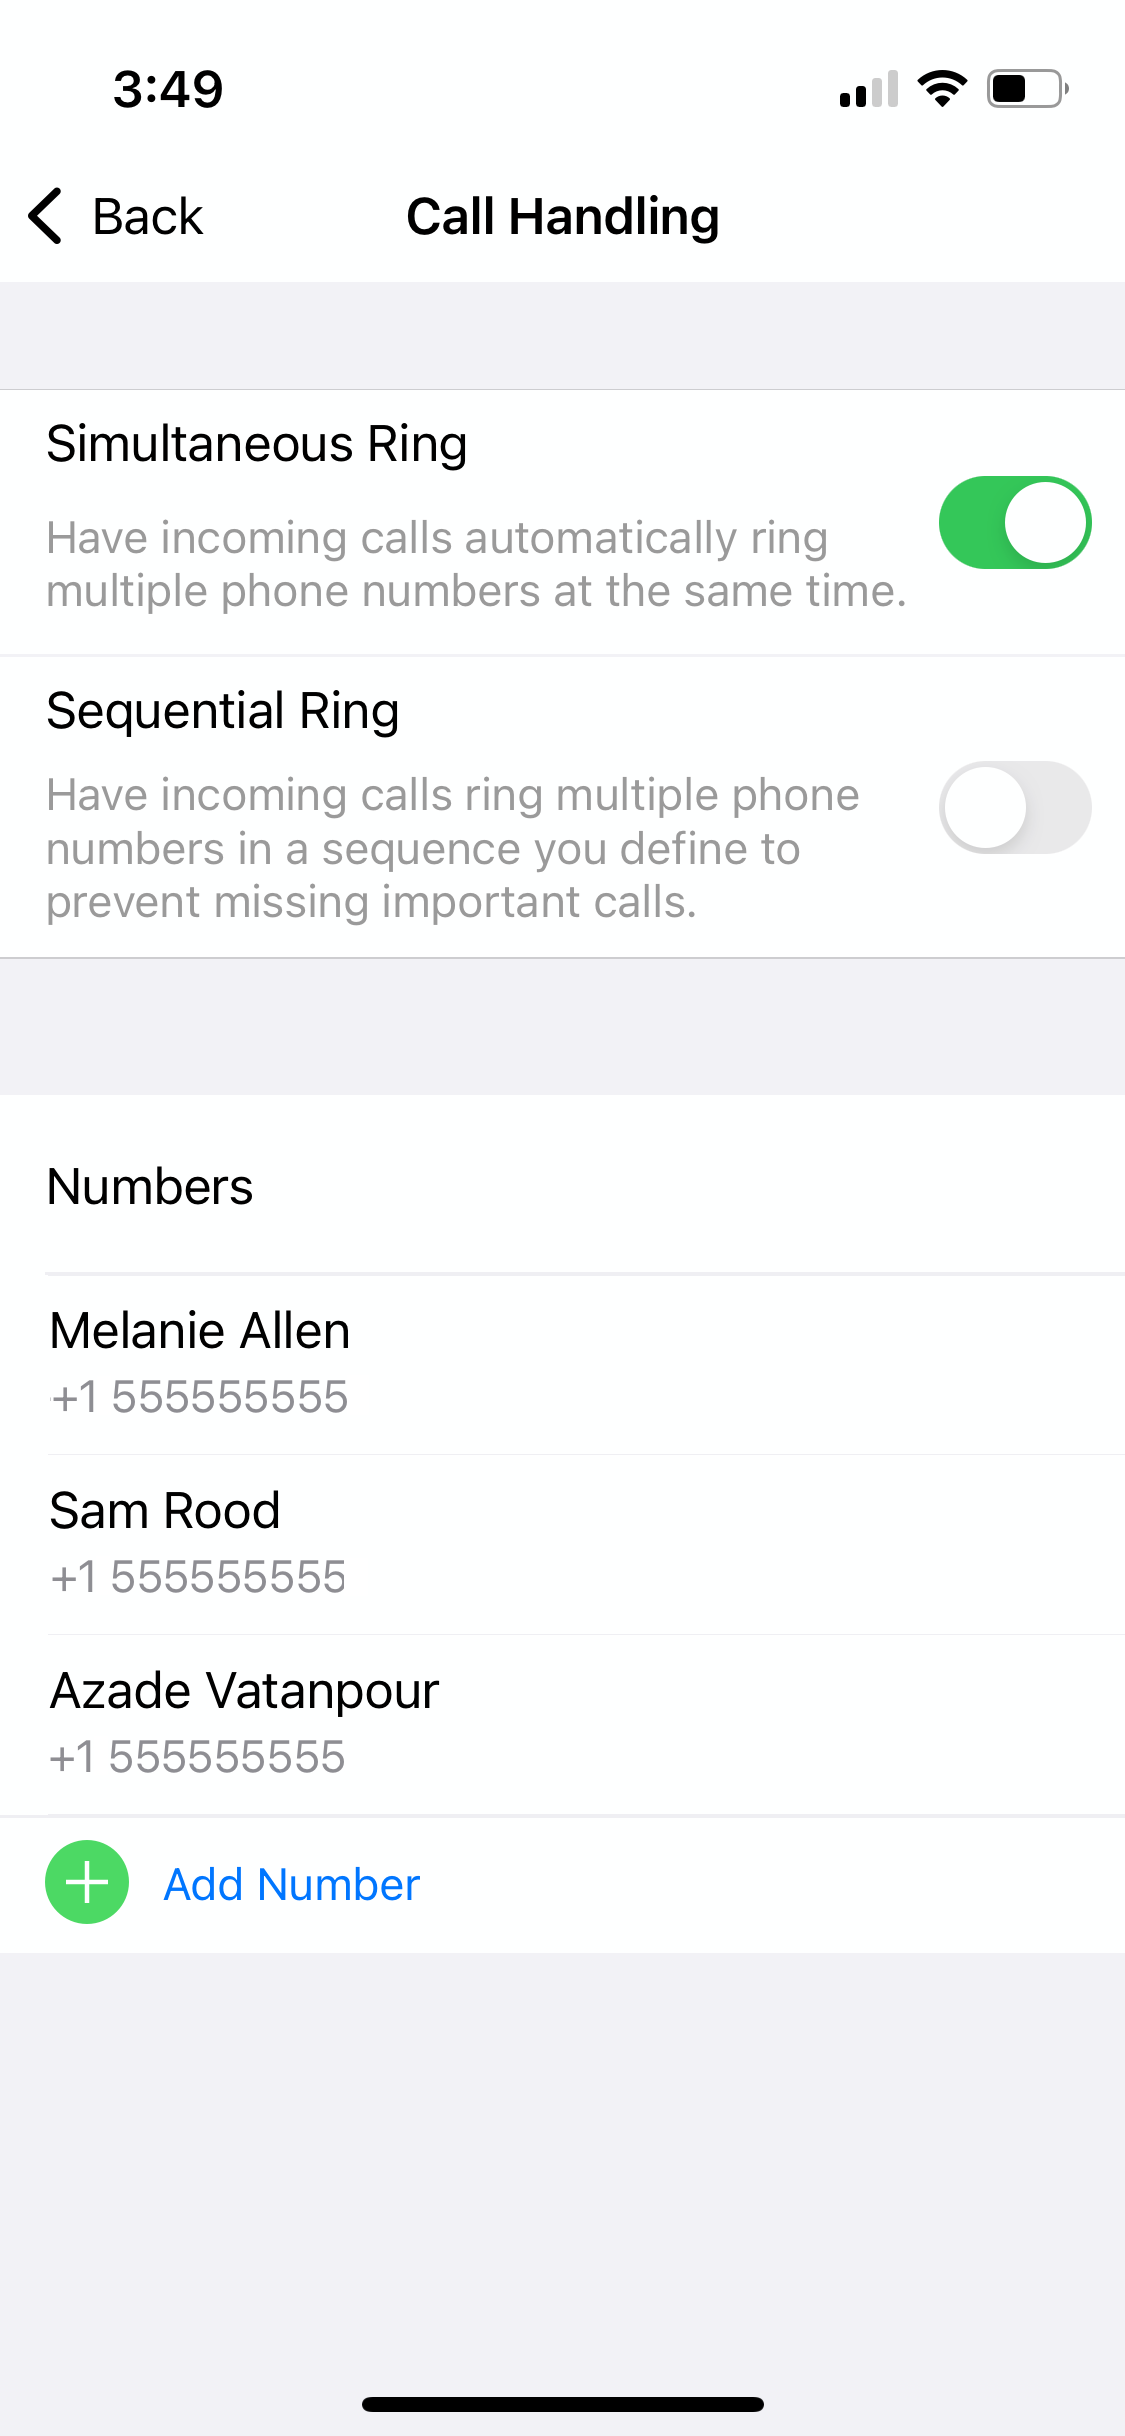
- Tap Add Number to add numbers to the Add Number List.
- This is the list of numbers that is used by Sequential or Simultaneous ring. The maximum is 10 numbers.
When you leave the menu your settings will automatically apply.
- If you have Do Not Disturb or Business Hours settings applied, these rules apply first and your calls will go to voicemail instead of going to the numbers in the Call Handling list.
- The call will show as a "Missed Call" for any parties that did not pick the call.
Read on to learn about using MultiLine's Call Handling Settings. You can set multiple numbers to receive incoming calls sequentially.
Overview
You can use Call Handling in the MultiLine Settings menu to
- Set Simultaneous or Sequential Dial
- Set Call Forwarding
- Set a Business Hours Schedule
- Turn on Do Not Disturb
Before you start
- You need to be connected to the Internet to change your Call Handling settings.
- An organization can choose to turn this feature off. If so, you won't see Call Handling in the Settings menu.
Set Simultaneous or Sequential Dial
Use the Call Handling setting to designate multiple numbers for receiving incoming calls all at once (simultaneous), or one at a time in order (sequentially).
- Select Settings from the bottom menu.
- Tap Call Handling.
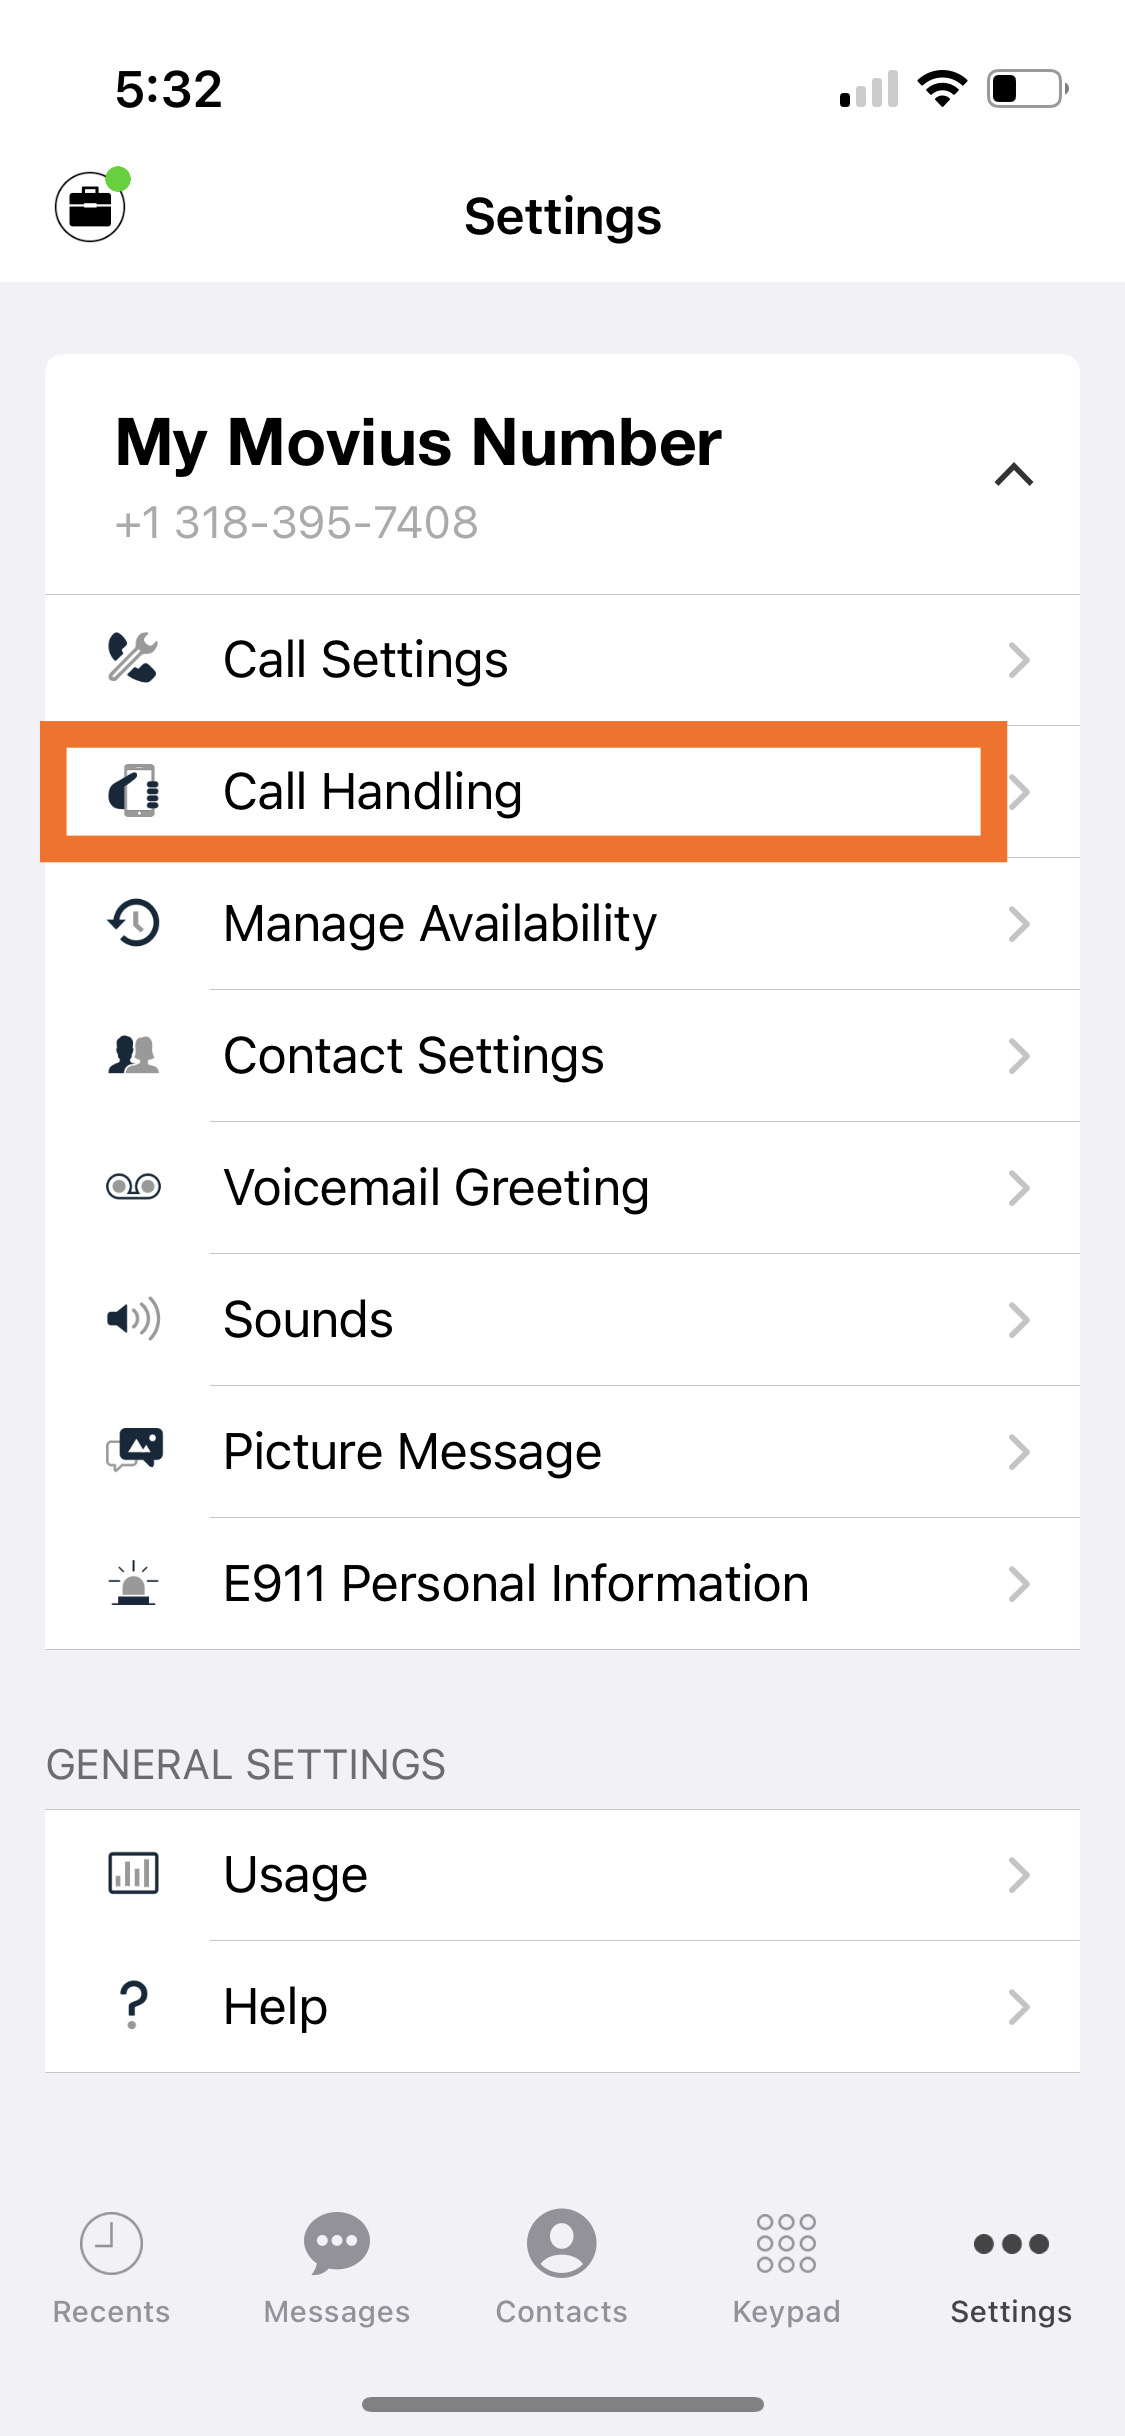
- Choose your desired Call Handling setting.
- Sequential Ring: Rings the primary MultiLine application and then ring each number one after the other listed in the Add Number list.
- Simultaneous Ring: Simultaneously rings all telephone numbers listed in the Add Number list, including your MultiLine number. The first phone to pick up receives the call.

- Tap Add Number to add numbers to the Add Number List.
- This is the list of numbers that is used by Sequential or Simultaneous ring. The maximum is 10 numbers.
When you leave the menu your settings will automatically apply.
- If you have Do Not Disturb or Business Hours settings applied, these rules apply first and your calls will go to voicemail instead of going to the numbers in the Call Handling list.
- The call will show as a "Missed Call" for any parties that did not pick the call.
Set Call Forwarding
Use Call Forwarding to send calls to your MultiLine number to the specified number. Your MultiLine phone will not ring or receive the call when Call Forwarding is set.
- Select Settings from the bottom menu.
- Go to Settings and select My Schedule.
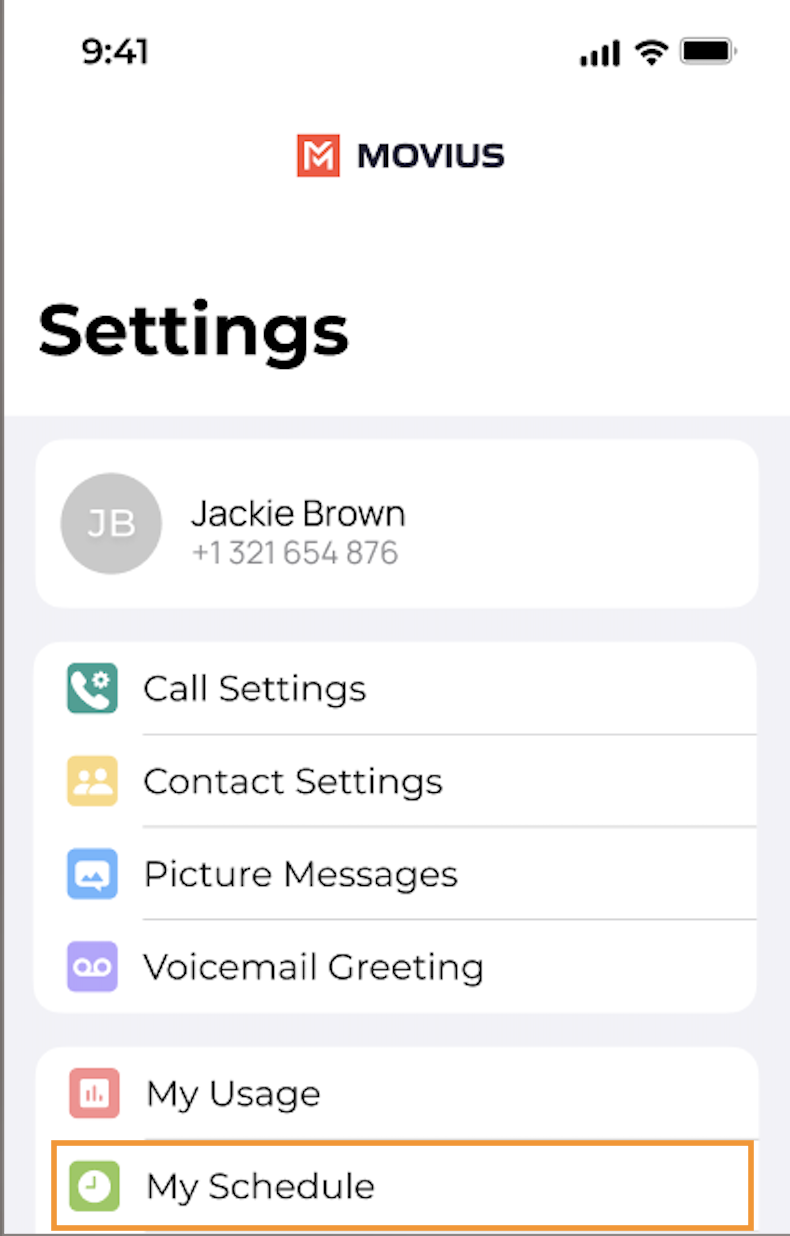
- Tap on Call Forwarding to enable it.
- Enter the forwarding phone number
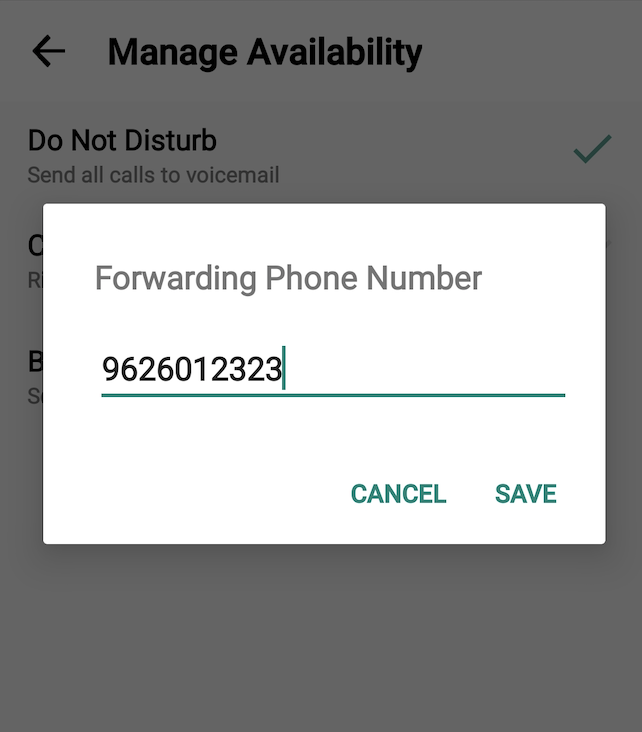
- Tap Save. If successful, you'll see the number you set on the screen.
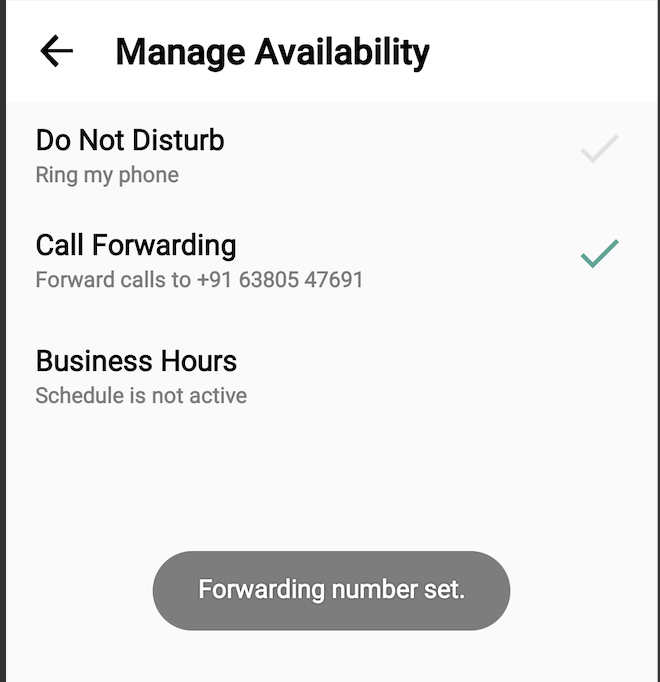
The forward function WILL NOT work if you enter your primary device’s number as the call forwarding number.
Set Business Hours
Use Business Hours to set which hours you would like your phone to ring. Outside of those hours, calls will go to voicemail.
- Select Settings from the bottom menu.
- Go to Settings and select My Schedule.

- Tap on Business Hours to enable it. Tap again to disable it.
- Use the sliders to set the hours you're available on your MultiLine number. Any incoming calls that are received outside those set hours will automatically be forwarded to your MultiLine voicemail.
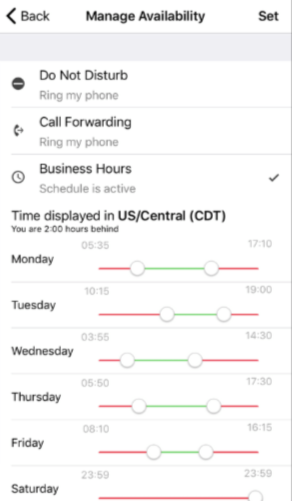
If you are using the Call Handling feature to set a list of numbers to simultaneously or sequentially dial, the Do Not Disturb or Business Hours settings apply first and the calls will go to your voicemail and not ring the numbers on your Call Handling lists.
Set Do Not Disturb
When Do Not Disturb is enabled, all the calls will be sent directly to your MultiLine voicemail.
- Select Settings from the bottom menu.
- Go to Settings and select My Schedule.

- Tap on Do Not Disturb to enable it. A checkmark will appear and the message will show that MultiLine will send all calls to voicemail. Tap again to disable it. The checkmark will disappear and the message will show that MultiLine will ring your phone.
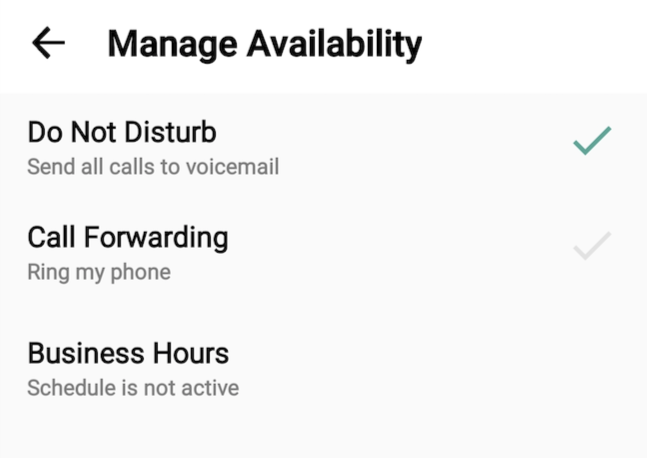
If you are using the Call Handling feature to set a list of numbers to simultaneously or sequentially dial, the Do Not Disturb or Business Hours settings apply first and the calls will go to your voicemail and not ring the numbers on your Call Handling lists.


