Read on to learn about adding Compliance Restrictions in the Management Portal.
Overview
In some regulated industries, there is a need to enforce controls that prevent certain user groups from messaging with each other to avoid conflicts of interest or the exchange of confidential information. We allow setting Compliance Restrictions and Compliance Groups in the Management Portal so that Customer Admins can define these user groups and block messaging between them.
An administrator creates compliance groups and then adds the groups when inviting users (Add Single User or Batch Add Users) or to existing users from their Accounts page.
Before you start
- This is a commercial feature that must be purchased to use.
- Compliance Restrictions are supported across user groups within the same region.
- An admin must have "Setup" Privilege in their Role in the organization to do these instructions. See What Admin Privileges are in Management Portal?.
Creating a Compliance Group
Compliance Restrictions can be set up for an organization in Setup > Compliance Groups.
- Go to Setup > Compliance Restrictions.

- Select the menu at the top then select Add.
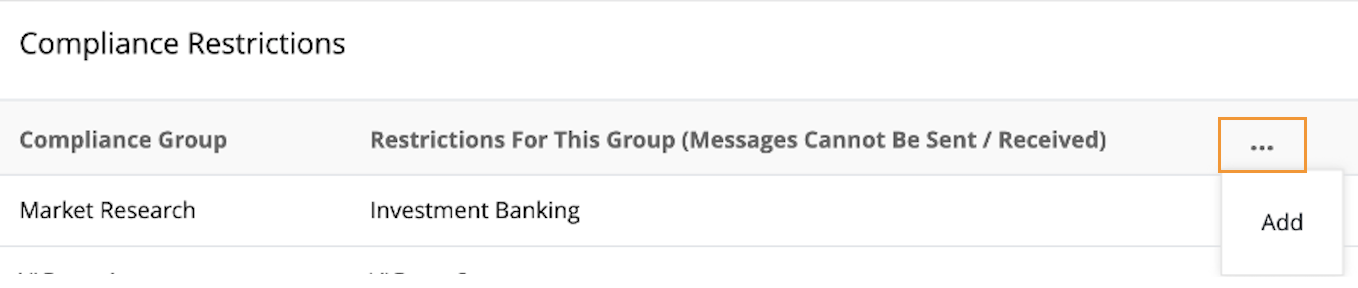
- Set the Compliance Restriction:
- Add the name of a Compliance Group to the Compliance Group field.
- Add the name of a Compliance Group they must not be able to message to the Restrictions For This Group field.
- To add multiple Compliance Groups, use pipes "|" to separate the values.
- Adding a name to Restrictions For This Group, does not create a Compliance Group. Anything added to this field that is not a Compliance Group will be ignored.
- Select Complete.


Now you'll be able to assign users to the Compliance Group.
Users in a Compliance Group who attempt to message a member of a restricted group will see a system message informing them that they're not allowed to message that user. The platform creates a record of the blocked messages and that the messages were blocked.
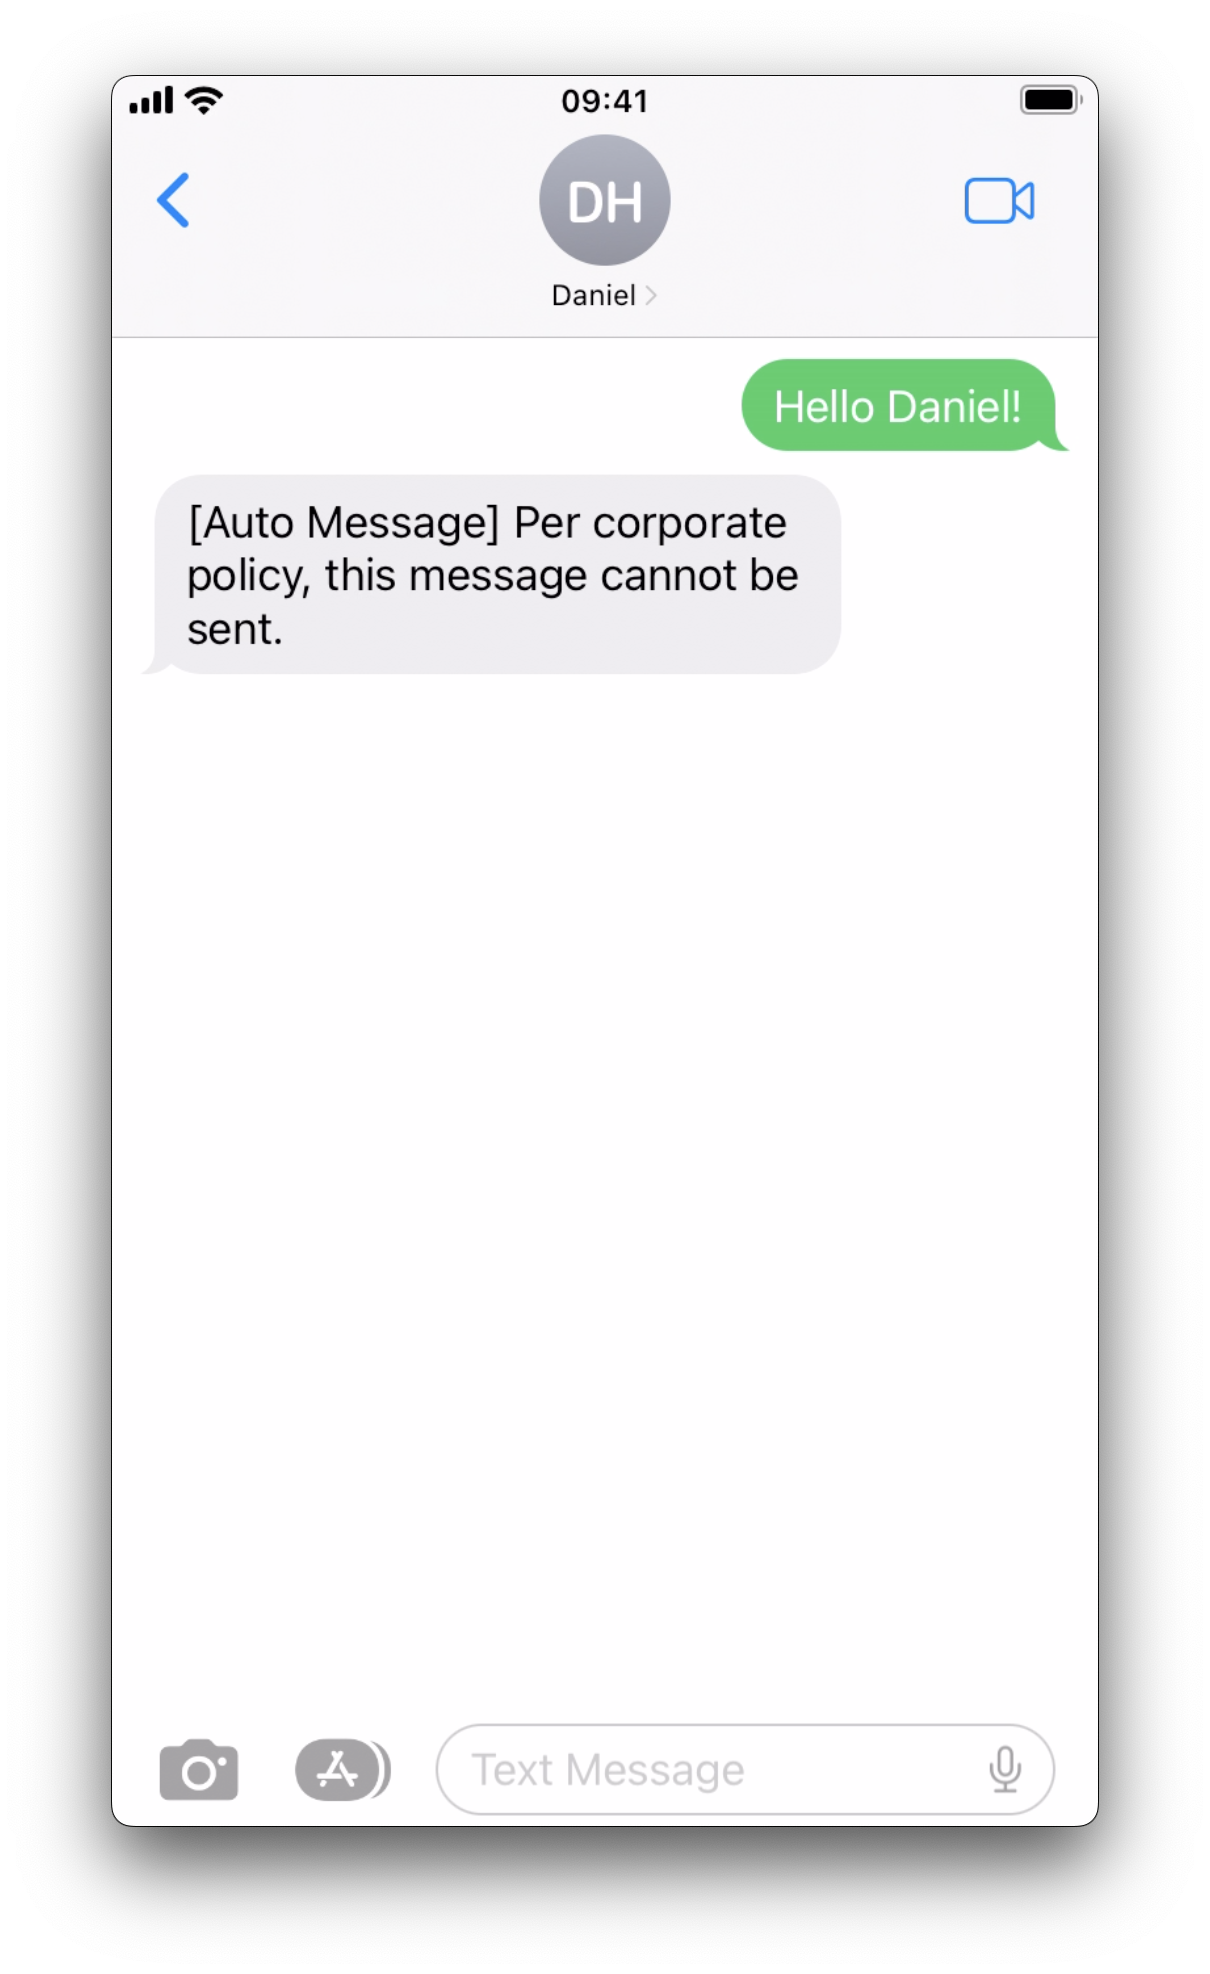 Example system message
Edit or Delete a Compliance Group
You can edit or delete compliance groups. Editing a group allows you to add or delete restricted groups.
- When you delete a group, it becomes an invalid group that is ignored by the platform, as though the user is set to "Unrestricted", and can message with any users. The group is not removed from the user, and if you later add a Compliance Group of the same name, the policies will apply to the user.
- Go to Setup > Compliance Restrictions.
- Select the menu for the Compliance Group, then select Edit or Delete.
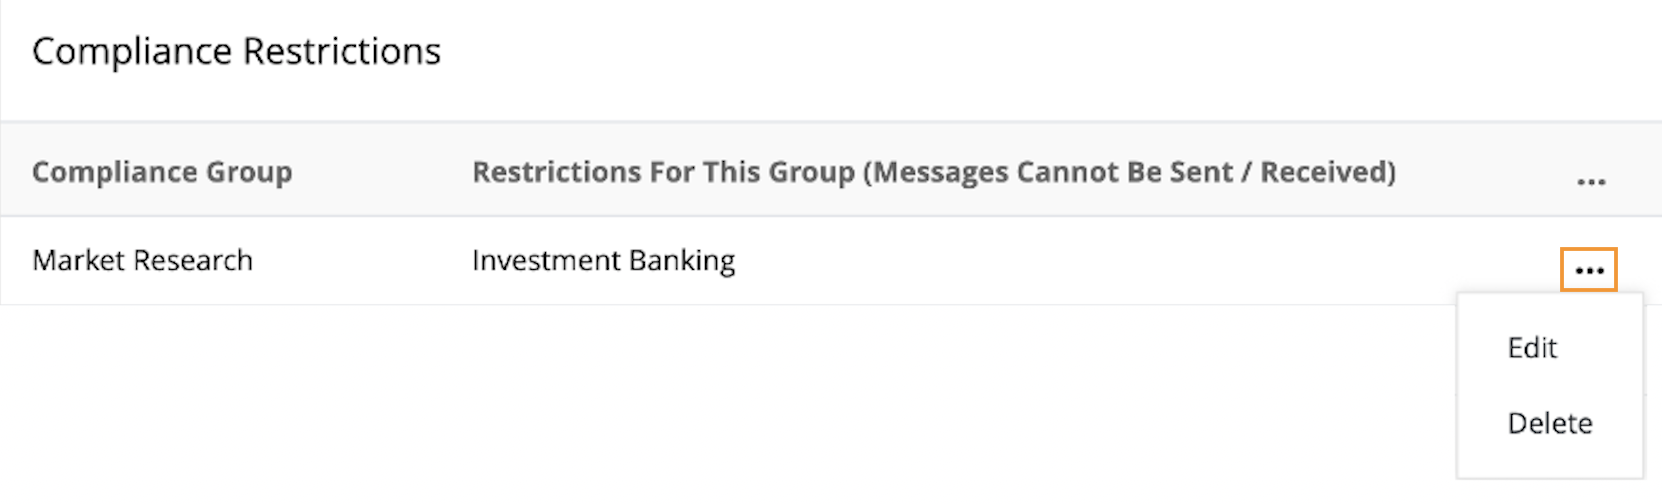
- Make your changes to the Restrictions For This Group and select Complete.

Setting a Compliance Group for a User Account
You can add the Compliance Group to a user from the Account page.
By default, users are set with "Unrestricted" as the Compliance Group, which means they will not be restricted from contacting any MultiLine user.
- Go to the User's Account page.
- Select Compliance Group from the list.
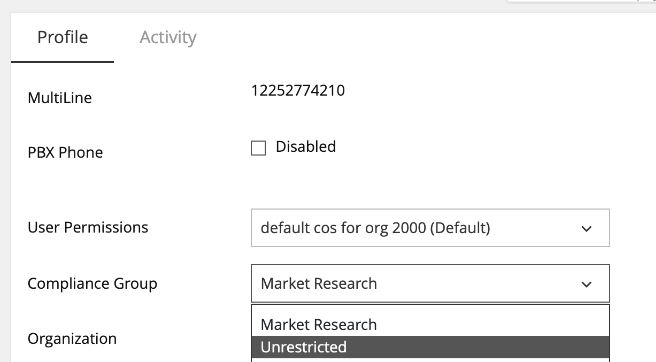
- Select Save.

Now the user will belong to the compliance group, and have the compliance restriction policy applied.
Setting a Compliance Group using the Batch CSV
There is a new field called Compliance Group available in the Batch .CSV file. Simply add the name of the Compliance Group to this column.
Troubleshooting
Error: Warning Restriction Group's should not contain the Compliance Group name
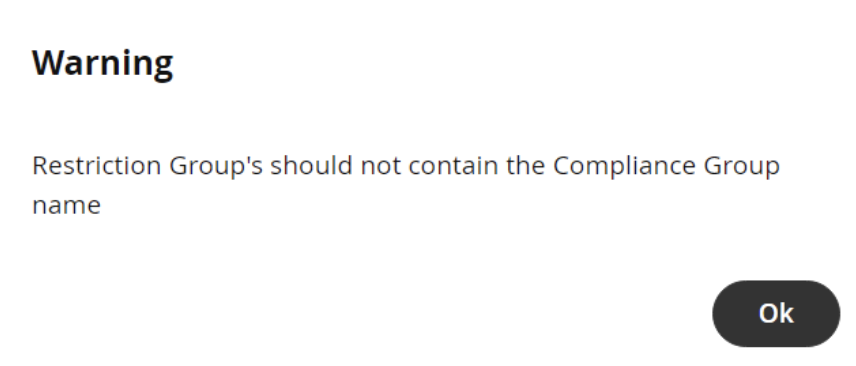
Meaning: Restriction groups must not contain themselves. If your Compliance Group is "Investment Bankers", for example, you cannot include "Investment Bankers" in the Restriction Group.