An admin must have "Setup>MS Teams" Privilege in their Role in the organization to do these instructions. See What Admin Privileges are in Management Portal?.
MS Teams administrator can use self-service on MMP Portal to make the configuration changes for enabling MultiLine Messaging app for users in their organization. Please request Movius Support to enable self-service for provisioning and installing MultiLine Messaging app in your tenant.
Prerequisites
-
Firewall changes. Below URLs should be allowed for outbound traffic:
-
-
Secure websocket connections
-
-
-
-
webclient-uk3.moviuscorp.net:443 (169.50.222.162)
-
-
-
-
-
webclient-sng01.moviuscorp.net:443 (161.202.2.132)
-
-
-
-
-
webclient-wdc06.moviuscorp.net:443 (169.63.160.154)
-
-
-
-
-
webclient-dal12.moviuscorp.net:443 (169.63.26.234)
-
-
-
-
-
sml-webrtc.moviuscorp.net:443 (169.63.129.151 / 169.63.26.230)
-
-
-
-
-
lon02-webrtc.moviuscorp.net:443 (169.50.222.172)
-
-
-
-
-
sng01-webrtc.moviuscorp.net:443 (161.202.2.140)
-
-
-
-
-
slab-webrtc.moviuscorp.net:443 (169.46.89.190)
-
-
-
- Https connections
-
-
-
sml.moviuscorp.net:8021 (169.63.160.148 / 169.63.26.228)
-
-
-
-
-
us.moviuscorp.net:8021 (169.63.160.148 / 169.63.26.228)
-
-
-
-
-
wdcgc2.moviuscorp.net:8021 (169.63.160.148)
-
-
-
-
-
dal12.moviuscorp.net:8021 (169.63.26.228)
-
-
-
-
-
uk3.moviuscorp.net:8021 (169.50.222.162)
-
-
-
-
-
sng01.moviuscorp.net:8021 (161.202.2.132)
-
-
-
-
-
cdnakauamq11hbp9.cdn.appdomain.cloud
-
-
-
-
-
workspace.movius.ai
-
-
-
User running the Set Up should have Azure access to give consent to Movius application and confirm creation in Azure AD.
-
Capture the information below during the setup.
|
SL No |
Parameter |
Information |
Value | |
|
1 |
tenant_id |
Azure AD tenant ID |
| |
|
2 |
client_id |
Provided by Movius |
|
Consent URL format:
Replace the tenant_id with your Azure AD tenant ID in which you want to add MultiLine Messaging application and the client_id with the value from Table above.

Step 2 - Admin needs to log in with admin credentials and “Accept” to give consent to the application.
Step 3 - After accepting, the below error will occur. This is expected. Ignore the error and continue to the next step. 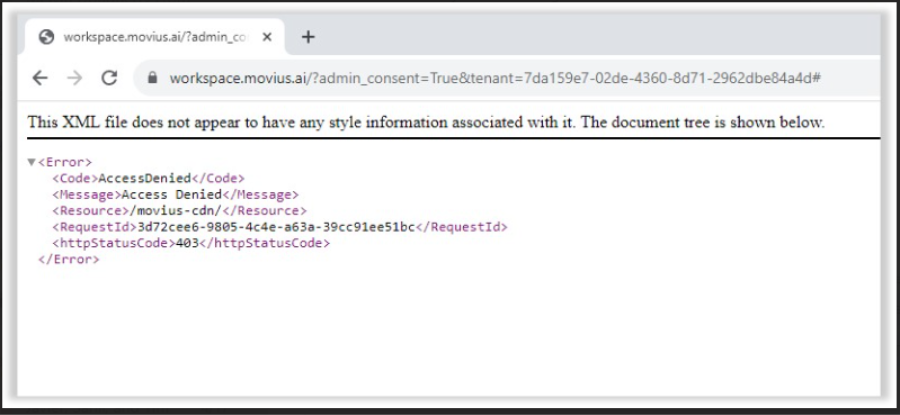
Step 4 - Verify Tenant-Wide Admin Consent
Please ensure that tenant-wide admin consent has been granted for the MultiLine Messaging application:
-
Navigate to Azure AD → Enterprise Applications → MultiLine Messaging.
-
Go to Permissions.
-
Click on Grant admin consent for [tenant-name].
-
A Microsoft login window will appear — please sign in using an account with Global Administrator privileges.
-
Review the requested permissions and click Accept to grant consent for all users within the tenant.
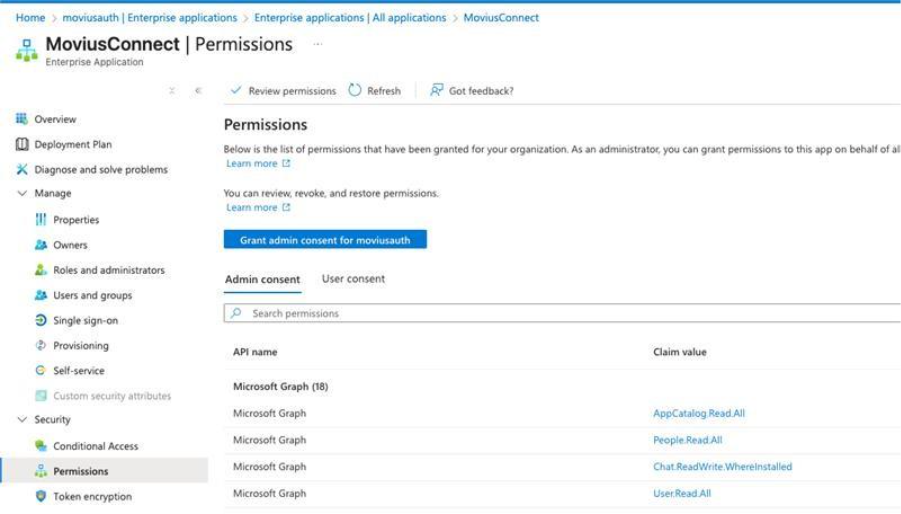

This ensures that all users within the tenant can access the application without needing individual consent.
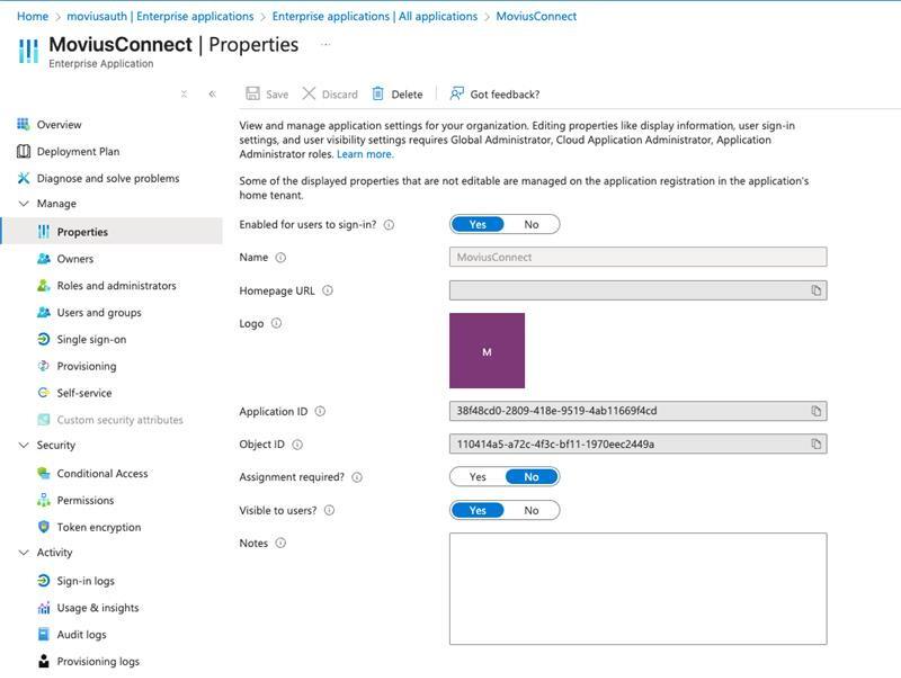
Step 5 - Verify User Assignment Settings
Next, please verify that user sign-in is properly configured:
-
Go to Azure AD → Enterprise Applications → MultiLine Messaging.
-
Under Properties, confirm that “Enabled for users to sign in” is set to Yes.
-
Check if “Assignment required?” is enabled.
-
If Yes, please ensure that the required users are assigned under Users and groups.
-
Alternatively, you can set “Assignment required?” to No so that all users can access the application.

Note - Administrators can implement organizational policies within MS Teams Admin Center to pin the app for all users within tenant, they have access to configure settings to make Multiline Messaging application as a mandatory application for users within MS Teams.
Step 6 - Login to MMP portal, navigate to Setup>Feature Setting>MS Teams and click on Get Started on Teams MultiLine Messaging.
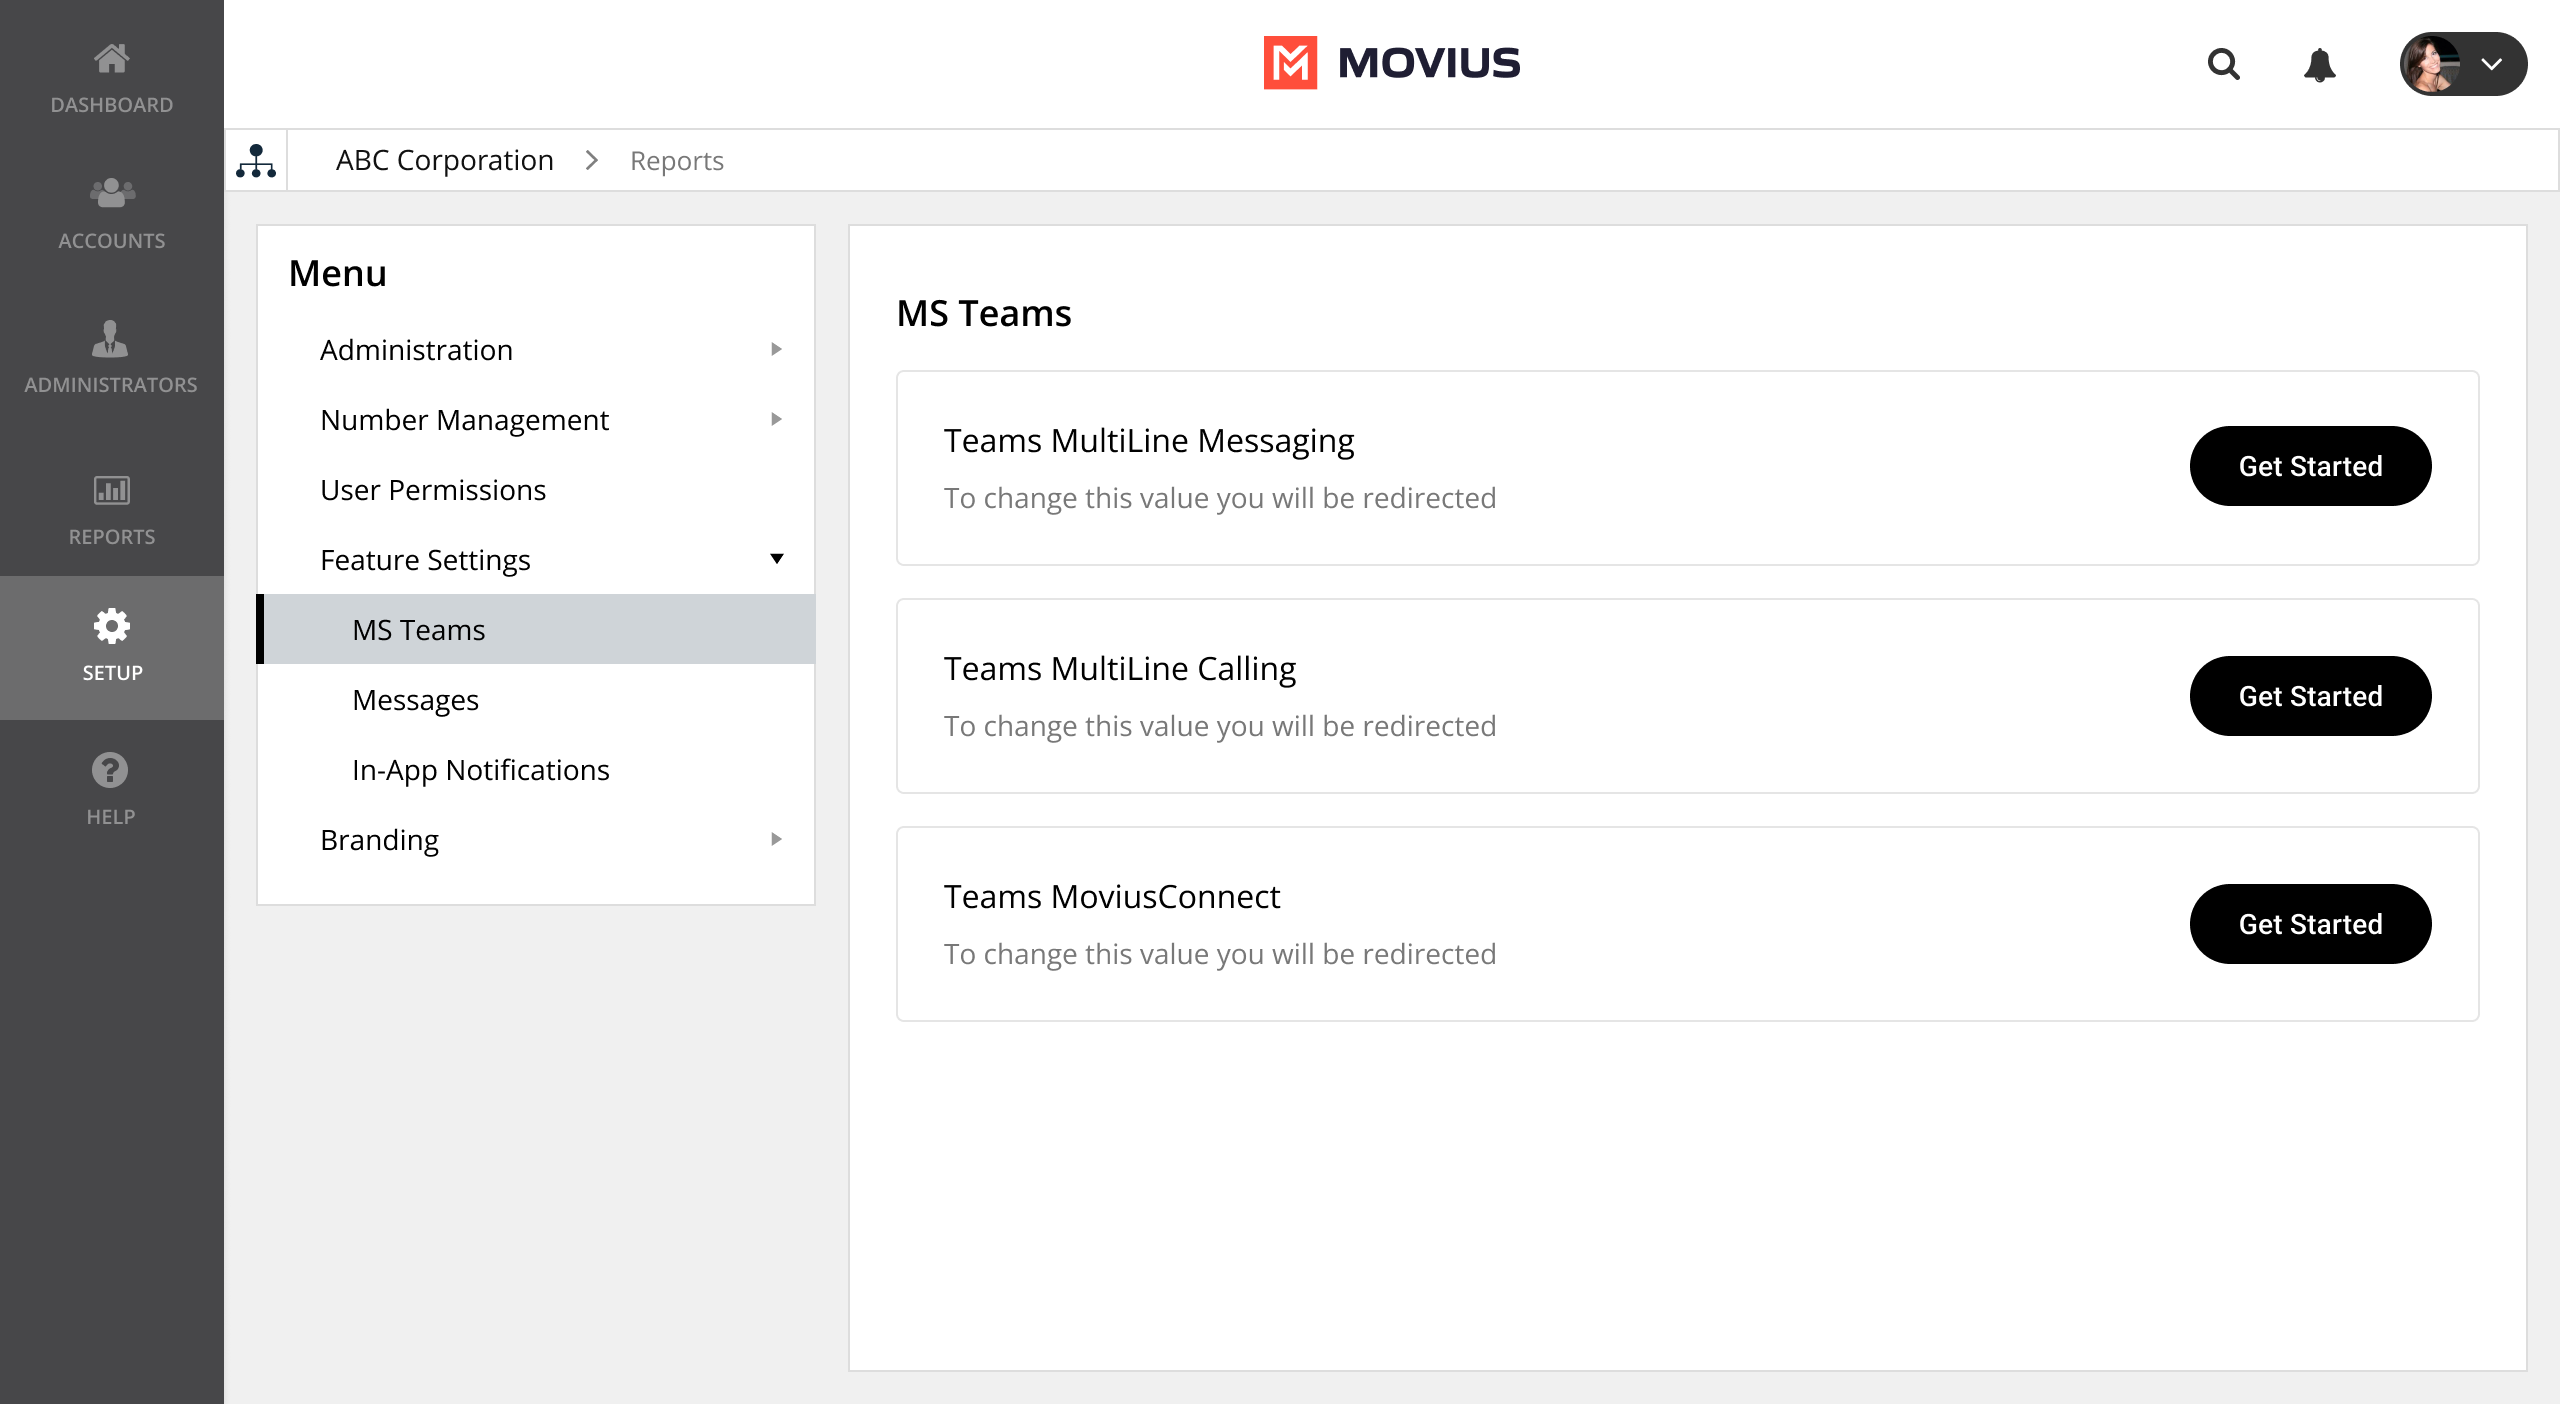
Step 7 - Enter the Tenant Id where the Teams MultiLine Messaging application was added and click on Provision. Status will be updated to Provisioned.
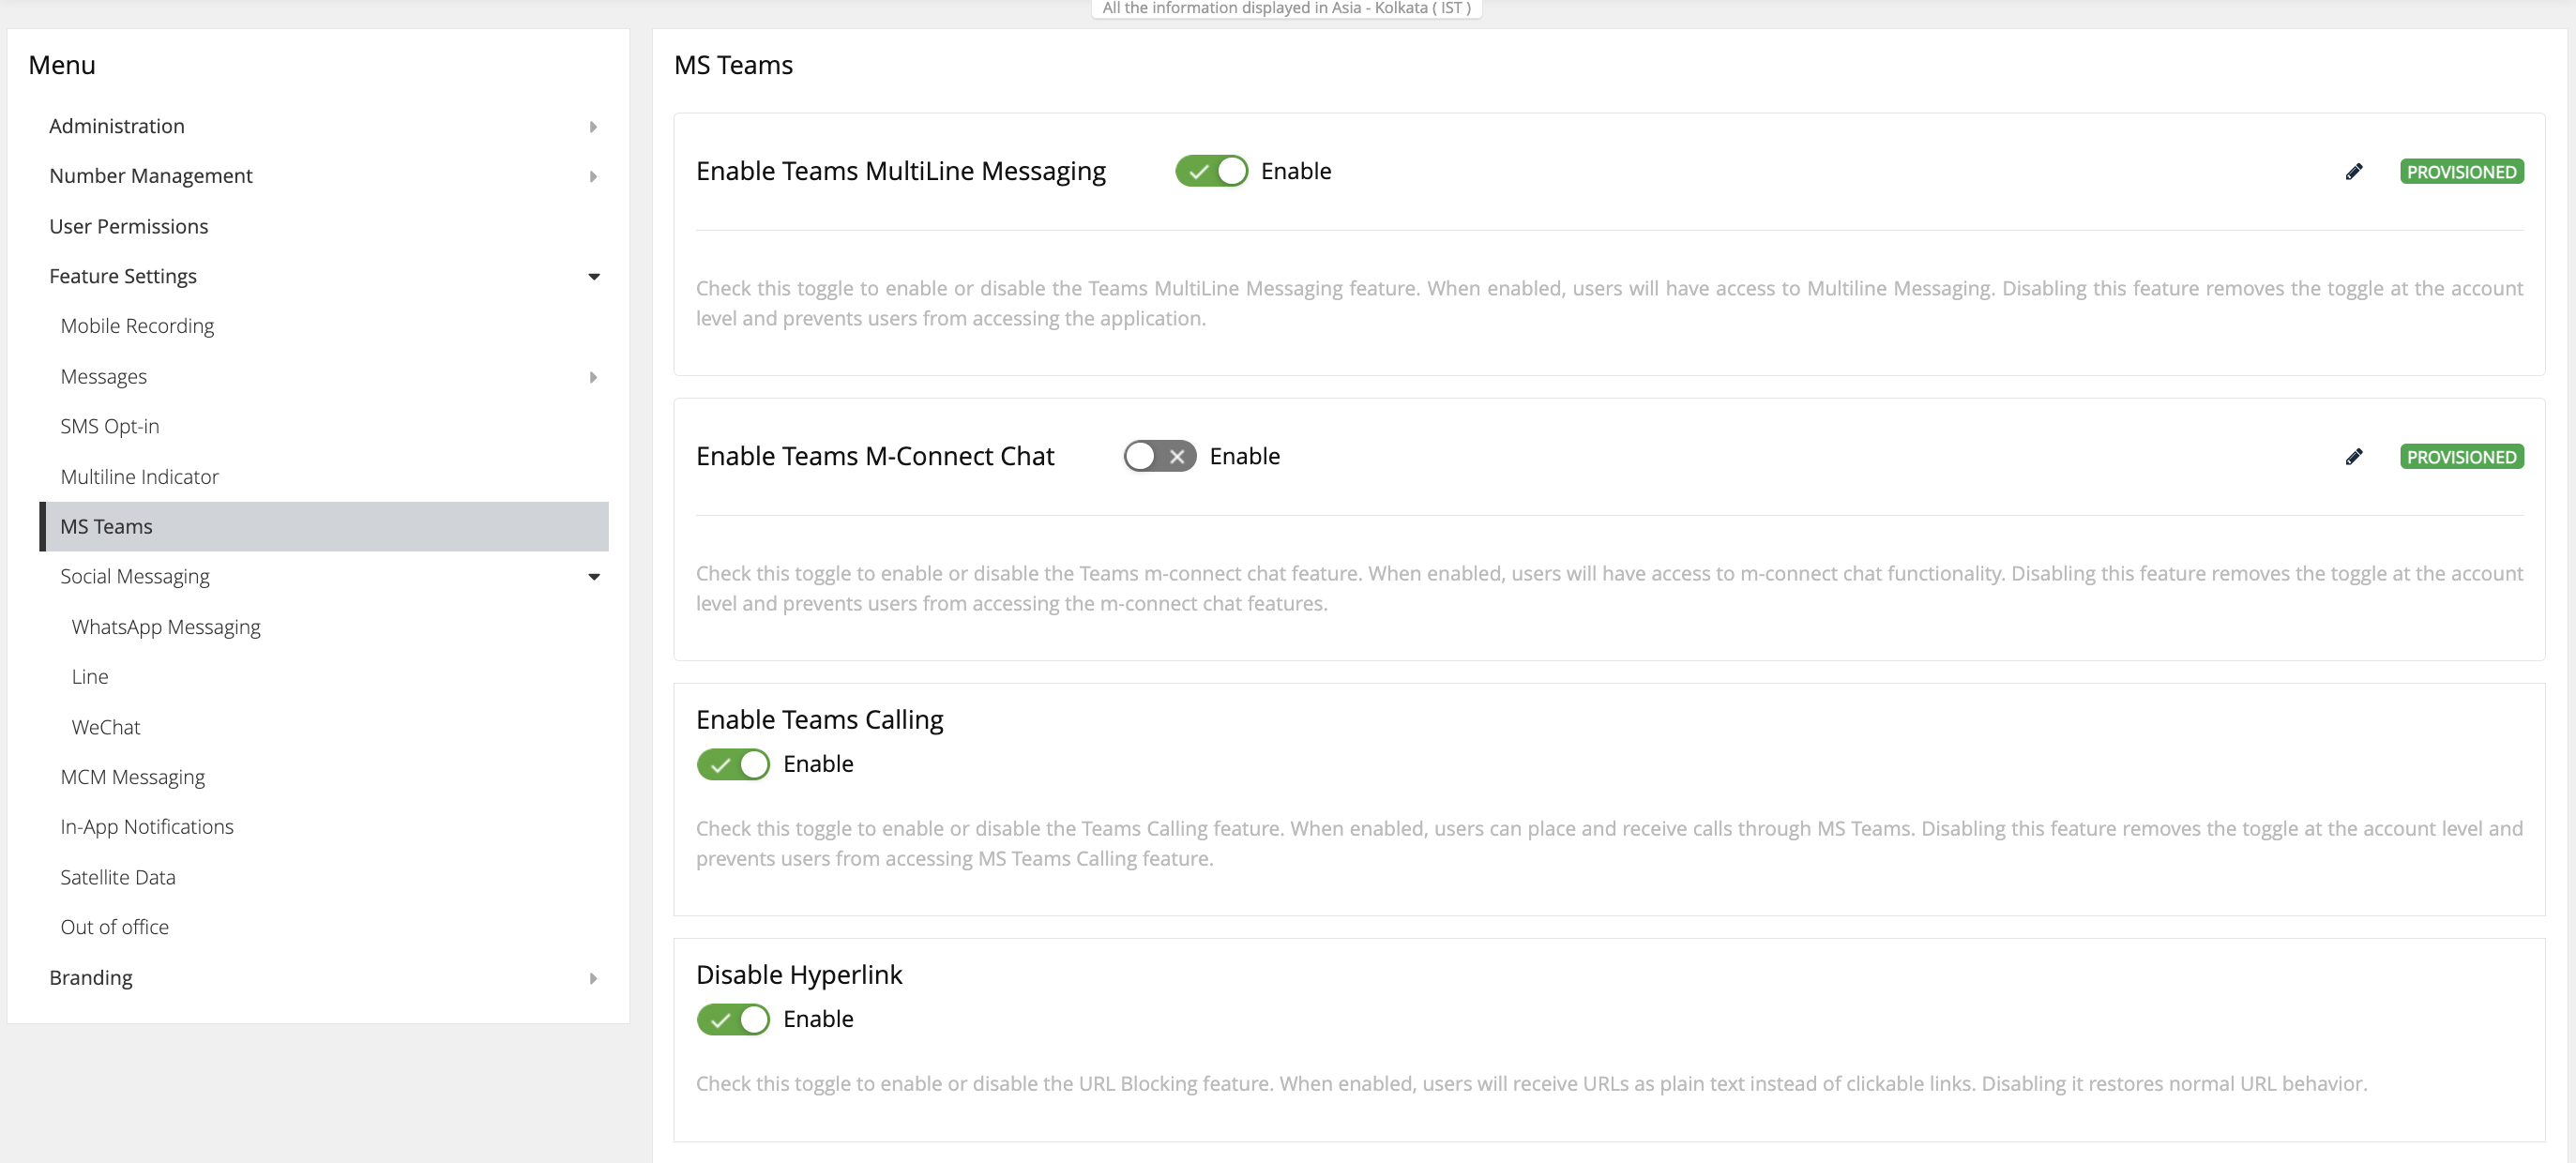
After the previous steps are completed, MMP administrators will have the option to edite the tenant id by clicking on pencil icon next to status or disable the MultiLine Messaging for their organization by switching off the toggle.
Step 8 - MMP administrators can then enable the MultiLine Messaging application for accounts within their organization by turning on Teams MultiLine Messaging toggle.
- Teams MultiLine Messaging can be turned on from account without user having to onboard the MultiLine mobile application.
- After the Subscriber logins to Teams Messaging for the first time, there status at account changes to Activated and line record gets created. Teams MultiLine Messaging toggle is then moved at line level.
- Teams MultiLine Messaging toggle can be turned off in order to disable the feature for user.

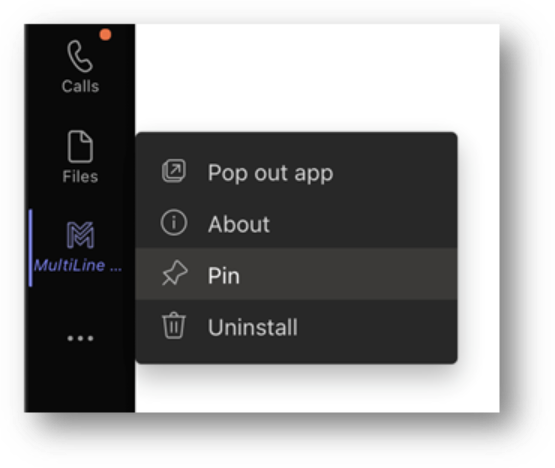
Adding Multiline Application to Microsoft Teams
These steps are completed by end-users to add the Microsoft Teams messaging app to Microsoft Teams.

The App can then be re-organized and pinned on the sidebar in Microsoft Teams.
MultiLine Accounts can also be created with provisioning APIs and Teams MultiLine Messaging will be enabled through the APIs.
MultiLine Accounts can also be created through excel Bulk Provisioning and Teams MultiLine Messaging can be enabled for MultiLine accounts through excel.