This provides instructions to MultiLine for Salesforce administrators who need to upgrade MultiLine for Salesforce.
Step 1: Upgrade MultiLine for Salesforce
- Select MultiLine for Salesforce from AppExchange
- Click Get Now and log in with your Salesforce credentials
- Click Install in Production.
- Enter all required fields, accept Terms and Conditions and click Confirm and Install
- Click on Install for All Users then click Upgrade
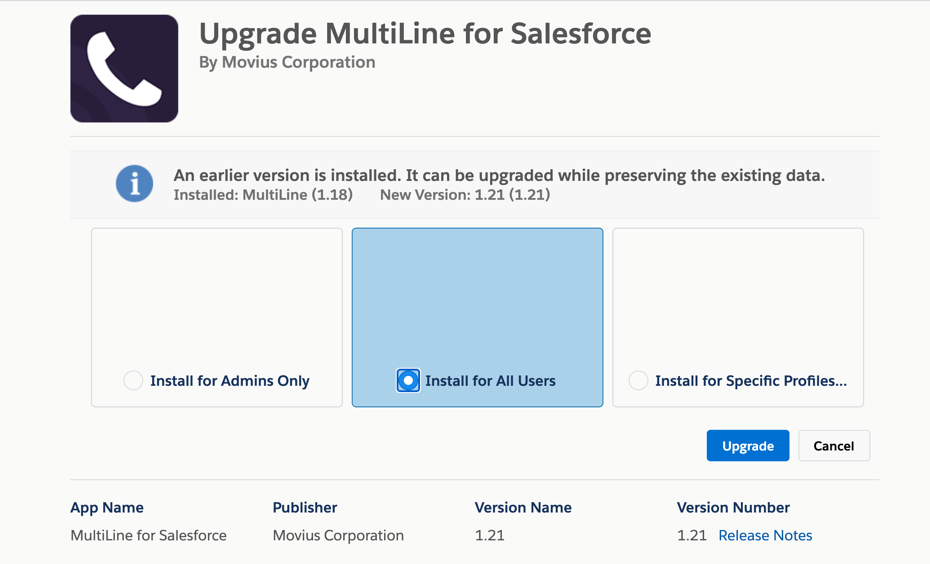
- After the upgrade, the latest version of the MultiLine for Salesforce application will be listed in Installed Packages.
- Go to Setup > Named Credentials and delete the entry for the MultiLine for Salesforce application under Named Credentials.
- Note: This will be whatever it was labeled when created.
Step 2: Start Registering MultiLine
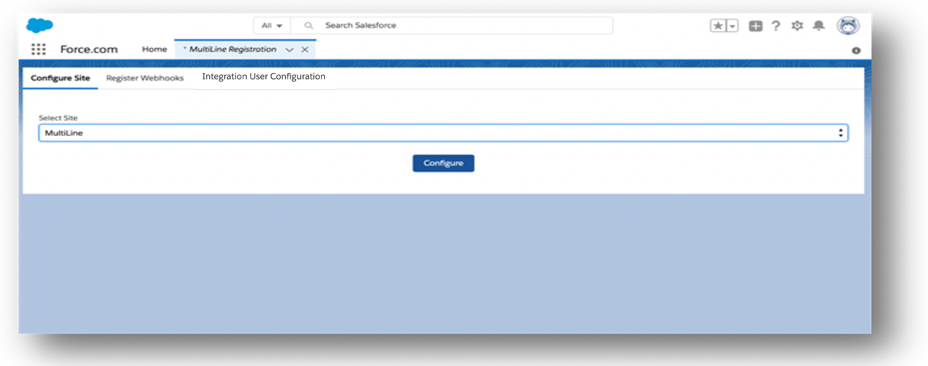
- Open App Launcher and open MultiLine Registration.
- Select MultiLine site under Configure Site and click Configure
- Click Register Webhooks tab and enter the information in the fields below:
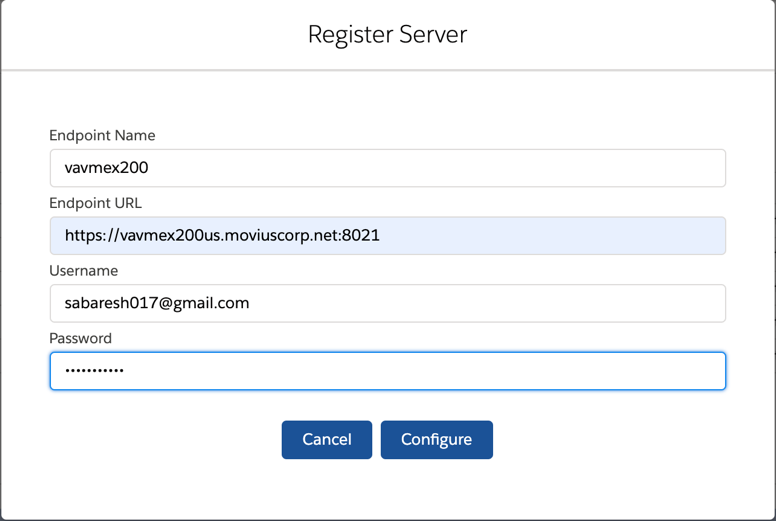
- Click on Add New Server button
- Enter Endpoint Name
- Enter Endpoint URL
- Note: the Endpoint URL is included in an email that you received with the API user credentials
- Example:https://[MultiLine admin portal URL]:8021
- Note: add port 8021 to MultiLine management portal URL
- Enter Username/ Password credentials in the email that you received with the API user credentials
- Click Configure
Step 3: Generate the Certificate
- To generate the key and certificate run the following OpenSSL command in any Linux server:
openssl req -newkey rsa:2048 -nodes -keyout key.pem -x509 -days 365 -out certificate.pem
- This creates certificate.pem and key.pem files you'll need for the next steps
Step 4: Create Connected App
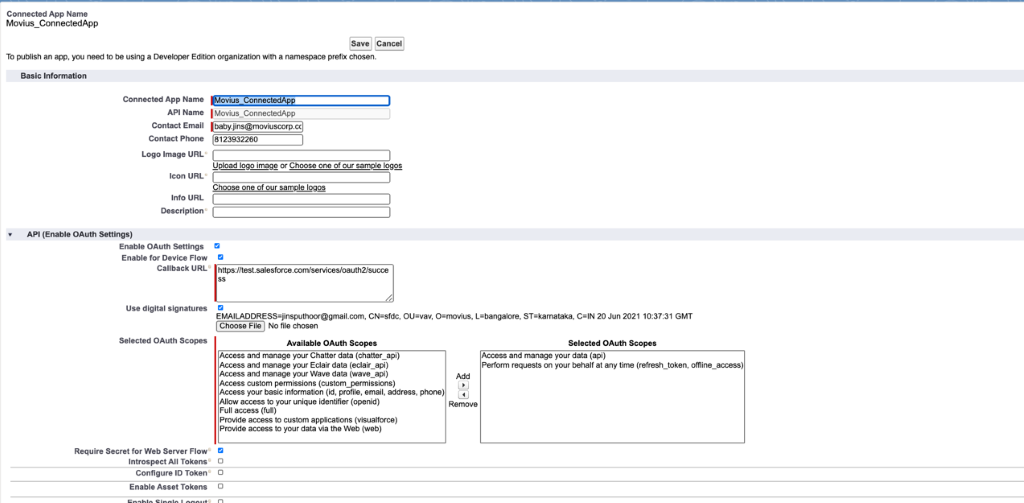
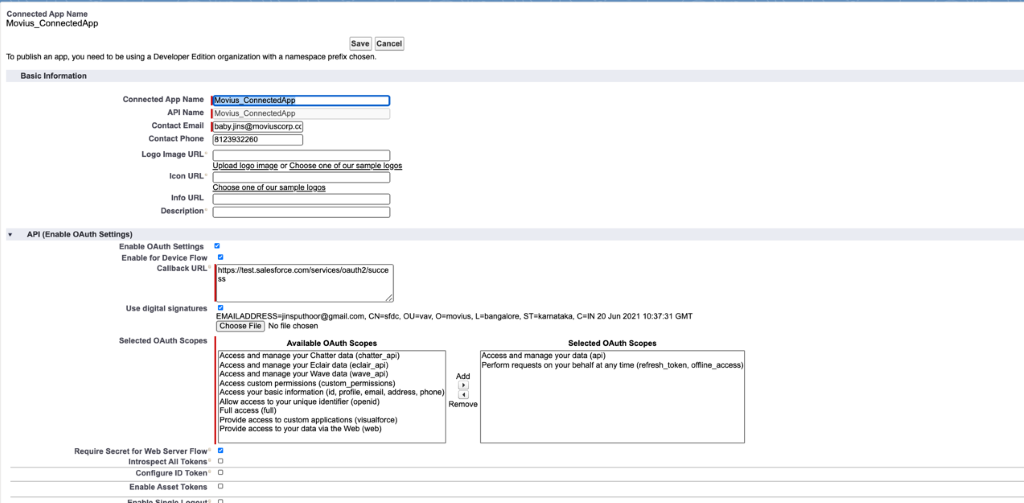
- Go to Setup > App Manager and click New Connected App
- Enter Name: Movius_ConnectedApp and fill in the Contact Email field
- Click Save
- Go to App Manager > Select Movius_ConnectedApp > Edit
- Check Enable OAuth Settings
- Check Enable for Device Flow
- Check Use digital signatures and upload the certificate.pem file we created earlier
- Move the following OAuth Scopes to Available
- Access and manage your data(api)
- Perform requests on your behalf at any time (refresh_token_offline_access)
- Select the checkbox for Require secret for Web Server Flow
- Click Save
- Click Continue
Step 5: Manage Connected App
- Click Manage
- Click Edit Policies
- From the Permitted Users dropdown, select Admin approved users are pre-authorized
- Click Save
- Click Manage Profiles
- Select System Administrator
- Click Save
Step 6: Create Integration Profile

- Create a profile for Movius Integration User
- Clone with System Admin
- Click Save
- Click Edit
- Select Movius_ConnectedApp created earlier
- Under Administrative Permissions, select Apex REST Services
- Select API enabled
- Under Standard Object Permissions, give read access to below:
- Account
- Contact
- Opportunities Objects
- Under Custom Object Permissions section, give create, read and edit access to below Custom Objects:
- MultiLine Log
- MultiLine Configuration
- MultiLine Messages
- Click Save
Step 7: Create Integration User
- Create new user as Movius Integration User
- Enter Profile as Movius Integration User
- Complete the rest of the mandatory fields
Step 8: Create Static Resources
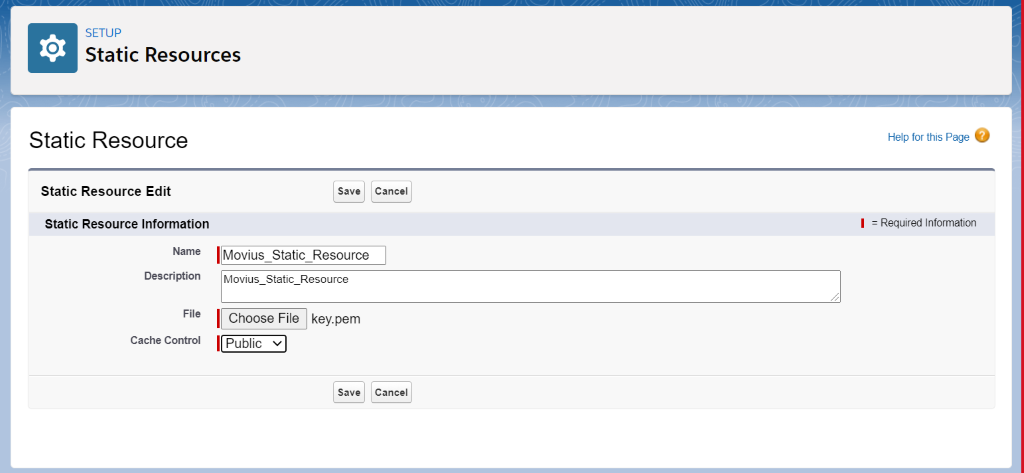
- Go to Setup > Static Resources and click New
- Complete Name and Description fields
- Upload the key.pem file created earlier
- Set Cache Control to Public
Step 9: Configure Integration User

- Open App Launcher and open MultiLine Registration
- Click on Integration User Configuration
- Static Resource Name: copy+paste the name created earlier
- Consumer Key: copy+paste key from Connected App created earlier
- Consumer Secret: Copy+paste secret from Connected App created earlier
- Integration Username: Use the integration user created earlier
Step 10: Reconfigure Users
- For all users, clear MultiLine and MultiLine Registration Date fields inside User Settings and click Save
- Change the User Profile to one without MML Permissions or remove the MML Permissions from user’s Assignment


