Read on for instructions on activating the MultiLine for Intune iOS app.
Get your invitation
- Expect an invitation to be sent to your work email. Please don't reply to this email, as it is auto-generated.
NOTE: Movius does not send or manage MultiLine invitations. Please reach out to the appropriate contact at your organization to request new invitations or receive troubleshooting assistance.
Activate MultiLine for Intune
Once you download the MultiLine for Intune app fromthe App Store, open the app to begin the activation process.
1. Tap Continue to begin.
2. Confirm any permission requests - Microphone, Contacts, Notifications - as they appear.
 Permission Requests
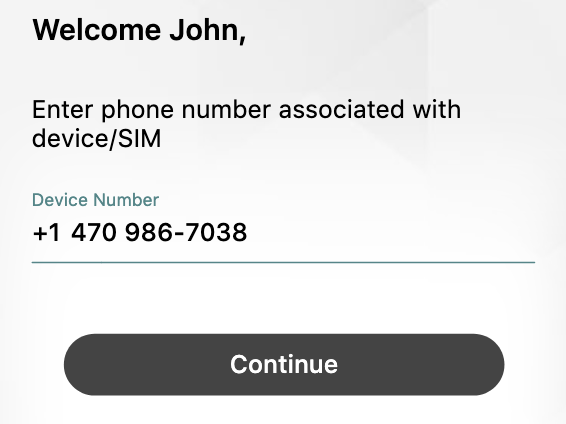
3. Some users will be prompted to enter their phone number and confirm that it is correct on the next screen.
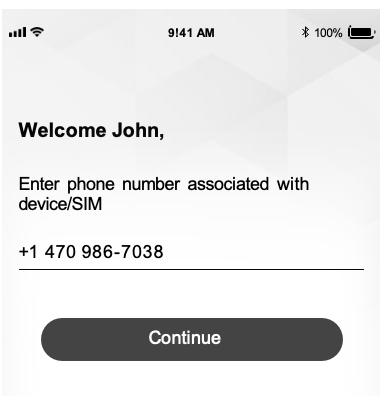 Screen to enter your phone number (not the MultiLine number)
4. Select Yes after confirming that you entered your phone number correctly. Confirmation screen
5. Some users may see a step for PIN code verification. This PIN code is usually auto-detected, but users can also receive the PIN by calling or email.  PIN verification step
6. Your new number displays. Tap Okay, Got it to continue.
 Your MultiLine number screen
That's it!
You've activated MultiLine for Intune.
MultiLine for Intune apps work on iOS and Android smartphones and their interface differs accordingly. To learn how to call and message with MultiLine for Intune, please select your smartphone type:
Read on for instructions on activating the MultiLine for Intune Android app.
Before you start:
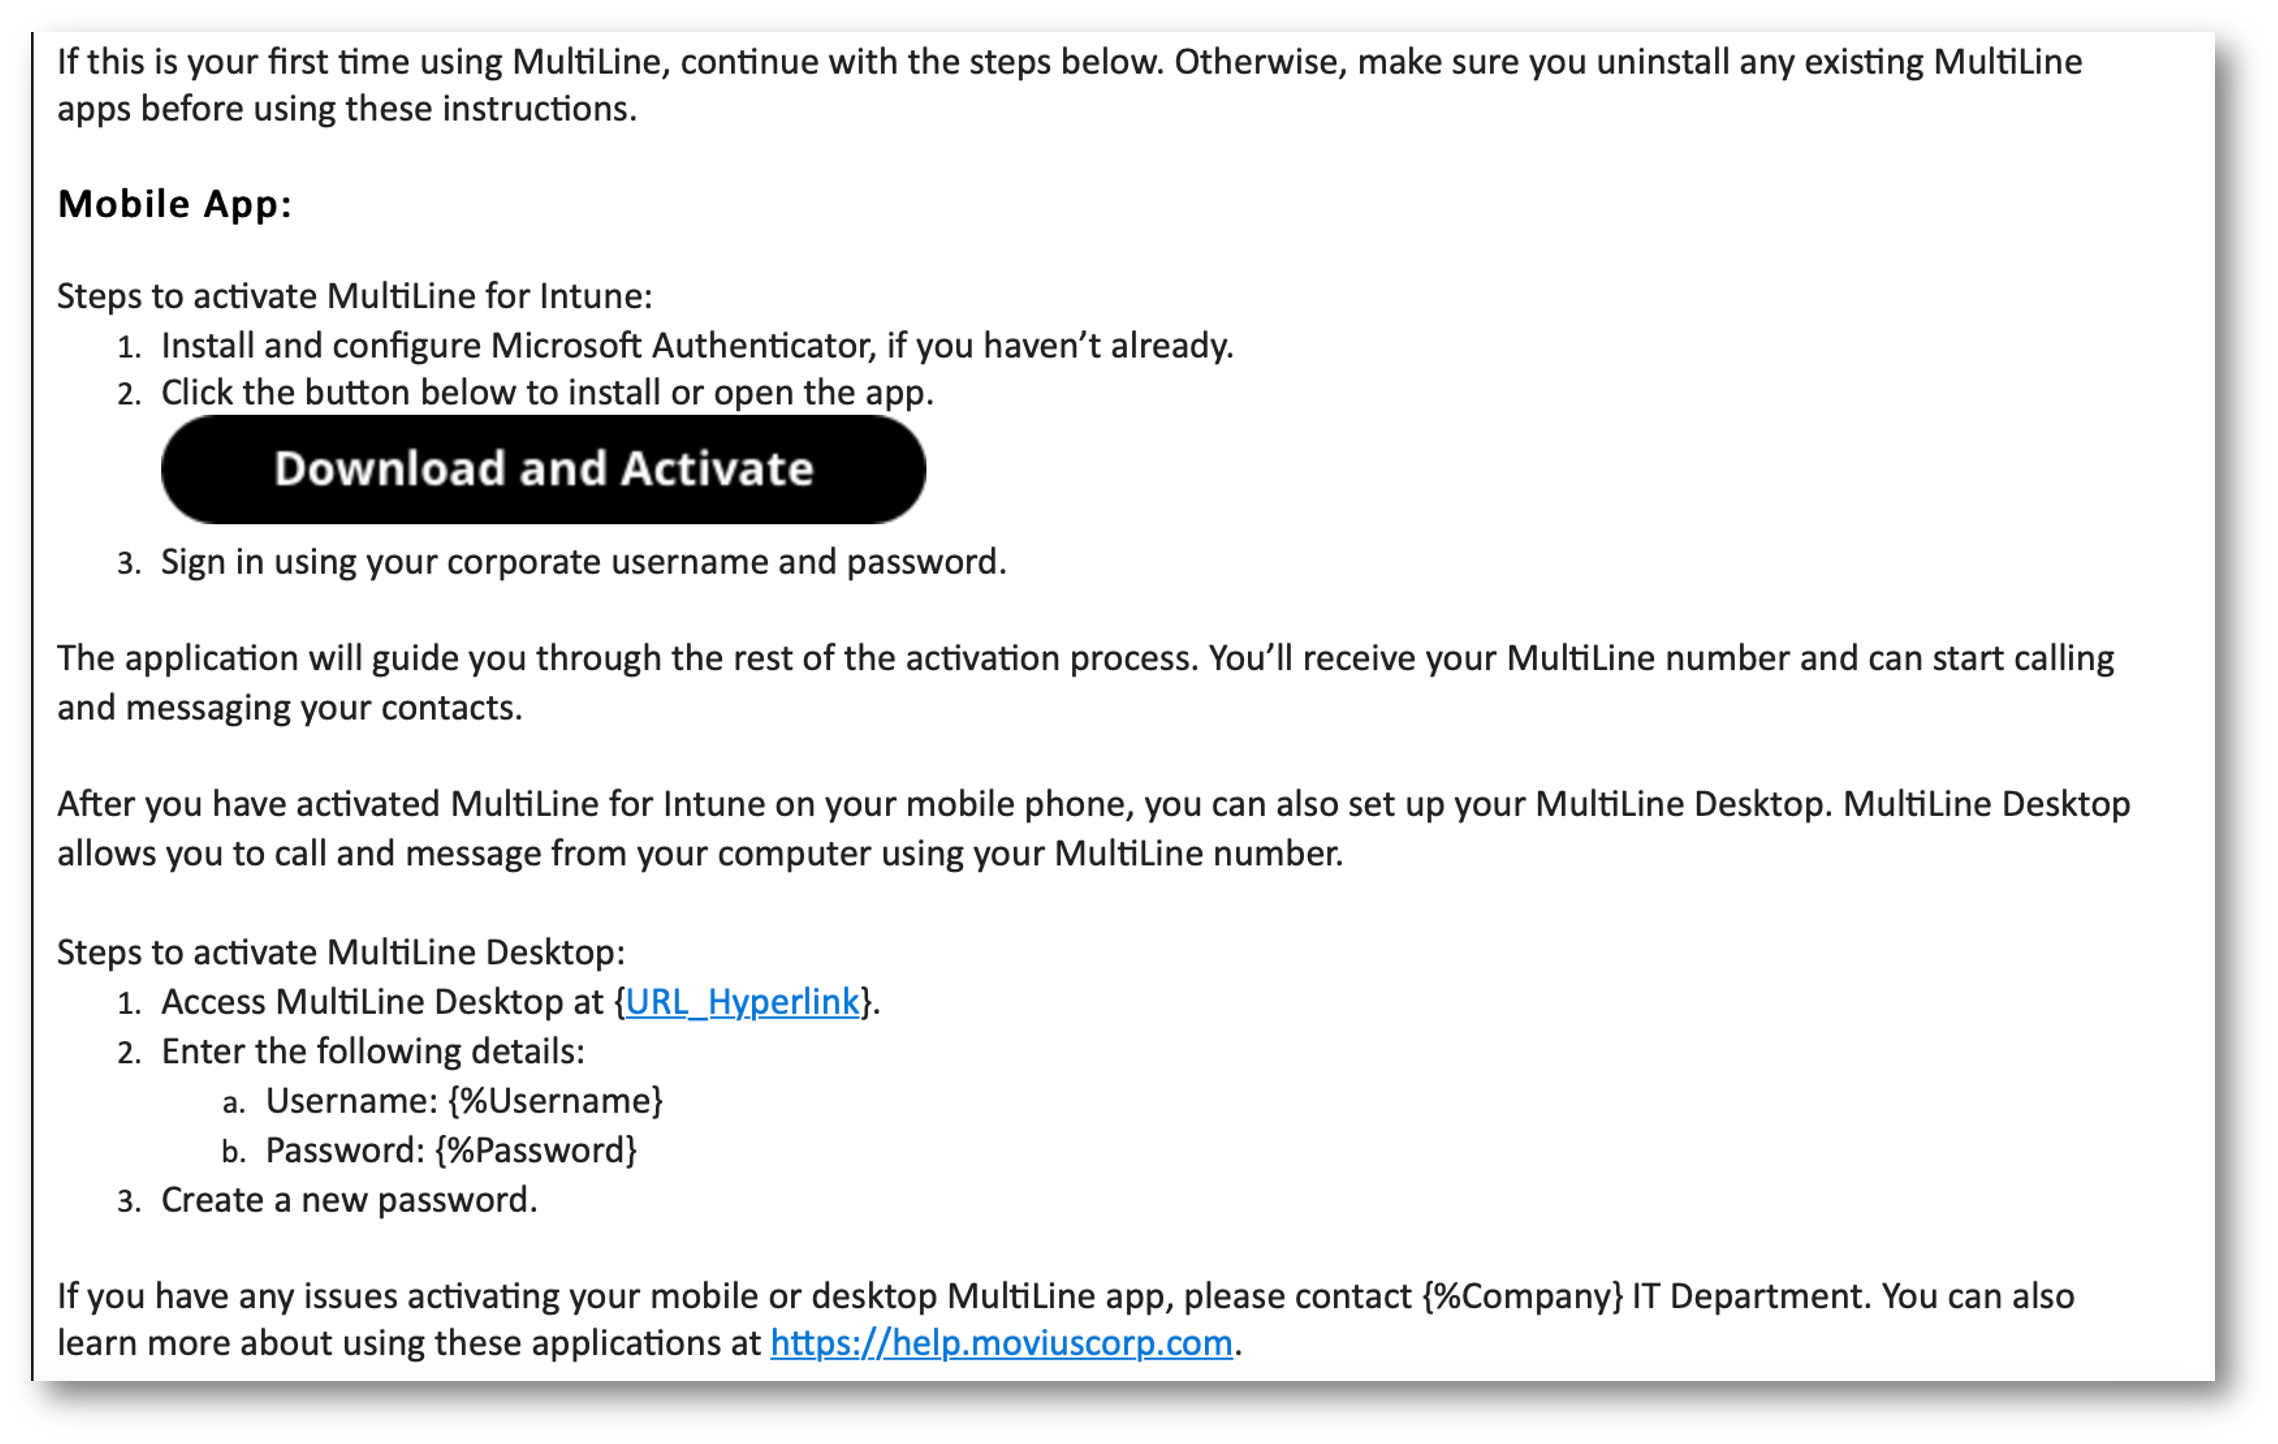
- Download and install Company Portal [external link].
- Installation instructions: iOS | Android | Android (with enrollment) [external links]
Get your invitation
- Expect an invitation to be sent to your work email. Please don't reply to this email, as it is auto-generated.
NOTE: Movius does not send or manage MultiLine invitations. Please reach out to the appropriate contact at your organization to request new invitations or receive troubleshooting assistance.
Activate MultiLine for Intune
Once you download the MultiLine for Intune app from Google or Play Store, open the app to begin the activation process.
- Select your Exchange account.
- Confirm any permission requests - Microphone, Contacts, Notifications - as they appear.
- Read the Disclosure & Consent Requirement, then tap Proceed. Note: MultiLine does not upload, store, transmit, or sell your Contacts information.
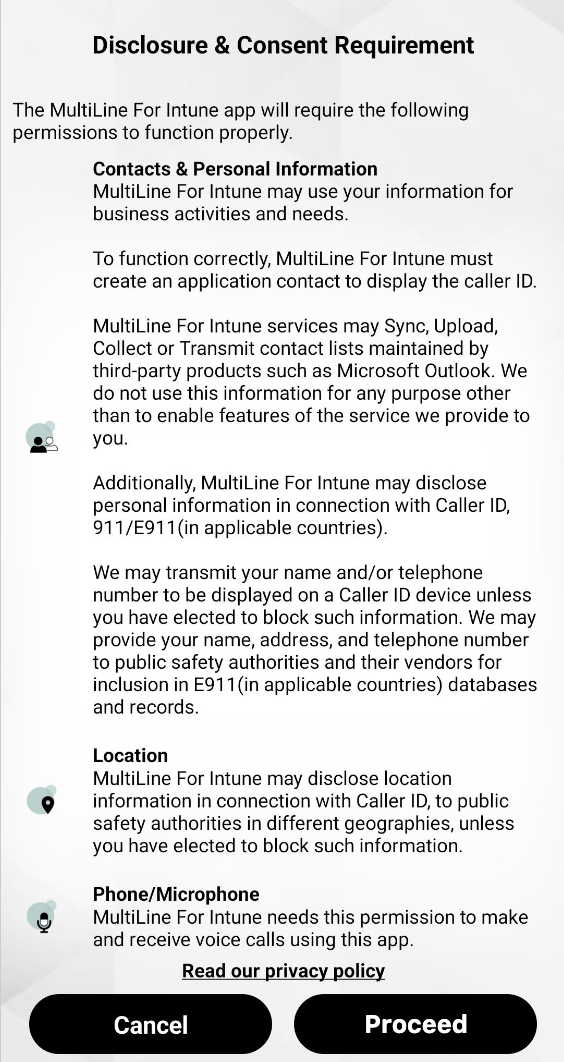 Android Permission Screen
 - Confirm your phone number (the one associated with your SIM card, your usual number).
 Screen to enter your phone number (not the MultiLine number)
 - Confirm that you entered the correct phone number in the next prompt.
- Confirm in the next prompts (sent from your phone) that you will allow the permissions.


Your MultiLine number will display. Tap Okay, got it to continue. Your MultiLine number screen
That's it!
You've activated MultiLine for Intune.
MultiLine for Intune apps work on iOS and Android smartphones and their interface differs accordingly. To learn how to call and message with MultiLine for Intune, please select your smartphone type:
If you're installing MultiLine on a tablet or device without cellular connectivity, this instruction is for you.
Everything you need to get started will be sent to you in a MultiLine for Intune invitation. You can use it to start the activation process.
Before you start:
- .Installation instructions: iOS
Get your invitation
- Expect an invitation to be sent to your work email. Please don't reply to this email, as it is auto-generated.
- If you open the link on your phone, you can click the link in the invitation to download and launch the MultiLine app.
 Example Invitation - The appearance of invitation will vary

NOTE: Movius does not send or manage MultiLine invitations. Please reach out to the appropriate contact at your organization to request new invitations or receive troubleshooting assistance.
Activate MultiLine for Intune
Once you download the MultiLine for Intune app from the App store, open the app to begin the activation process.
1. Tap Continue to begin.
2. Confirm any permission requests - Microphone, Contacts, Notifications - as they appear.
Permission Requests
3. Some users will be prompted to enter their phone number and confirm that it is correct on the next screen.
Screen to enter your phone number (not the MultiLine number)
4. Select Yes after confirming that you entered your phone number correctly.Confirmation screen
5. Some users may see a step for PIN code verification. This PIN code is usually auto-detected, but users can also receive the PIN by calling or email. PIN verification step
6. Your new number displays. Tap Okay, Got it to continue.
Your MultiLine number screen
That's it!
You've activated MultiLine for Intune.
If you're installing MultiLine on a tablet or device without cellular connectivity, this instruction is for you.
Everything you need to get started will be sent to you in a MultiLine for Intune invitation. You can use it to start the activation process.
Before you start:
- Download and install Company Portal .
- Installation instructions: Android | Android (with enrollment) .
Get your invitation
- Expect an invitation to be sent to your work email. Please don't reply to this email, as it is auto-generated.
- If you open the link on your phone, you can click the link in the invitation to download and launch the MultiLine app.
Example Invitation - The appearance of invitation will vary
NOTE: Movius does not send or manage MultiLine invitations. Please reach out to the appropriate contact at your organization to request new invitations or receive troubleshooting assistance.
Activate MultiLine for Intune
Once you download the MultiLine for Intune app from Google or Play Store, open the app to begin the activation process.
1. Tap Continue to begin.
2. Confirm any permission requests - Microphone, Contacts, Notifications - as they appear.
Permission Requests
3. Some users will be prompted to enter their phone number and confirm that it is correct on the next screen.
Screen to enter your phone number (not the MultiLine number)
4. Select Yes after confirming that you entered your phone number correctly.
6. Your new number displays. Tap Okay, Got it to continue.
Your MultiLine number screen
That's it!
You've activated MultiLine for Intune.