Read on to learn how to add or update contacts in the Movius for BlackBerry Android app.
Overview
The Movius for BlackBerry app provides you a separate contact list for your business calling and texting. When you sync with Exchange, there is a two-way sync between your MultiLine Contacts List and Exchange Contacts list. So you can add contacts from the MultiLine App, MultiLine Desktop, or by adding them in Exchange.
Before you start
- Before adding a contact, you need to have selected your Contact Source as Exchange Contacts.
Add a contact
You can add a contact from the contact screen or from your recent calls.
Adding a contact from the Contact screen
- Go to Contacts.
- Tap the Add Contact button.
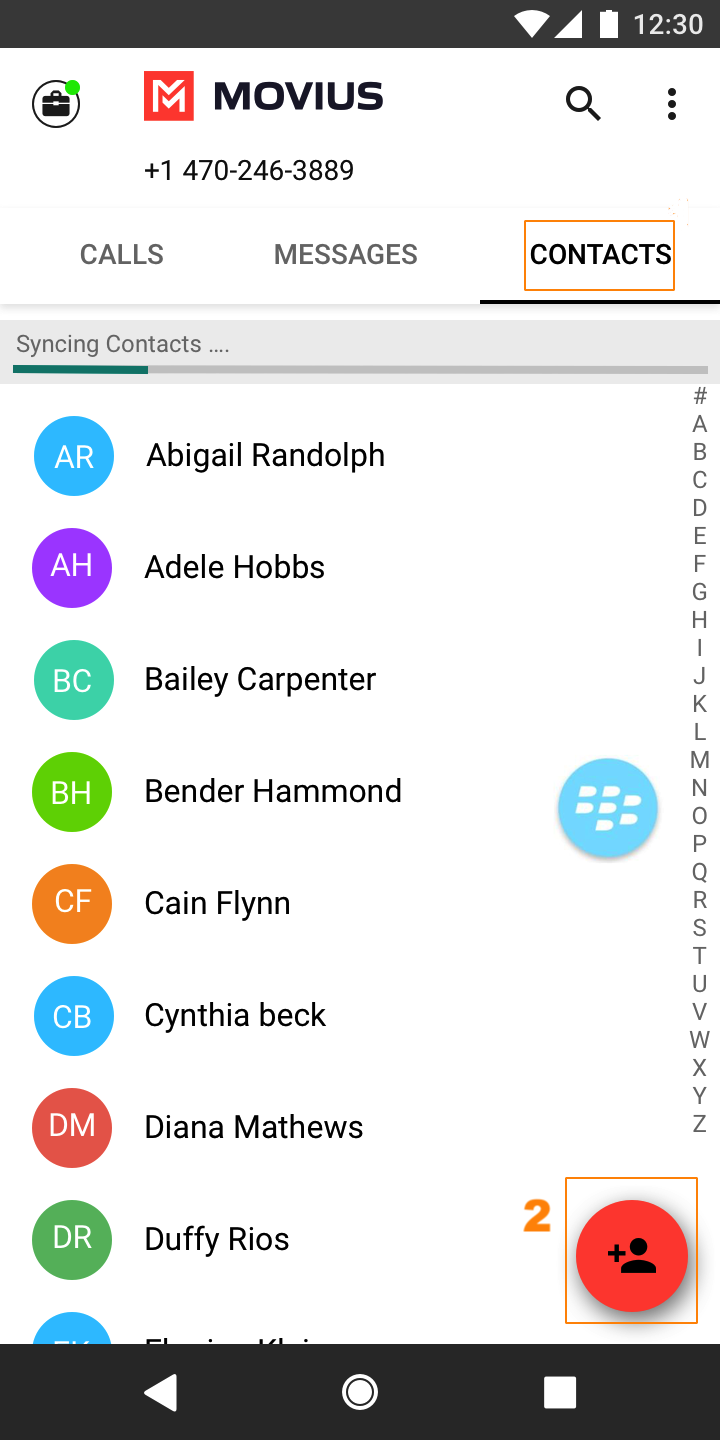 Add a contact from Contacts screen
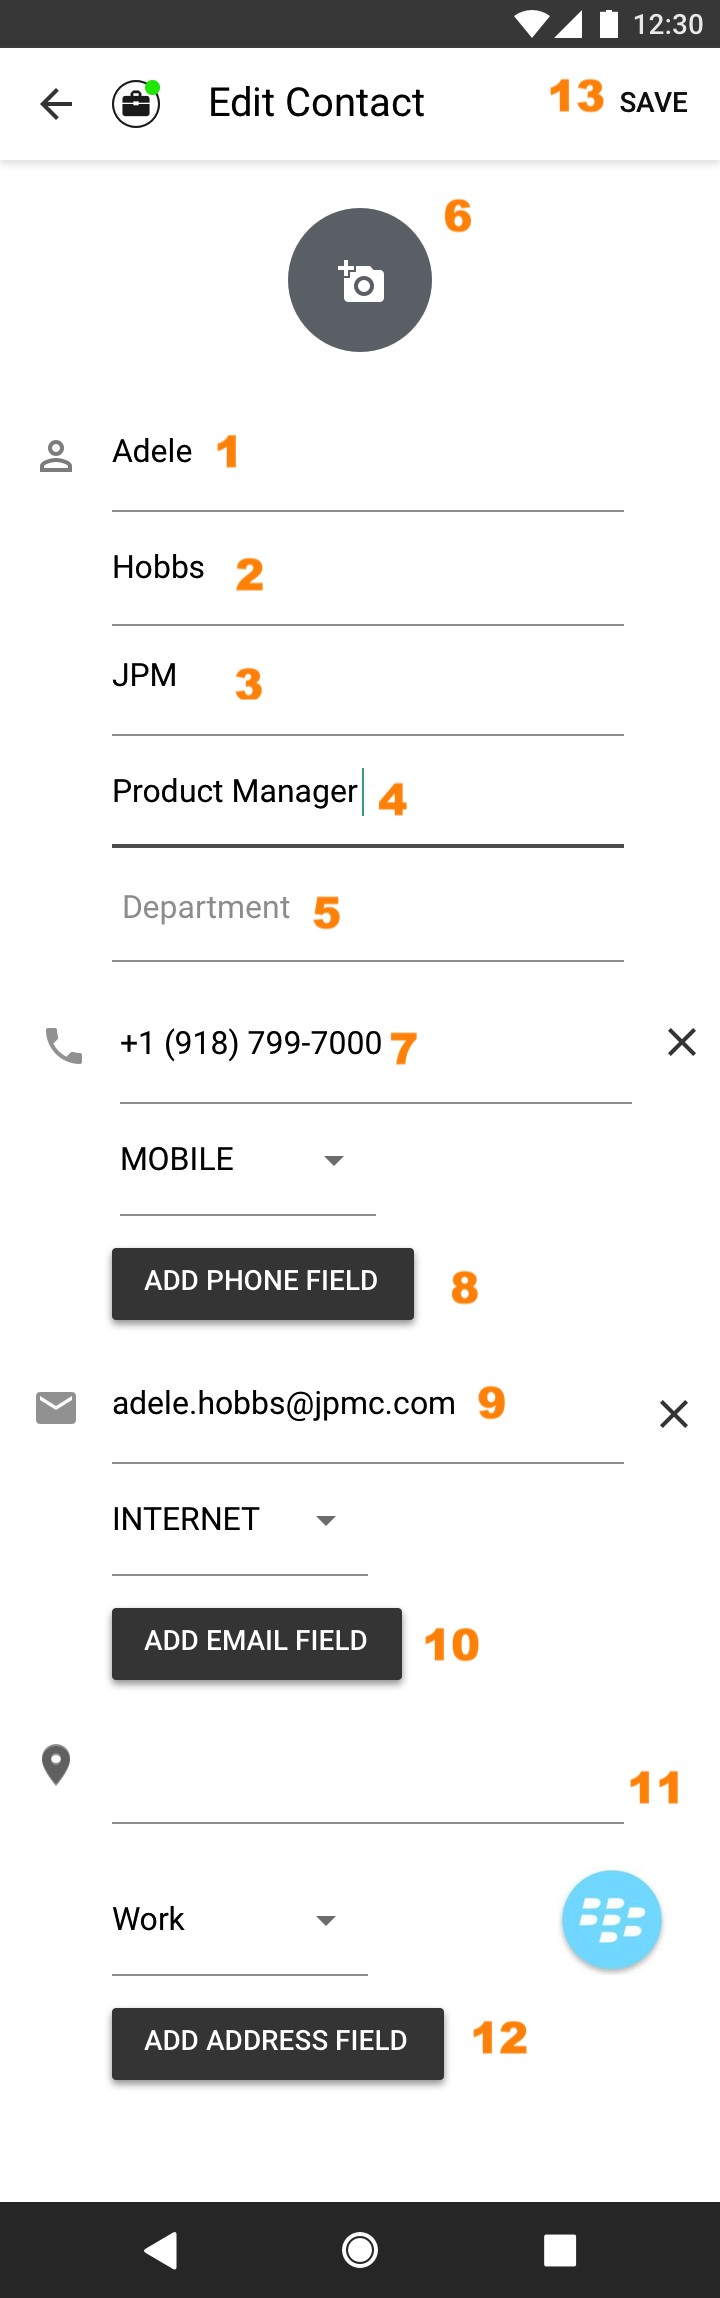
 - Create your contact using the available fields on the Edit Contact screen.
- First name
- Last name
- Company
- Job Title
- Department
- Contact photo
- Number
- Add additional numbers
- Add additional emails
- Address
- Add additional addresses
- Delete Contact
- Save and exit
 Create a contact


Adding a contact from your recent calls
- Go to your recent calls.
- Select the down-arrow to access options.
- Select Add Contact.
Update contact with a new number
If you have a contact that calls you from a new number you can update that contact with the new number.
- Go to Calls.
- Select the down arrow for the unknown number.
- Select Update.
- Enter the name or number of the existing contact you want to update. Note for Exchange Contacts users: this does not search the entire GAL.
- The new number will be added.
- From this screen you can change the label, if desired.
- If you need to delete the previous number, tap the x and confirm.
- Select Save.
View, search and edit contacts
To view, edit, delete, or message contacts, you must add at least one contact.
1. The Contacts screen displays all contacts in alphabetical order by default. Note: The next set of instructions will teach you how to change this setting if you like.
2. Tap on Search name/number to begin typing the name or number to narrow down the list to a desired contact. Note: The search field will not display until you begin scrolling.

2. Clicking on any contact will bring you to that contact's information page, where you can call, message, favorite, or block the contact.
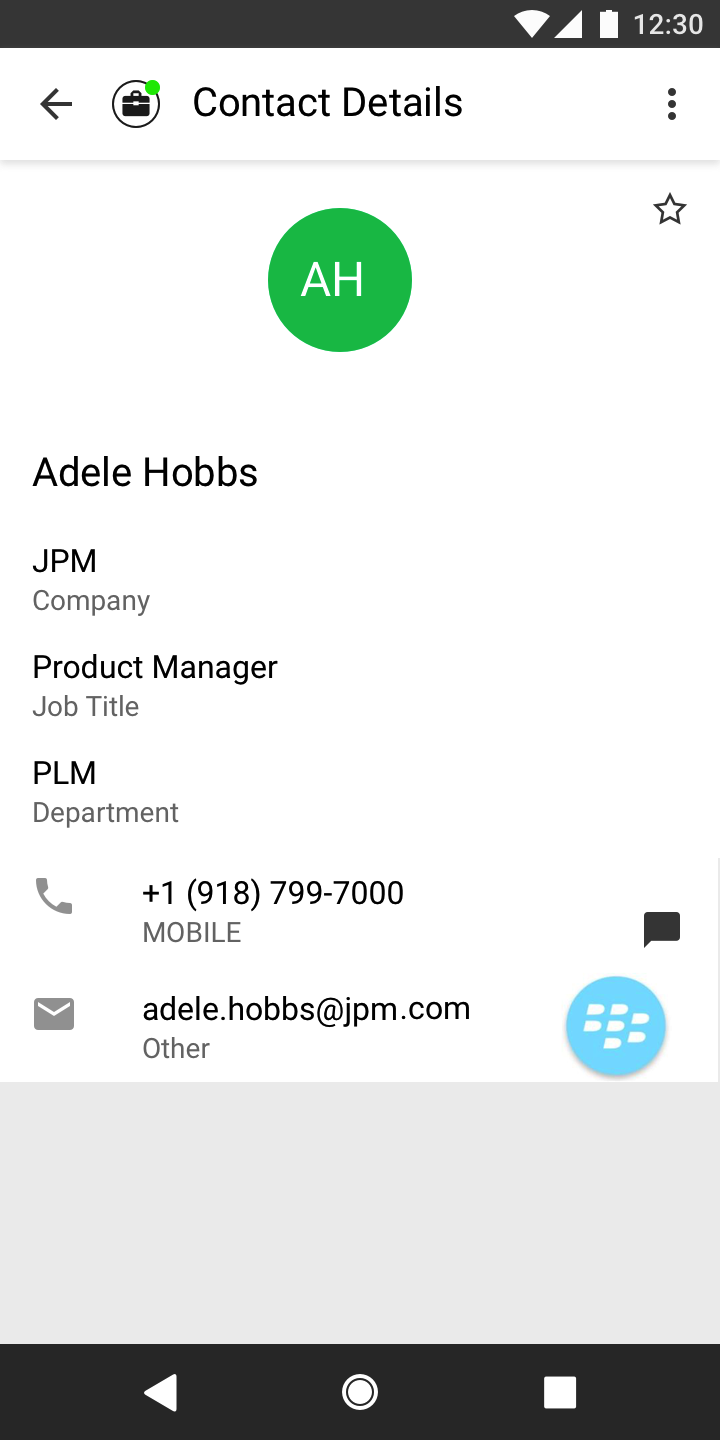
3. Select the Settings menu in the top right-hand corner allows you to choose to delete or edit, the selected contact.

Change the Contacts list display and order
- Select the menu icon ⋮ upper right-hand corner (Android).
- Select Settings.
- Select Contact Settings.
- You can sort by first or last name
- You can display first name or last name first
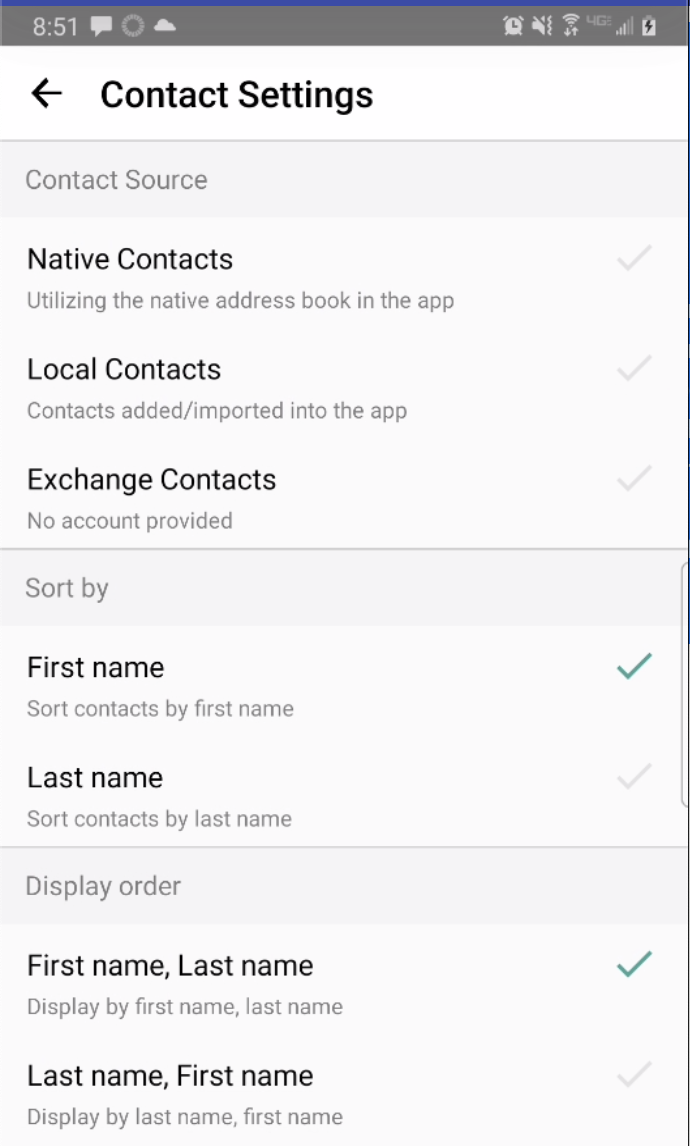 Contact Settings screen
- When complete, you can exit the menu and your Contacts list will be in the chosen Sort by and Display order settings selected.

Add a Favorite contact
You may want to add contacts that you're in touch with more frequently to your favorite contacts. This makes it easier to start new calls or messages with them.
- Go to the Contacts screen.
- Tap your contact to open the Contact details.
- Tap the Star in the upper right-hand corner.
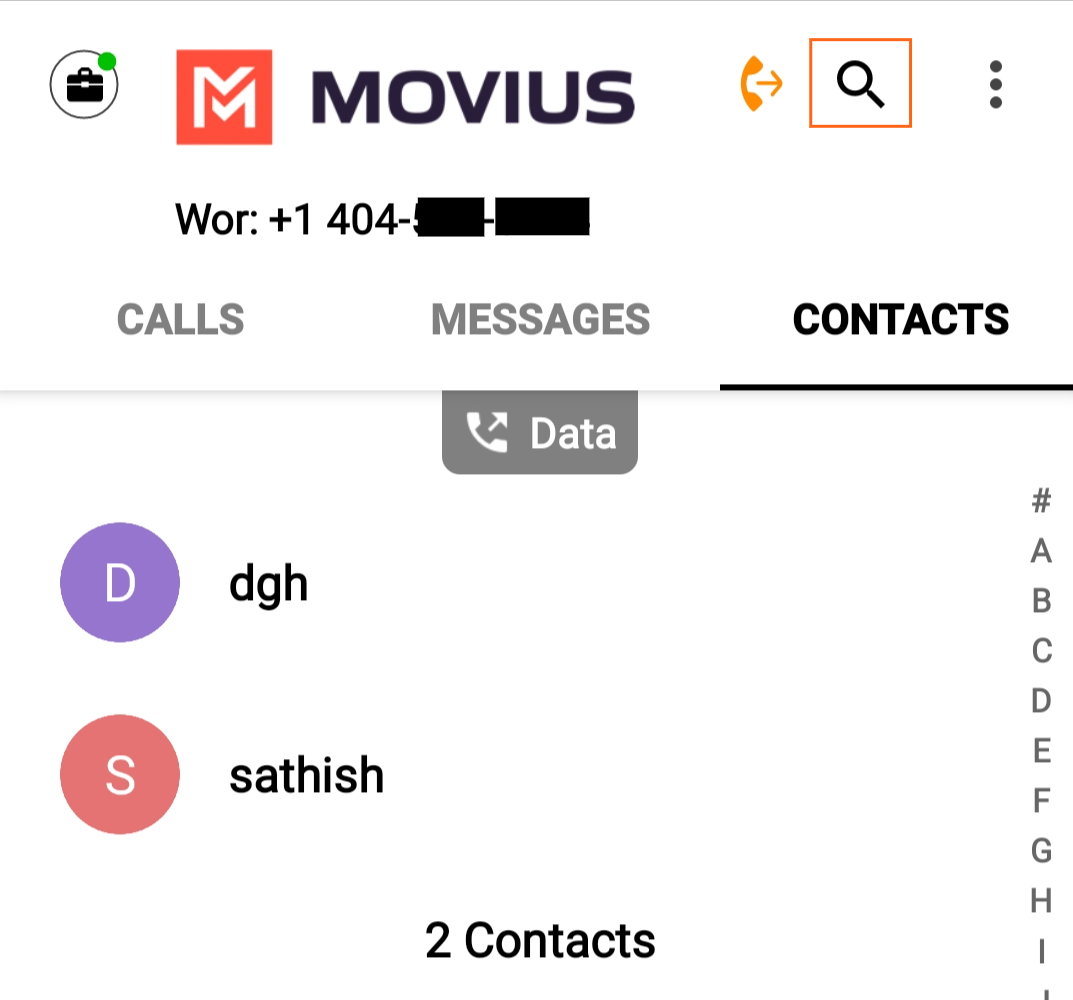
How to search and store a contact from Exchange (Android Only)
When you're using Exchange contacts, you'll be able to search for any contact from the Global Address List (GAL), your company’s list of all employees. However, the full GAL will not show up in the list of contacts for performance reasons. Therefore, you may want to store the contacts you contact often.
This feature is only available in the Android version of MultiLine applications.
- To search for a contact, tap the Search icon and enter the name or number of the contact you want to look up.
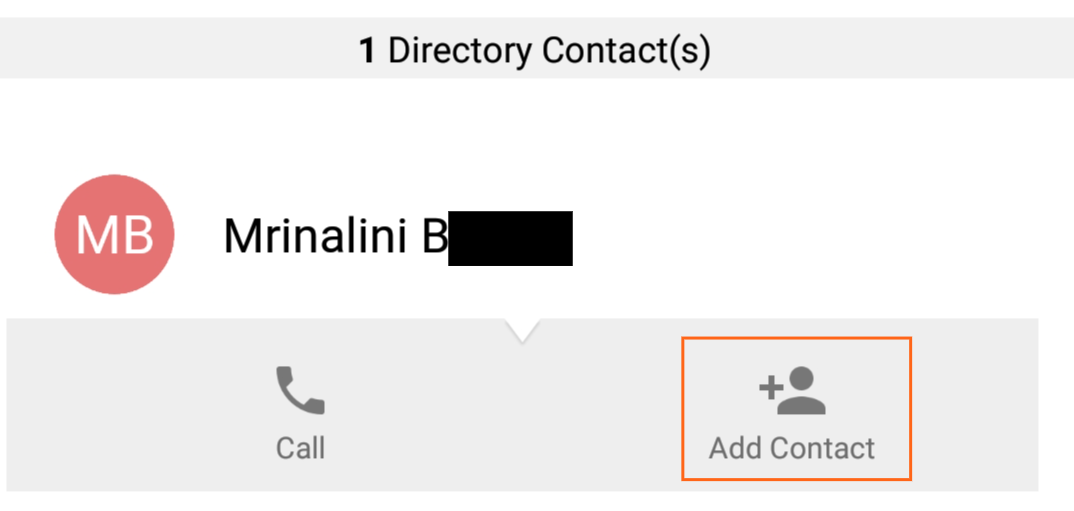
- Your result will be displayed in two categories Stored Contacts and Directory Contacts. To store the directory contact, tap the result.
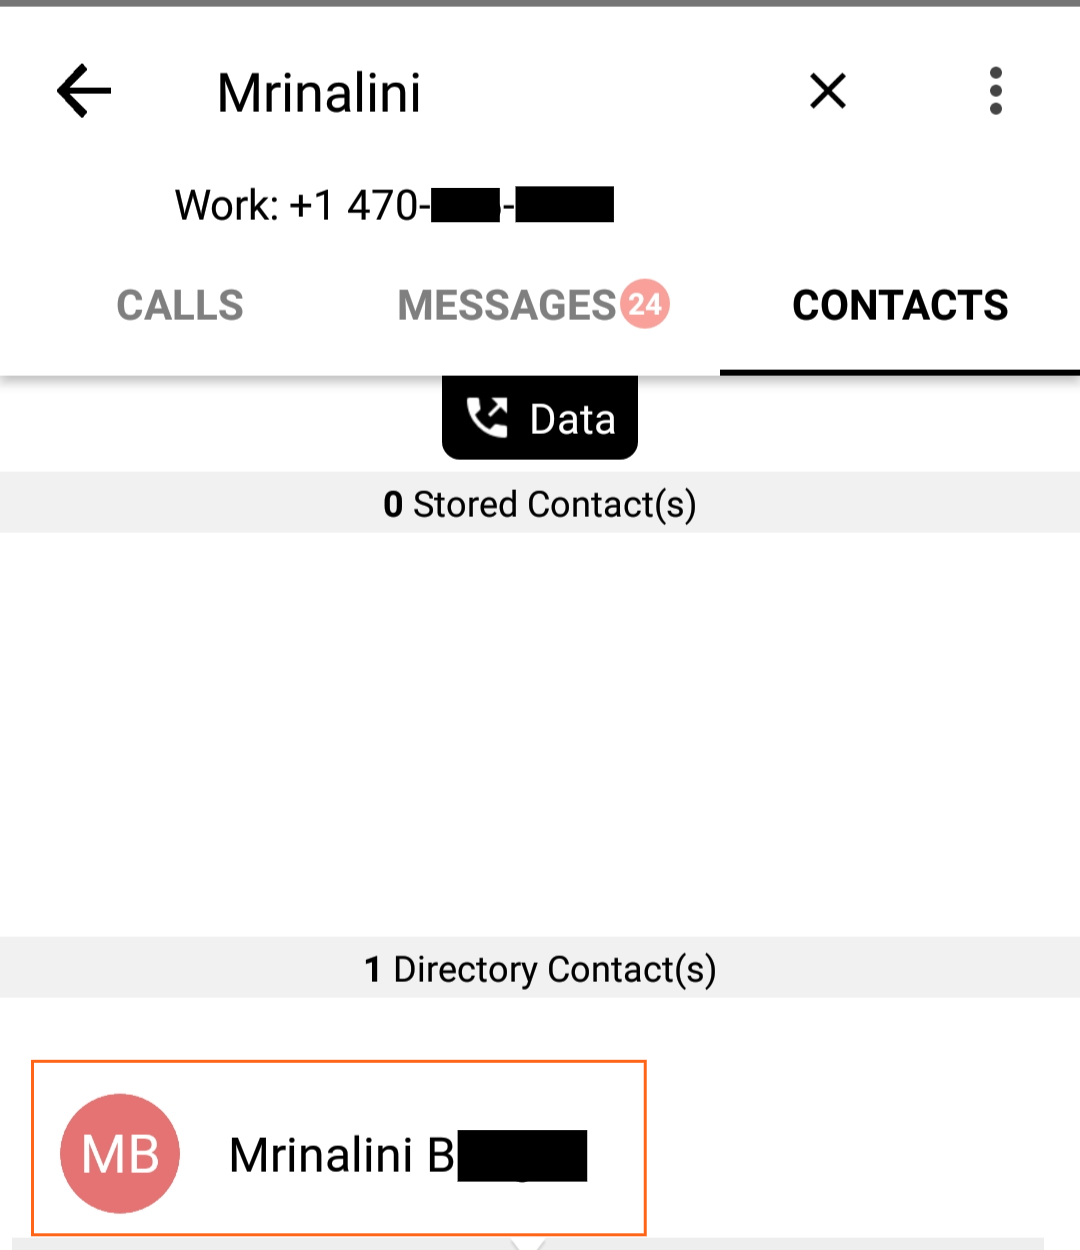
- Tap the Add Contact button. Now this contact is a Stored Contact and will appear in the Contacts tab.