Steps to install m-Connect Chat in Microsoft Teams
Prerequisites and Permissions
-
Required Admin Roles
-
Teams Administrator or Global Administrator role in Microsoft 365
-
Access to Microsoft Teams Admin Center
-
Appropriate licensing (Microsoft 365 Business Basic/Standard/Premium or Enterprise)
Step 1: Access Teams Admin Center
Navigate to Microsoft Teams Admin Center https://admin.teams.microsoft.com/
Sign in with your administrator credentials
Step 2: Locate m-Connect Chat application
-
Navigate to Teams App > Managed apps
-
Search m-Connect Chat

- Select m-Connect Chat
Step 3: Providing Admin consent
Option 1: Through Teams Admin center (Recommended)
-
Navigate to Permissions tab

-
Click on “Grand admin consent” Highlighted
-
New login window will be opened, login with the admin account
-
Review the permission and click on “Accept”

-
Once accepted “Admin consent has been granted for some required permissions.” This message will be displayed in the apps page

Option 2: Through Consent URL
Open the URL to provide admin consent for the application.
https://login.microsoftonline.com/{tenant-id}/adminconsent?client_id=38f48cd0-2809-418e-9519-4ab11669f4cd
-
Azure Tenant id where m-Connect Chat needs to be added
-
Client id of m-Connect chat application: 38f48cd0-2809-418e-9519-4ab11669f4cd
Step 4: Update App Availability
-
On the same page (Manage App details page)
-
Click on Available to

-
Edit availability

-
Choose Everyone if the application should be available for all users and apply
Step 5: Admin consent through Teams App
-
Login to Microsoft Teams with the admin account ( https://teams.microsoft.com/v2/ for browser)
-
Navigate to Apps

-
Search for app “m-Connect Chat”

-
Add m-Connect Chat

-
Open m-Connect Chat

-
Click on “Get Stared”
-
User can see a pop up which as for permission

-
Click on “Continue”
-
A new popup window for permission opens
-
Tick “Consent on behalf of your organization” and click on “Accept”

-
Application setup is done
Step 6: Verify Enterprise Application
-
Navigate to Azure Portal (https://portal.azure.com/)
-
Navigate to Microsoft Entra id -> Enterprise applications -> Select “MoviusConnect”

-
Select “Properties” under “Manage” section
-
Verify “Enabled for users to sign-in?” property is “Yes”
-
Verify “Assignment required” property is “No” (If all user should able to access the app)
-
Verify “Visible to users?” property is “Yes”

-
Save the property if changed
Step 7 - Login to MMP portal, navigate to Setup>Feature Setting>MS Teams and click on Get Started on Teams m-Connect Chat.
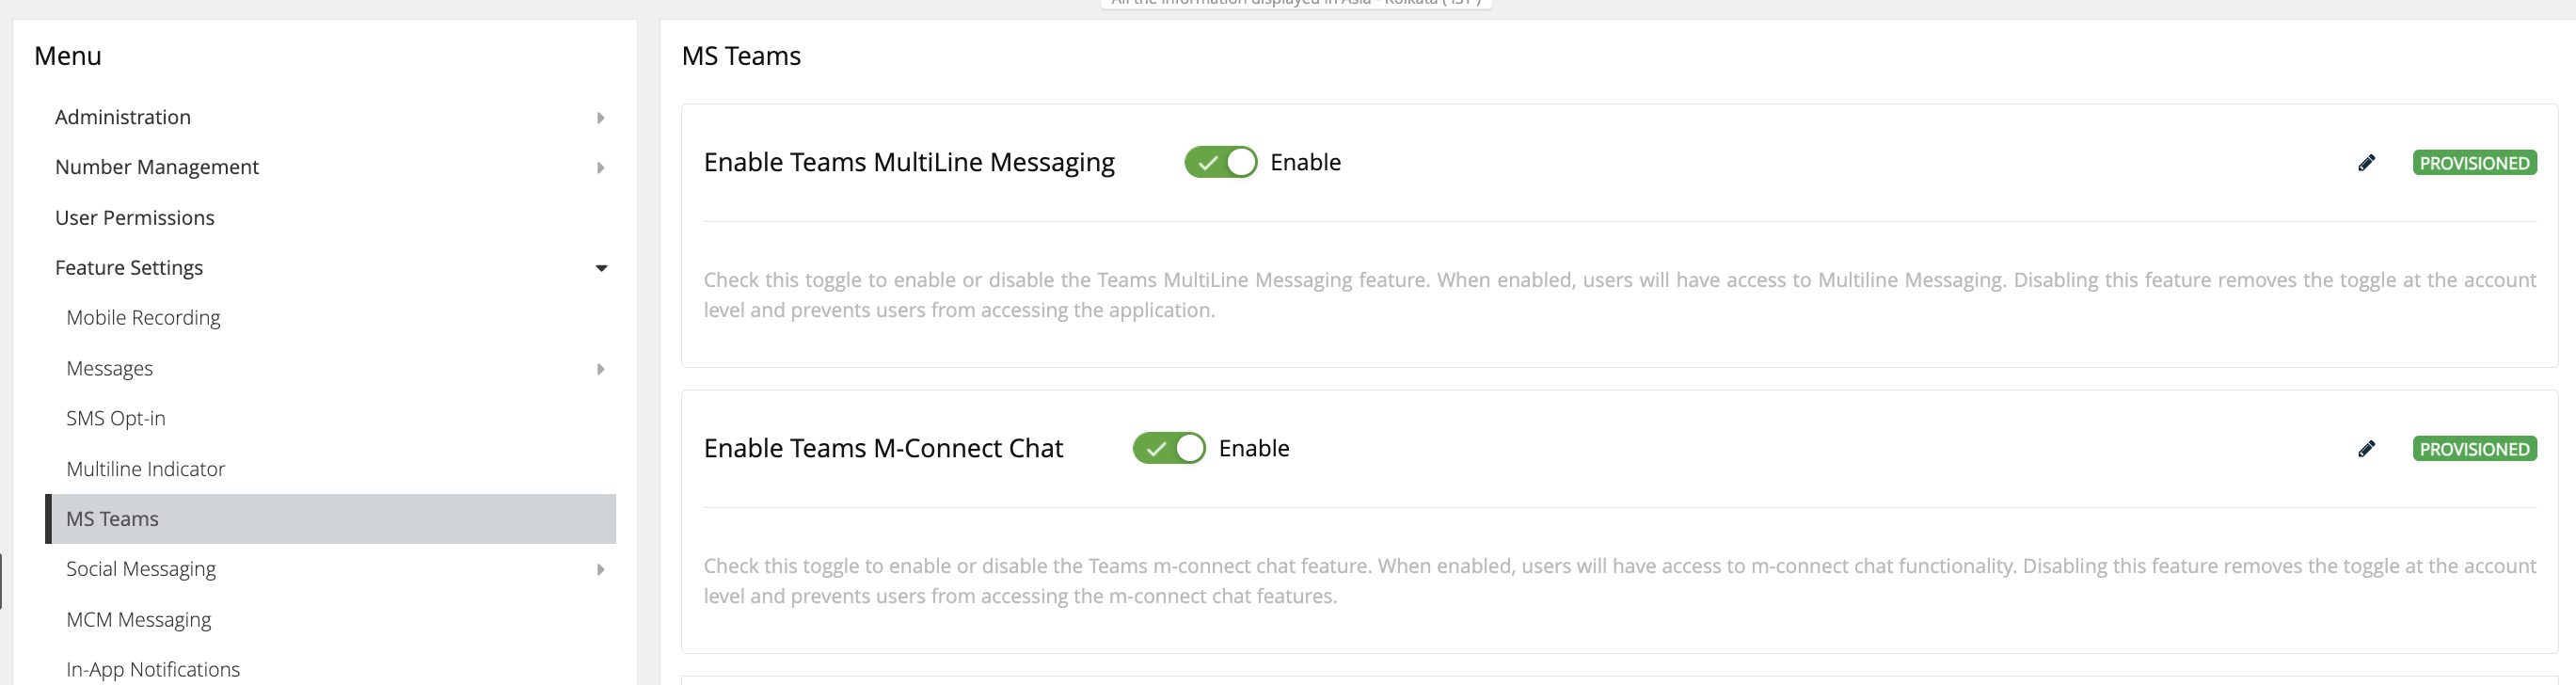
Step 8 - Enter the Tenant Id of Tenant where the Teams m-Connect Chat was added and click on Provision. Status will be updated to Provisioned.
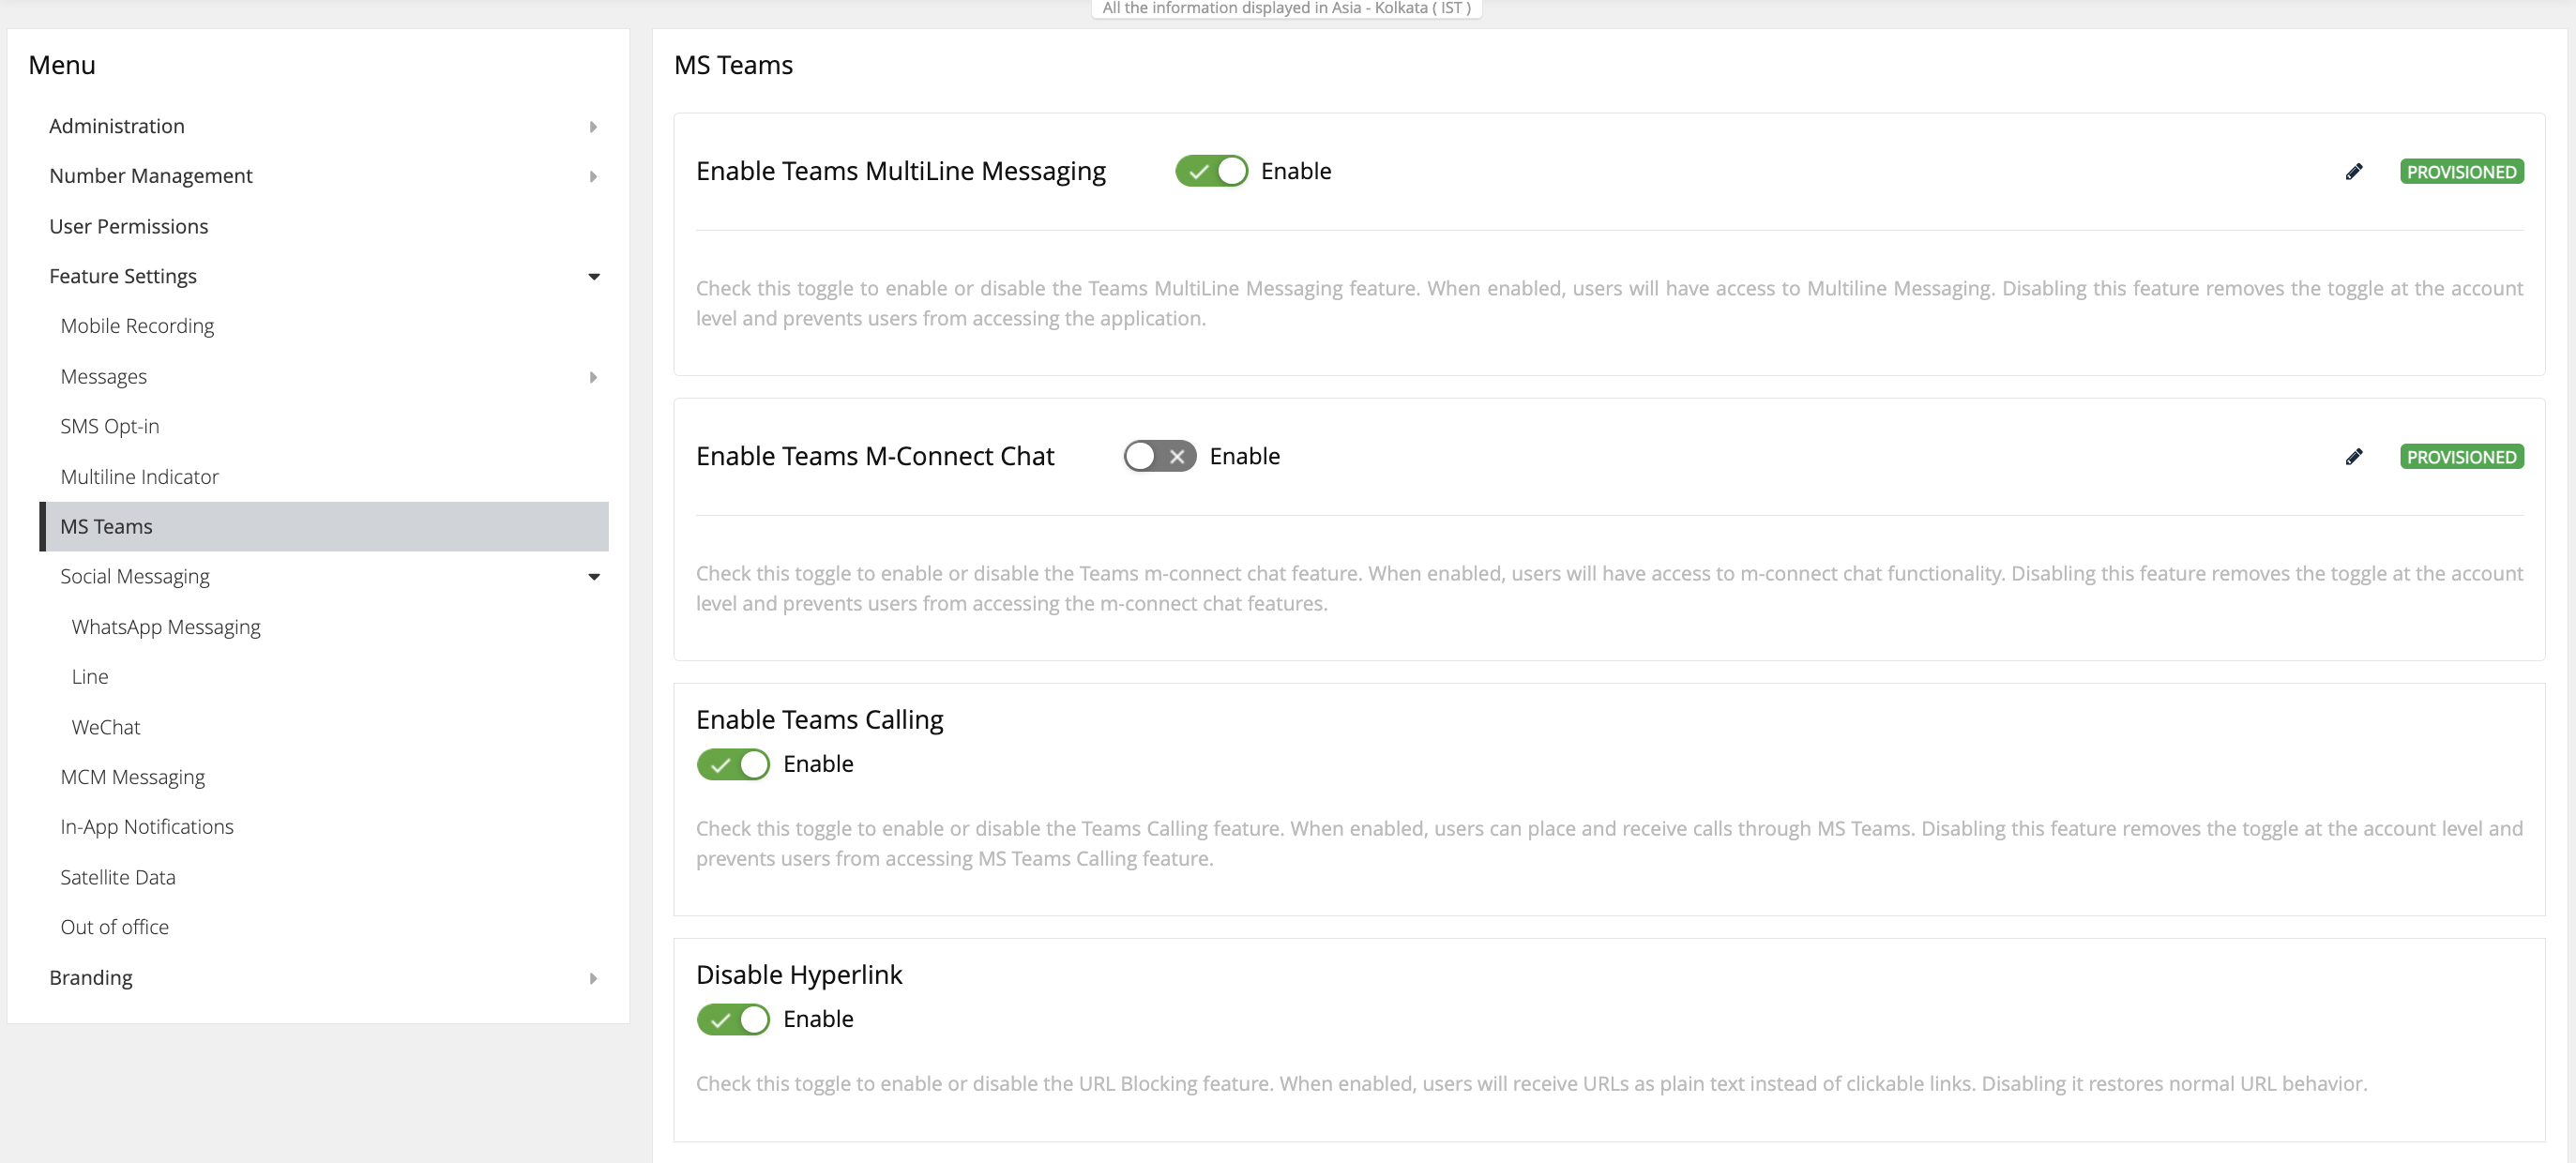
After the previous steps are completed, MMP administrators will have the option to edite the tenant id by clicking on pencil icon next to status or disable the m-Connect Chat for their organization by switching off the toggle.
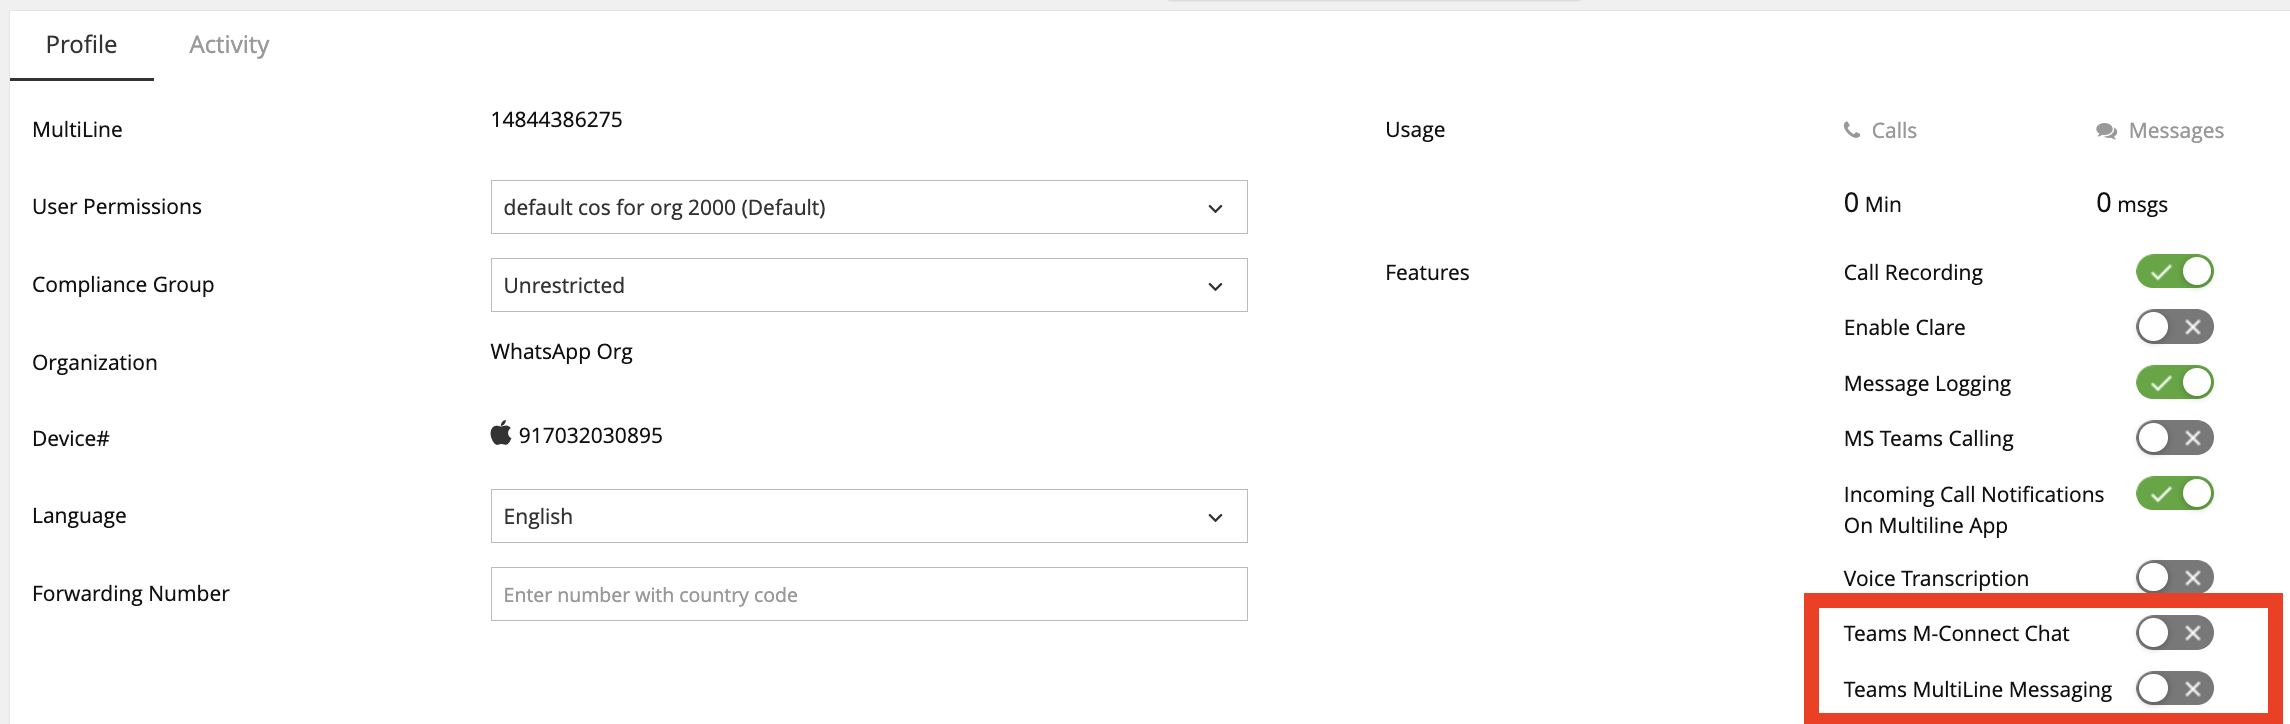
Step 9 - MMP administrators can then enable the m-Connect Chat application for accounts within their organization by turning on Teams MultiLine Messaging toggle.
- Teams m-Connect Chat can be turned on from account without user having to onboard the MultiLine mobile application.
- After the Subscriber logins to Teams m-Connect Chat for the first time, there status at account changes to Activated and line record gets created. Teams m-Connect Chat toggle is then moved at line level.
- Teams m-Connect Chat toggle can be turned off in order to disable the feature for user.