
Everything you need to get started will be sent to you in a MultiLine invitation. You can use it to start the activation process.
Step 1: Get your invitation
- Expect an invitation to be sent to your work email. Please don't reply to this email, as it is auto-generated.
- Your invitation will contain a Download and Activate button, a QR code, and credentials for activating MultiLine manually.
Sample Email below:
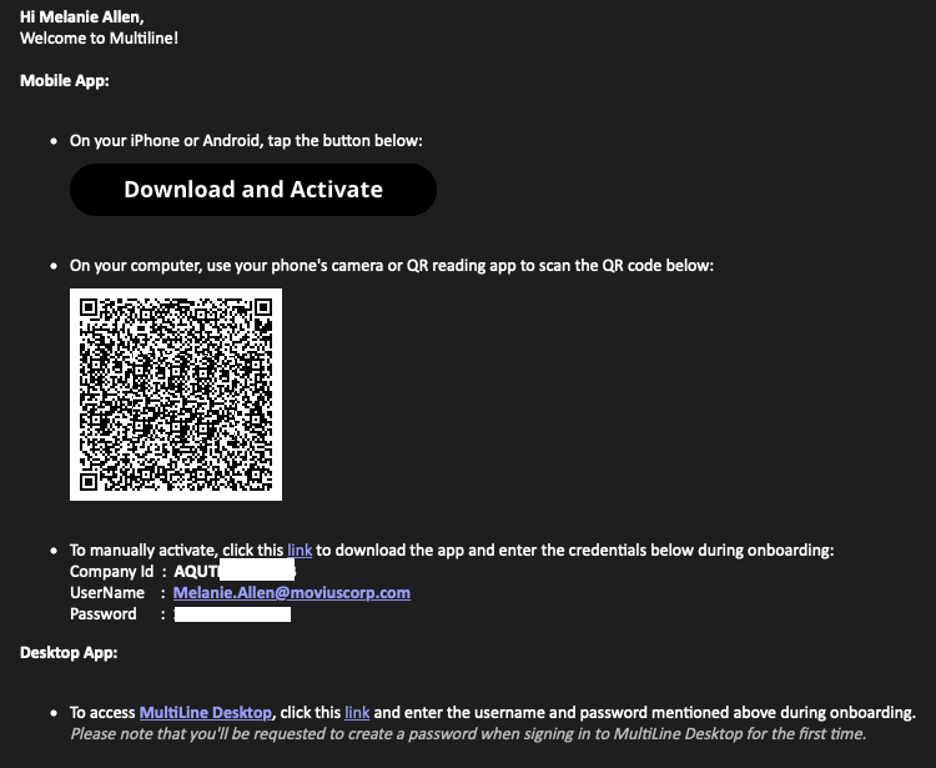
If you ever need to delete and reinstall the mobile app, you'll need this Password from the invitation to activate it. If you lose your invitation, request a new one from your IT administrator.
You receive MultiLine invitations from your IT organization, not Movius. Movius cannot send you invitations.
Some users may receive one of these alternative invitations:
- SMS invitation
- Legacy invitation (email will only contain credentials and not a QR code)
You have multiple options for activating MultiLine on your mobile device:
- If you are opening your email on your phone, tap the Download and Activate button.
- It will check if the MultiLine app is installed on your phone and begin installation if not. The activation process will begin immediately.
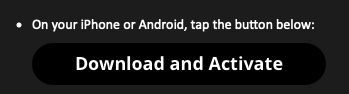 Example Download and Activate button in invitation
- It will check if the MultiLine app is installed on your phone and begin installation if not. The activation process will begin immediately.
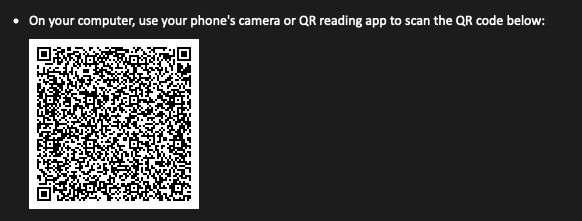
- If you are opening your email on your desktop or tablet, take out your phone camera and tap the QR code. Note: Not available for MultiLine for Intune.
- It will check if the MultiLine app is installed on your phone and begin installation if not. The activation process will begin immediately.
- If you've already downloaded MultiLine, you can also scan the QR code using MultiLine by opening the app and granting the Camera permission.
- If necessary, you can also activate manually by entering the details from your invitation. Click the Activate Manually link from the invitation or the first screen.


Step 2: Complete activation
- Read about the permissions required for the app, then tap Proceed. Note: MultiLine does not upload, store, transmit, or sell your Contacts information.
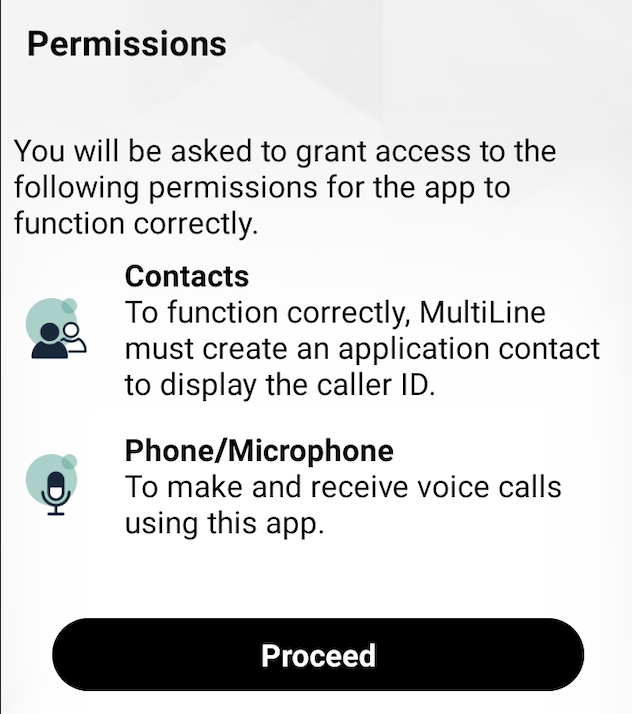 Permissions screen
 - Confirm in the next prompts (sent from your phone) that you will allow the permissions.
- Some users will be prompted to have a one-time PIN will be sent to your mobile device. If so, enter the number of your personal SIM (your non-MultiLine number). Note: Your personal phone number and PIN verification is needed to verify the MultiLine app is being placed on a SIM-based device and allows the app to leverage minutes mode when needed. MultiLine's software-based technology works completely through the app itself and never touches your personal data or SIM information, including personal calls, messages, searches, and applications.
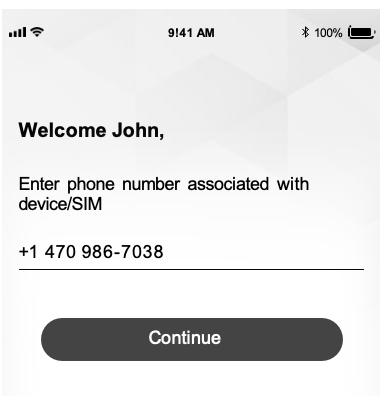 Screen to enter your phone number (not the MultiLine number)
- Most of the time, this PIN will be auto-detected. Tap Activate to continue. Note: in the rare case that the PIN is not detected, try RESEND PIN or GET PIN VIA CALL or GET PIN VIA EMAIL, if the options are available.
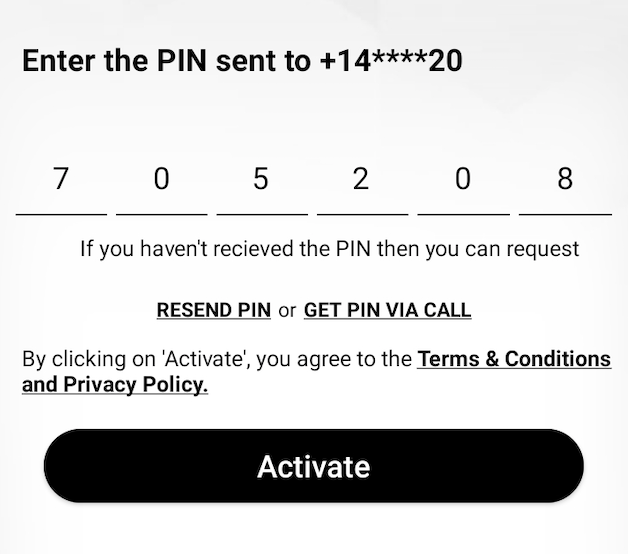 Activation Screen


Your MultiLine number will display. Tap Okay, got it to continue.
 Your MultiLine number screen
That's it!
You've completed activation and are ready to use MultiLine.
MultiLine apps work on iOS and Android smartphones and their interface differs accordingly. To learn how to call and message with MultiLine, please select your smartphone type:
Everything you need to get started will be sent to you in a MultiLine invitation. You can use it to start the activation process.
Step 1: Get your invitation
- Expect an invitation to be sent to your work email. Please don't reply to this email, as it is auto-generated.
- Your invitation will contain a Download and Activate button, a QR code, and credentials for activating MultiLine manually.
Sample Email below:
If you ever need to delete and reinstall the mobile app, you'll need this Password from the invitation to activate it. If you lose your invitation, request a new one from your IT administrator.
You receive MultiLine invitations from your IT organization, not Movius. Movius cannot send you invitations.
Some users may receive one of these alternative invitations:
- SMS invitation
- Legacy invitation (email will only contain credentials and not a QR code)
You have multiple options for activating MultiLine on your mobile device:
- If you are opening your email on your phone, tap the Download and Activate button.
- It will check if the MultiLine app is installed on your phone and begin installation if not. The activation process will begin immediately.Example Download and Activate button in invitation
- It will check if the MultiLine app is installed on your phone and begin installation if not. The activation process will begin immediately.
- If you are opening your email on your desktop or tablet, take out your phone camera and tap the QR code.
- It will check if the MultiLine app is installed on your phone and begin installation if not. The activation process will begin immediately.
- If you've already downloaded MultiLine, you can also scan the QR code using MultiLine by opening the app and granting the Camera permission.
- If necessary, you can also activate manually by entering the details from your invitation. Click the Activate Manually link from the invitation or the first screen.
Step 2: Complete activation
- Read about the permissions required for the app, then tap Proceed. Note: MultiLine does not upload, store, transmit, or sell your Contacts information. Permissions screen
- Confirm in the next prompts (sent from your phone) that you will allow the permissions.
- Some users will be prompted to have a one-time PIN will be sent to your mobile device. If so, enter the number of your personal SIM (your non-MultiLine number). Note: Your personal phone number and PIN verification is needed to verify the MultiLine app is being placed on a SIM-based device and allows the app to leverage minutes mode when needed. MultiLine's software-based technology works completely through the app itself and never touches your personal data or SIM information, including personal calls, messages, searches, and applications.Screen to enter your phone number (not the MultiLine number)
- Most of the time, this PIN will be auto-detected. Tap Activate to continue. Note: in the rare case that the PIN is not detected, try RESEND PIN or GET PIN VIA CALL or GET PIN VIA EMAIL, if the options are available.Activation Screen
Your MultiLine number will display. Tap Okay, got it to continue.
Your MultiLine number screen
That's it!
You've completed activation and are ready to use MultiLine.
MultiLine apps work on iOS and Android smartphones and their interface differs accordingly. To learn how to call and message with MultiLine, please select your smartphone type:
If you are using a tablet or iphone that does not have cellular connectivity, these instructions are for you.
Everything you need to get started will be sent to you in a MultiLine invitation. You can use it to start the activation process.
Step 1: Get your invitation
- Expect an invitation to be sent to your work email. Please don't reply to this email, as it is auto-generated.
- Your invitation will contain a Download and Activate button, a QR code, and credentials for activating MultiLine manually.
Sample Email below:
If you ever need to delete and reinstall the mobile app, you'll need this Password from the invitation to activate it. If you lose your invitation, request a new one from your IT administrator.
You receive MultiLine invitations from your IT organization, not Movius. Movius cannot send you invitations.
You have multiple options for activating MultiLine on your mobile device:
- If you are opening your email on your phone, tap the Download and Activate button.
- It will check if the MultiLine app is installed on your phone and begin installation if not. The activation process will begin immediately.
Example Download and Activate button in invitation
- It will check if the MultiLine app is installed on your phone and begin installation if not. The activation process will begin immediately.
- If you are opening your email on your desktop or tablet, take out your phone camera and tap the QR code. Note: Not available for MultiLine for Intune.
- It will check if the MultiLine app is installed on your phone and begin installation if not. The activation process will begin immediately.
- If you've already downloaded MultiLine, you can also scan the QR code using MultiLine by opening the app and granting the Camera permission.
- If necessary, you can also activate manually by entering the details from your invitation. Click the Activate Manually link from the invitation or the first screen.
Step 2: Complete activation
- Read about the permissions required for the app, then tap Proceed. Note: MultiLine does not upload, store, transmit, or sell your Contacts information.
Permissions screen - Confirm in the next prompts (sent from your phone) that you will allow the permissions.
- Some users will be prompted to have a one-time PIN will be sent to your mobile device. If so, enter the number of your personal SIM (your non-MultiLine number). Note: Your personal phone number and PIN verification is needed to verify the MultiLine app is being placed on a SIM-based device and allows the app to leverage minutes mode when needed. MultiLine's software-based technology works completely through the app itself and never touches your personal data or SIM information, including personal calls, messages, searches, and applications.Screen to enter your phone number (not the MultiLine number)
Your MultiLine number will display. Tap Okay, got it to continue.
Your MultiLine number screen
That's it!
If you're installing MultiLine on an Android phone or tablet without cellular connectivity, these instructions are for you.
Everything you need to get started will be sent to you in a MultiLine invitation. You can use it to start the activation process.
Step 1: Get your invitation
- Expect an invitation to be sent to your work email. Please don't reply to this email, as it is auto-generated.
- Your invitation will contain a Download and Activate button, a QR code, and credentials for activating MultiLine manually.
Sample Email below:
If you ever need to delete and reinstall the mobile app, you'll need this Password from the invitation to activate it. If you lose your invitation, request a new one from your IT administrator.
You receive MultiLine invitations from your IT organization, not Movius. Movius cannot send you invitations.
Some users may receive one of these alternative invitations:
- SMS invitation
- Legacy invitation (email will only contain credentials and not a QR code)
You have multiple options for activating MultiLine on your mobile device:
- If you are opening your email on your phone, tap the Download and Activate button.
- It will check if the MultiLine app is installed on your phone and begin installation if not. The activation process will begin immediately.Example Download and Activate button in invitation
- It will check if the MultiLine app is installed on your phone and begin installation if not. The activation process will begin immediately.
- If you are opening your email on your desktop or tablet, take out your phone camera and tap the QR code. Note: Not available for MultiLine for Intune.
- It will check if the MultiLine app is installed on your phone and begin installation if not. The activation process will begin immediately.
- If you've already downloaded MultiLine, you can also scan the QR code using MultiLine by opening the app and granting the Camera permission.
- If necessary, you can also activate manually by entering the details from your invitation. Click the Activate Manually link from the invitation or the first screen.
Step 2: Complete activation
- Read about the permissions required for the app, then tap Proceed. Note: MultiLine does not upload, store, transmit, or sell your Contacts information. Permissions screen
- Confirm in the next prompts (sent from your phone) that you will allow the permissions.
- Some users will be prompted to have a one-time PIN will be sent to your mobile device. If so, enter the number of your personal SIM (your non-MultiLine number). Note: Your personal phone number and PIN verification is needed to verify the MultiLine app is being placed on a SIM-based device and allows the app to leverage minutes mode when needed. MultiLine's software-based technology works completely through the app itself and never touches your personal data or SIM information, including personal calls, messages, searches, and applications.Screen to enter your phone number (not the MultiLine number)
- Your MultiLine number will display. Tap Okay, got it to continue.
Your MultiLine number screen
That's it!
You've completed activation and are ready to use MultiLine.