Read on to learn about sending and replying to messages with WhatsApp Messaging Connector.
Overview
The WhatsApp Messaging Connector allows compliant WhatsApp messaging directly inside MultiLine.
- MultiLine users can send WhatsApp messages to contacts, and they can read and reply to WhatsApp messages on the MultiLine messages screen alongside SMS and Voicemail messages.
- WhatsApp users receive messages from the MultiLine user as coming from an official WhatsApp business account.
- Picture messaging allows MultiLine users and WhatsApp users to share picture messages.
- Group messaging allows multiple MultiLine users to contact a single WhatsApp user. You can transfer the user to another MultiLine user, leave a conversation with that user, remove participant, or restart a conversation with that user.
Before you start
- Your organization has to enable WhatsApp Messaging Connector for it to be available in MultiLine. If not, you won't see the green WhatsApp messaging icon.
- You must add users to your contacts before you can send them a message.
- To start messaging a user you haven't messaged before, you'll need to request consent, and the user must reply with consent for the conversation to proceed. Messages will be queued and sent once the WhatsApp user opts in.
- Due to WhatsApp Business policies to prevent spam, after a lapse of conversation, chats can become inactive. Messages will be queued and sent once the WhatsApp user reinitates the conversation.
Messaging a WhatsApp user for the first time
You can start a new WhatsApp conversation from the Contact Details page. You'll be able to freely message this person until there has been a 24 hours since the last message. After which, starting new messages will require sending a template message.
1. Find the contact from your Contacts tab and tap to open the Contact Details.
2. The WhatsApp message icon will display next to messaging and calling icons. The green WhatsApp icon will distinguish WhatsApp messages from other message types.

3. The first time you send a message, you'll be asked permission to send the opt-in message. After sending the opt-in message, a new WhatsApp messaging thread is created that you can return to any time by going to your Messages tab on MultiLine
 What Movius MultiLine™ User Sees
Note: the WhatsApp user must reply to the opt-in message to affirm their consent before you can proceed to message.
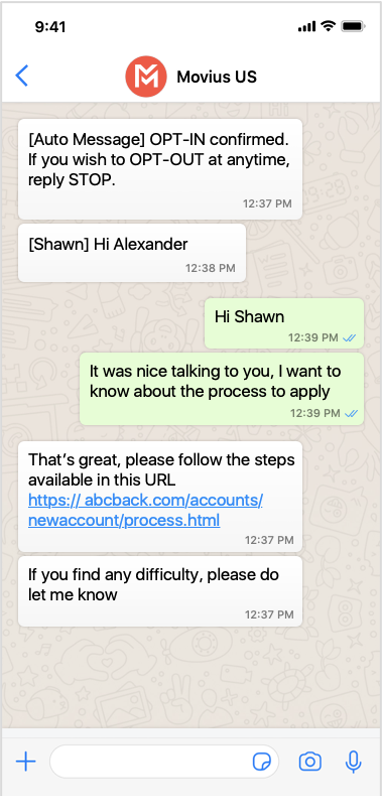 What the WhatsApp user sees
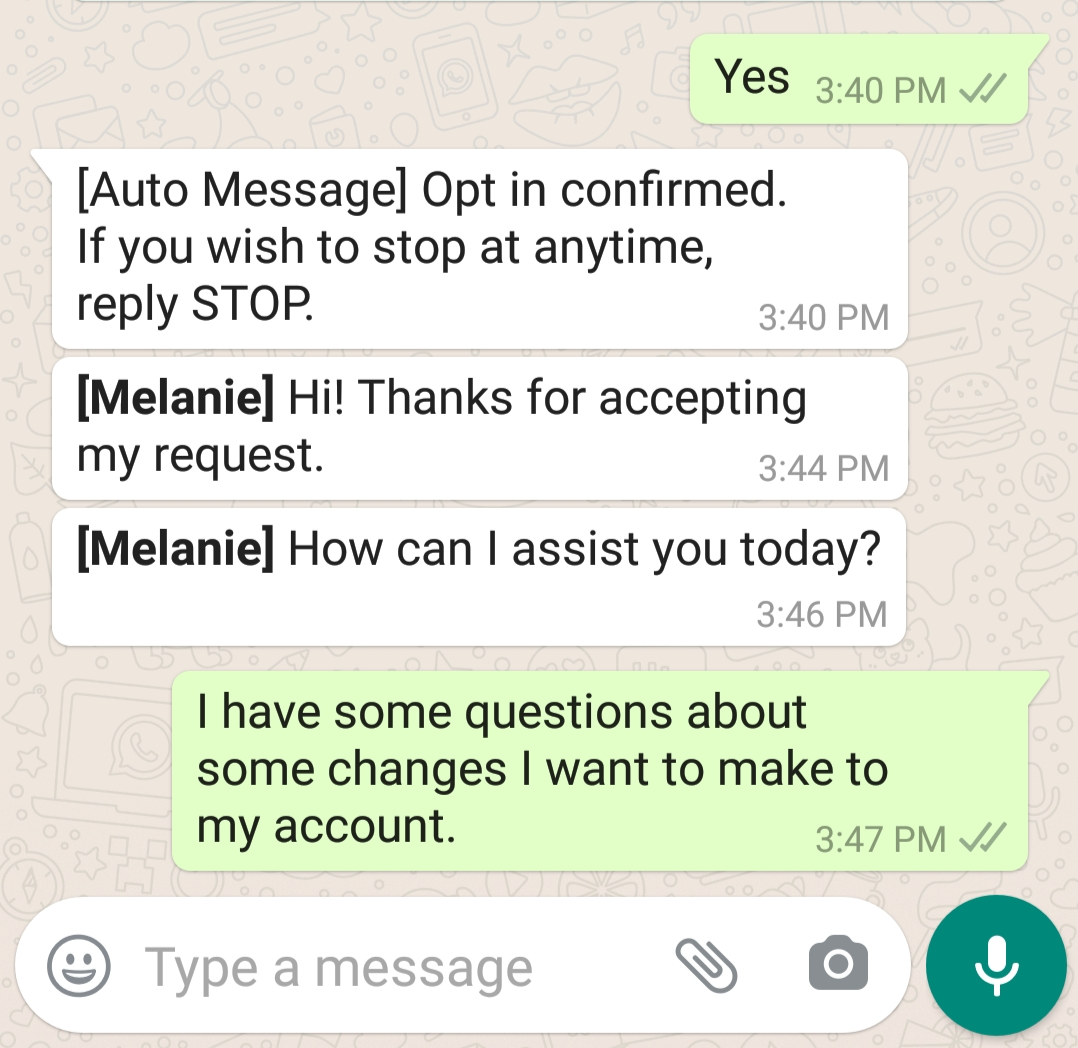
5. After the guest provides their consent, you can freely message the user until there has been 24 hours since you or the guest has sent a message. If more than 24 hours pass, then you will need to send a template message. Note: A guest can always freely message you.
 Start Messaging
Replying to WhatsApp messages
- You can reply to a WhatsApp message by tapping the WhatsApp icon from the Contact details page, or by finding the message thread in your message history.
- You can have multiple message threads with a user. You can access any of your threads to reply from the History page.
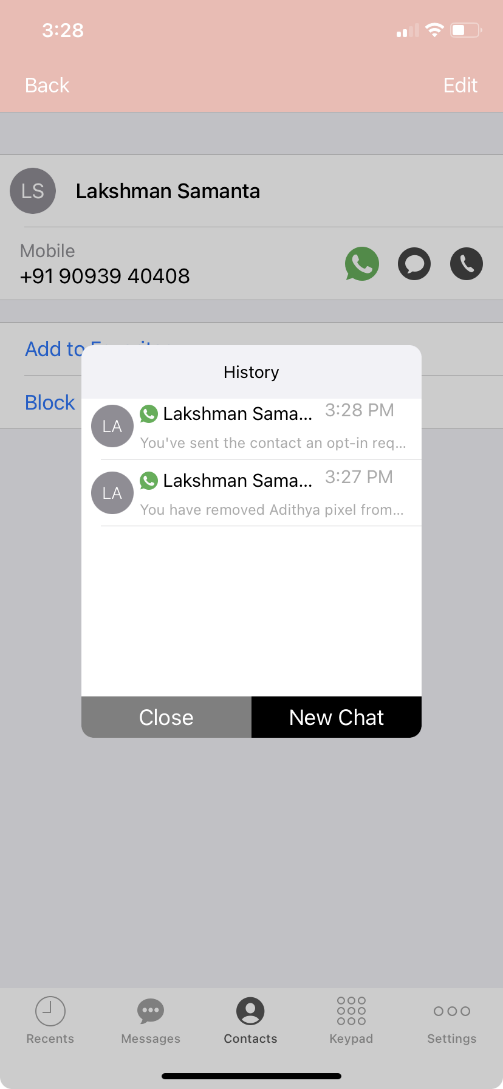
- If it has been less than 24 hours since the last message, you can message freely, but otherwise you will need to send a template message.
Sending a template message to start a new 24 hour conversation window
Once 24 hours has passed, you will see a message letting you know that you must restart the conversation using a template message. You can send template messages at any time.
1. Tap the Expand '+' icon to reveal the menu.
 Click the Expand '+' icon
2. Use the template message tool to send a template message.
 Click Templates
a. Tap the message you want and the message field will populate with the text.
b. Tap the Send icon to send the message.
 Choose a template
Sending Picture Messages
1. Tap the Expand '+' icon to reveal the menu.
Camera option
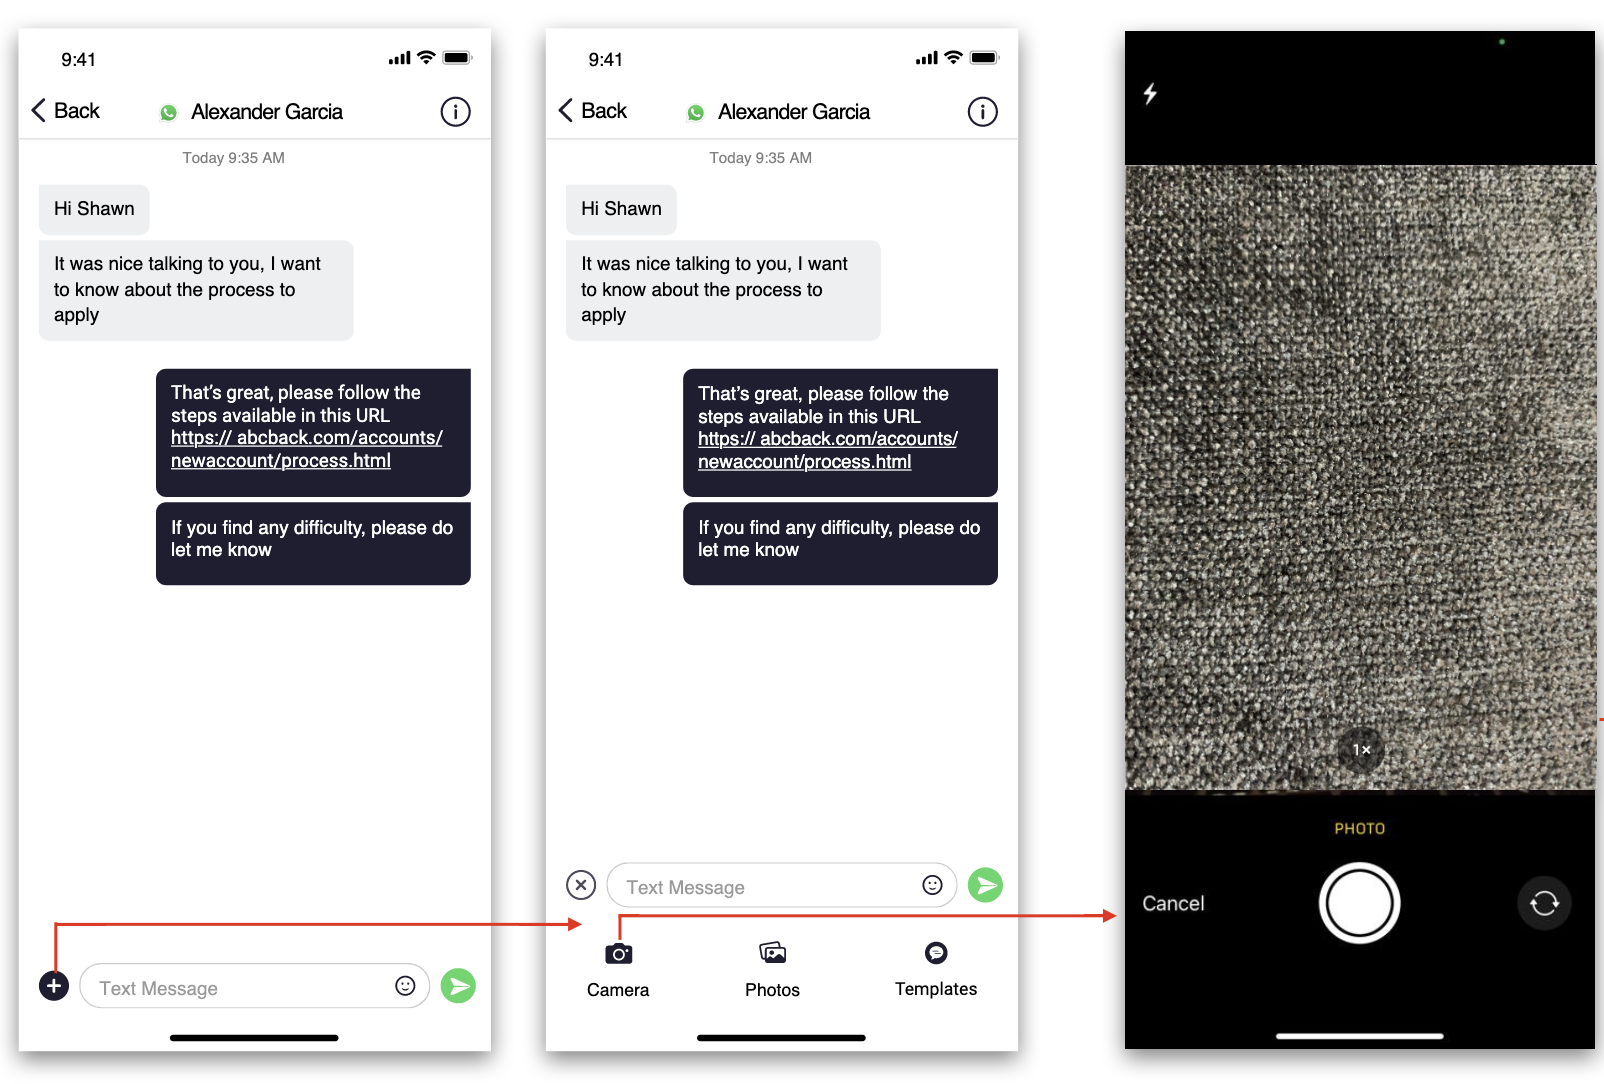
Note: You have the option to retake or cancel before sending.
Photo Library Option
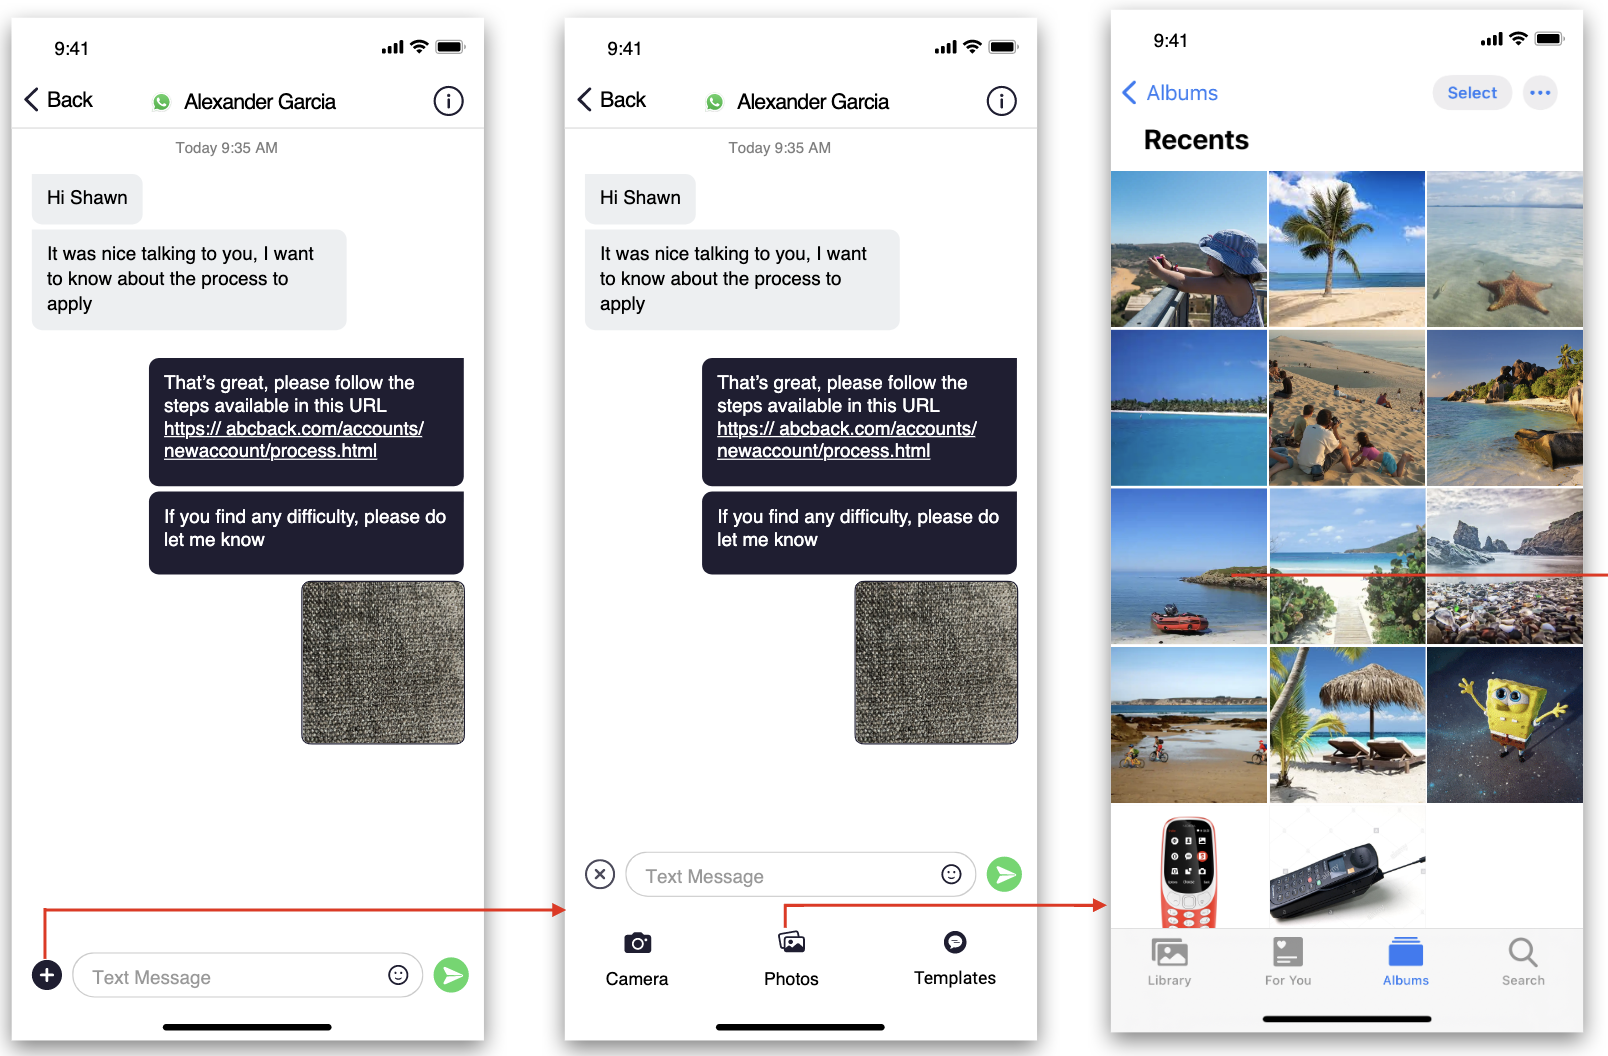
Read on to learn about group messaging with WhatsApp Messaging Connector in the Multiline Android app.
Overview
Group messaging allows multiple MultiLine users to contact a single WhatsApp user. You can transfer the user to another MultiLine user, leave a conversation with that user, remove the participant, or restart a conversation with that user.
Create a Group Message
To send a group message, go to your existing conversation with the user.
1. The Details menu is in the upper righthand of the screen. For iOS, tap the Information icon. For Android, tap the Settings menu icon.
 Choose Information Icon
2. Tap Add User to Conversation.
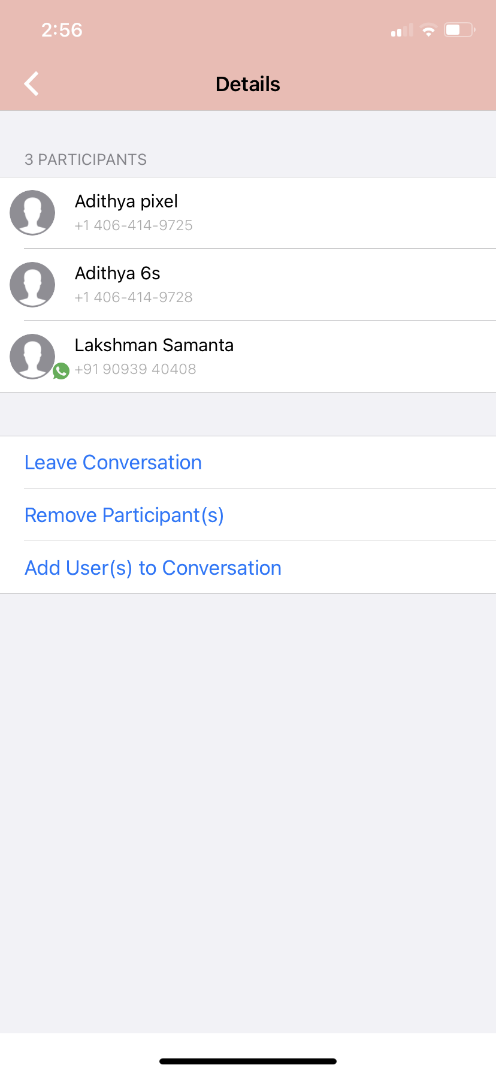
3. Select participants.
Note: Only MultiLine users in your sub-organization that are enabled with the WhatsApp Business Messaging Connector will display.
 Add User: Select contacts
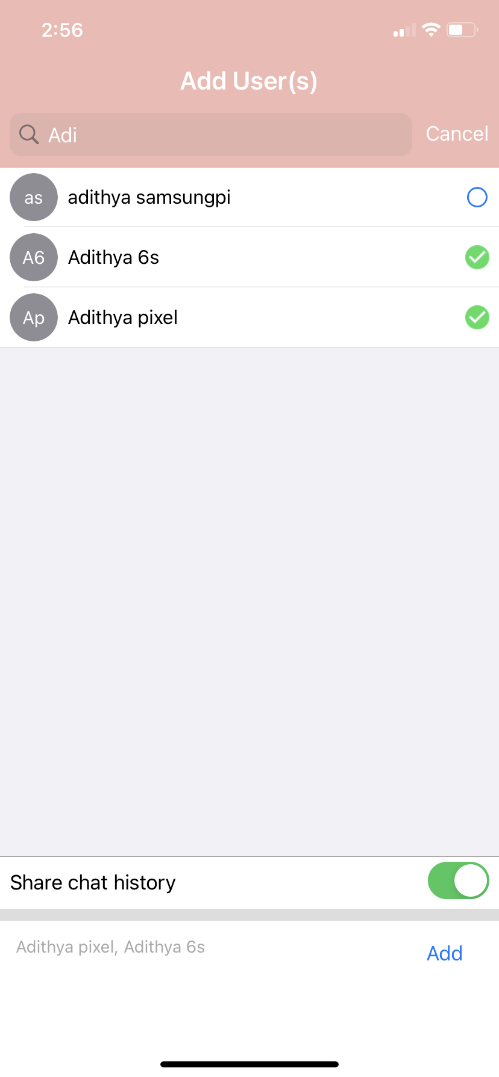 4. Selected users will be added to the group chat.
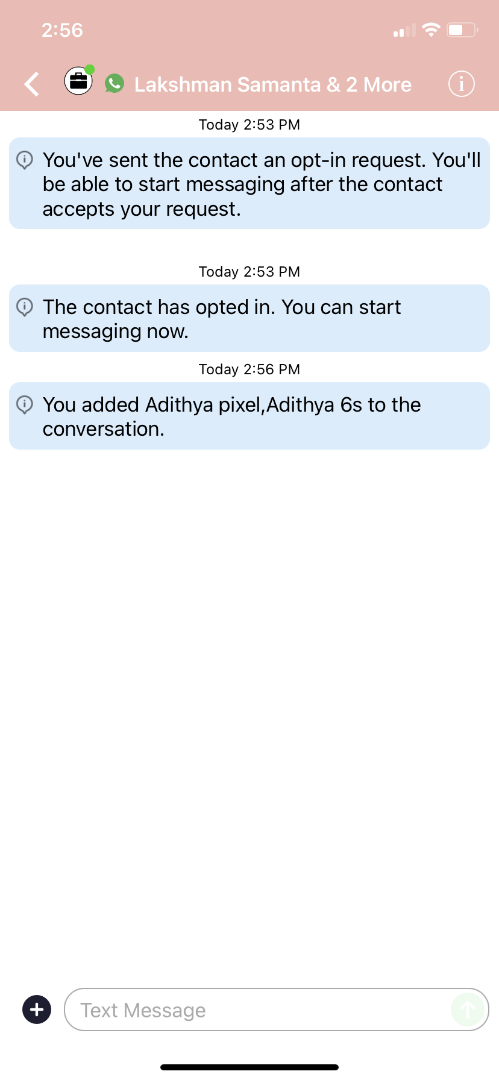
Leave a group chat
To leave a conversation, open the existing WhatsApp conversation.
- The Details menu is in the upper righthand menu. For iOS, tap the Information icon. For Android, tap the Settings menu icon.
 Details menu in WhatsApp message thread (iOS)
2. Tap Leave Conversation.
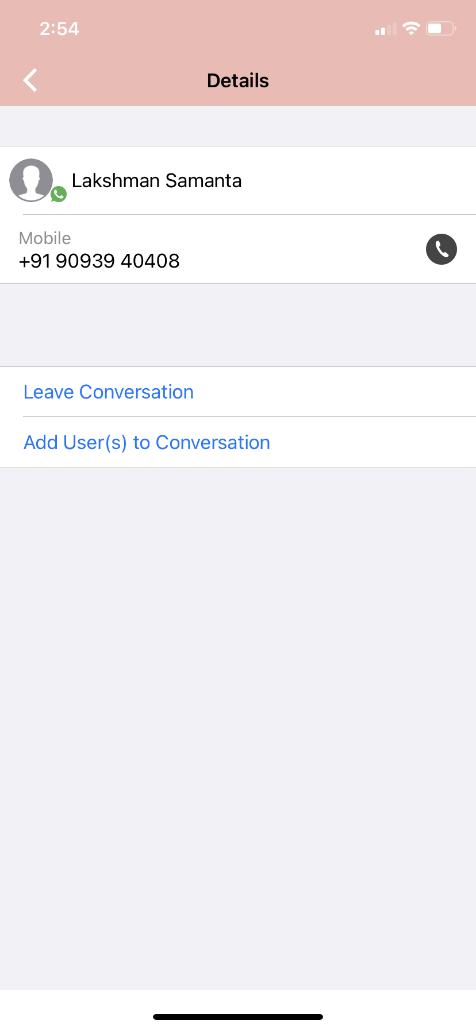
3. The WhatsApp user will see the automated message that you're no longer available to chat.
 Automated Message to WhatsApp User: User left the chat
4. You will see an automated message that you've left the chat.

Remove a participant
1. Tap the Details menu for the Conversation.

2. Tap the Remove Participant option.
3. Select the participant you want to remove and then tap Done.
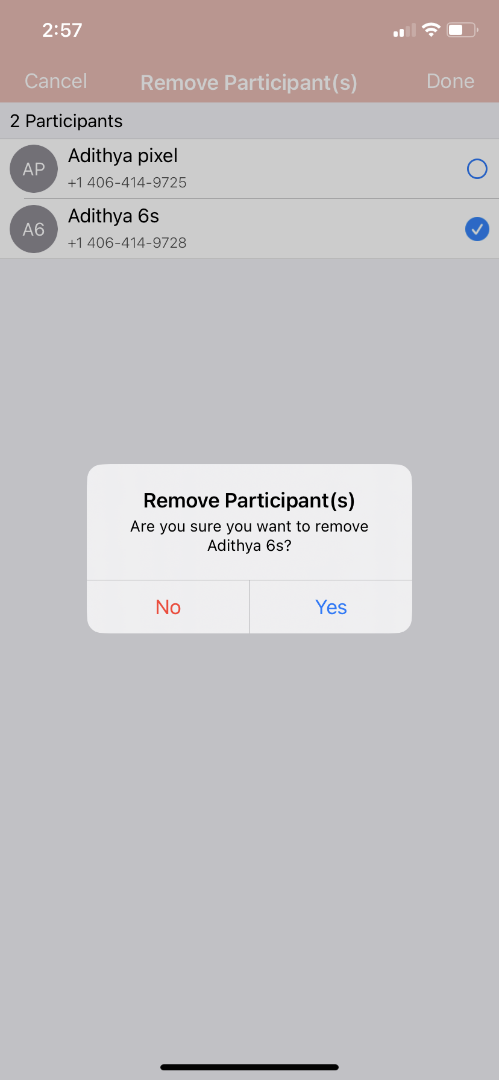
4. Confirm with Yes.

You will see:

Other MultiLine users in the group chat will see:

The WhatsApp user will see:

The MultiLine user you removed will see:

Restarting a Conversation
If you would like to restart a conversation that you left, you can send a new opt-in message. Send a new message by tapping the WhatsApp message icon in the Contact's details.
Refer to this topic to learn what to expect when you initiate a new WhatsApp conversation.
Overview
WhatsApp Business Accounts are required to gain consent from WhatsApp users prior to messaging them. These opt-in messages are captured by the Movius platform for attestation purposes.
Before you start
- Your organization must enable WhatsApp messaging for this feature to be available.
- You can only send WhatsApp messages to users in your contacts. If you need help setting up your contacts, see Get started with Contacts.
WhatsApp Opt-In Flow
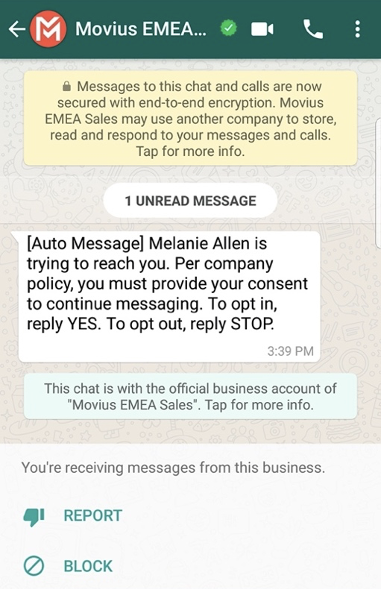
When you try to send a message to a client with WhatsApp for the first time, you're required to get consent using an Opt In process.
- To start a new WhatsApp conversation, find your contact and click the WhatsApp icon.
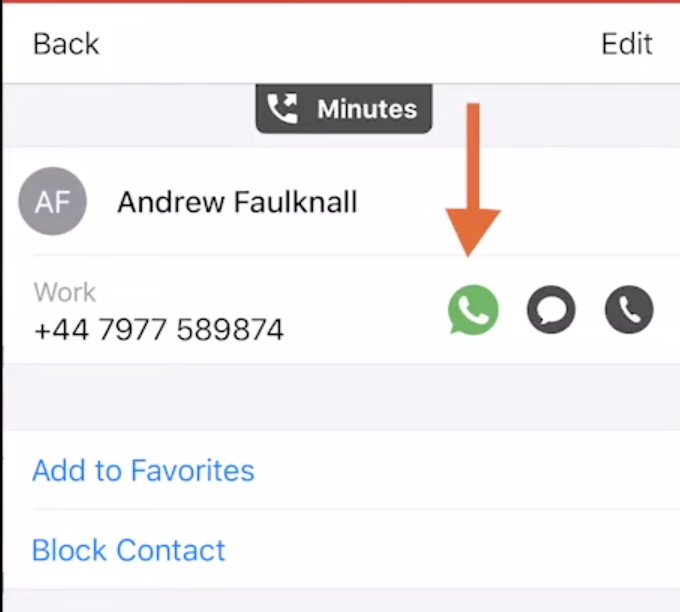
- A prompt will appear asking you if you'd like to send the contact an Opt In message.
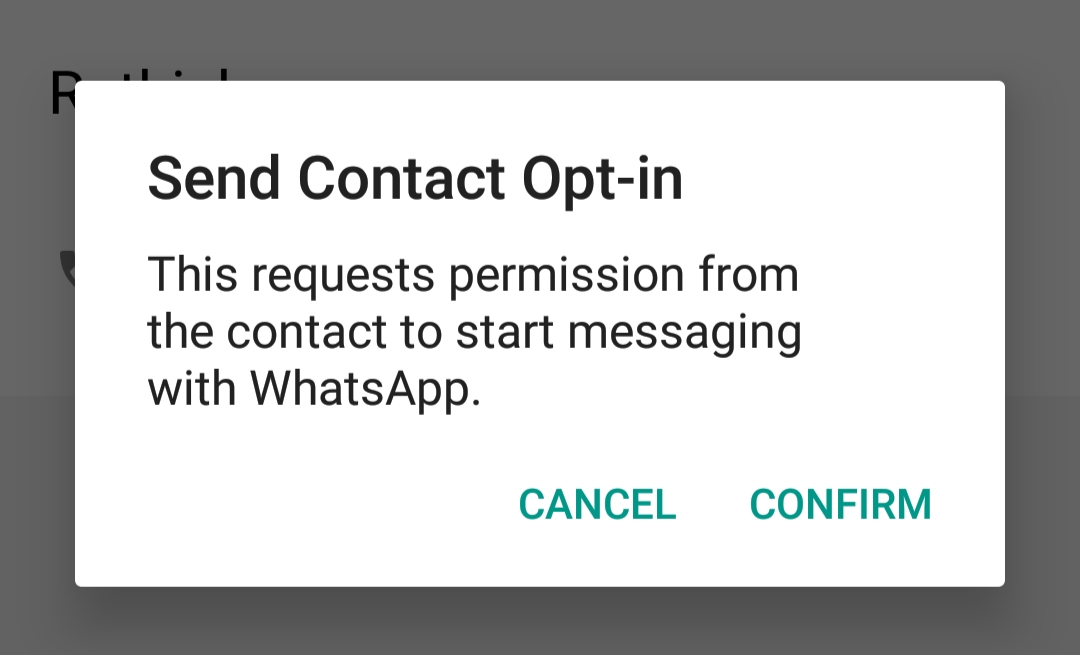
- A prompt will appear asking you if you'd like to send the contact an Opt In message.
- Click Confirm to send the Opt-In. There are four possible outcomes:
- Contact doesn't have WhatsApp
- You'll see a message letting you know your contact isn't a WhatsApp user, and ask if you'd like to send an SMS instead.
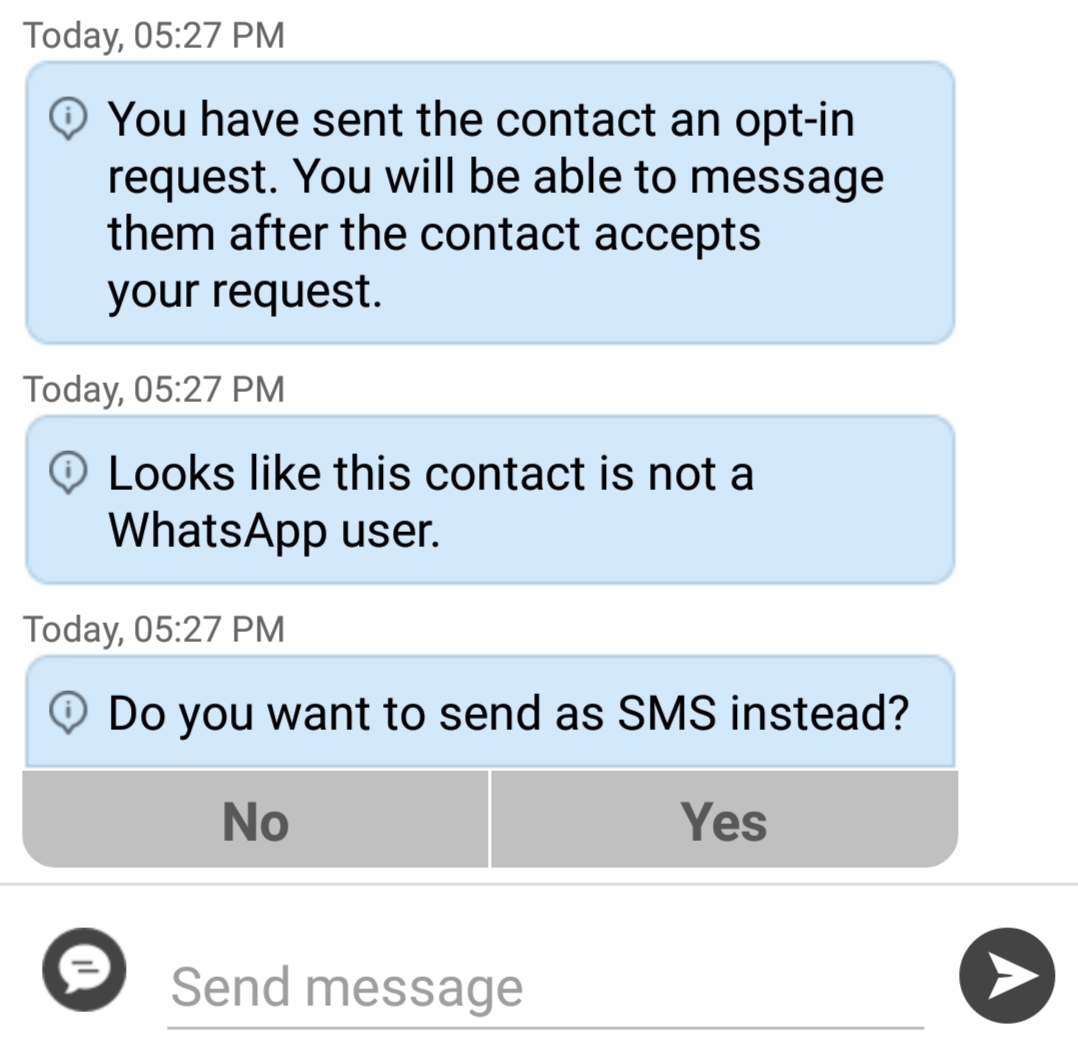
- Select Yes to go to the SMS message screen. Select No to return to contacts.
- You'll see a message letting you know your contact isn't a WhatsApp user, and ask if you'd like to send an SMS instead.
- Contact has WhatsApp- customer receives opt-in request
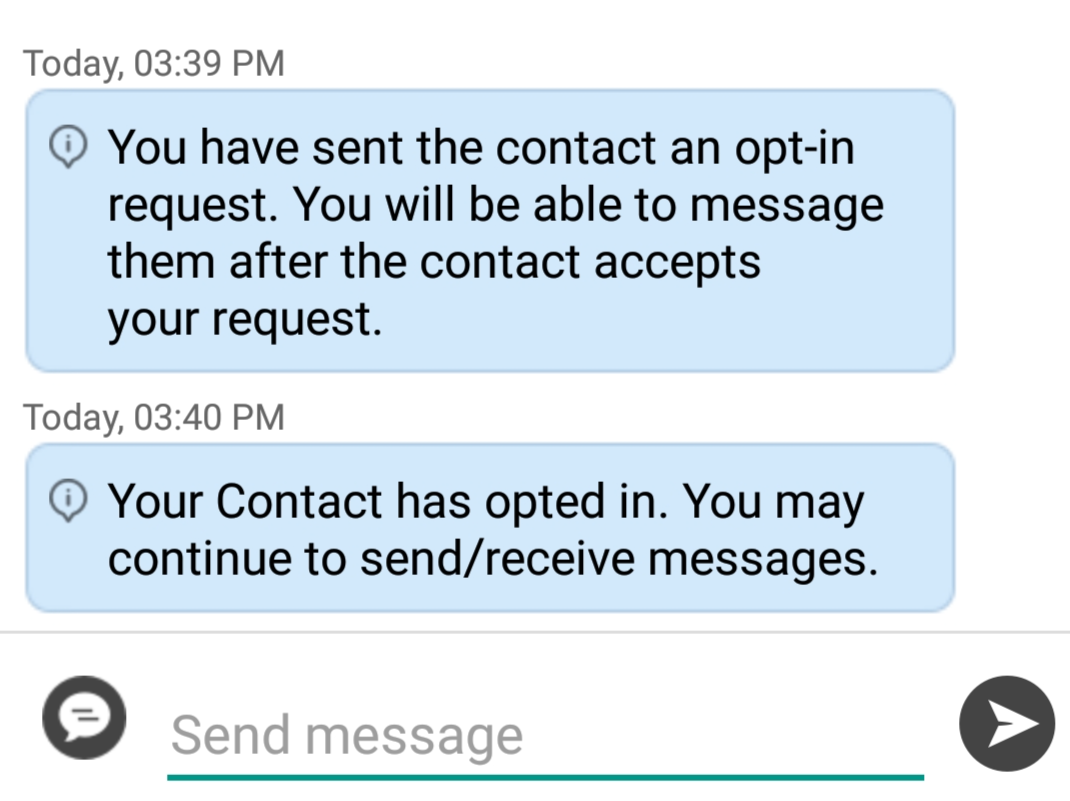
- Contact accepts Opt-In request
- You'll see a confirmation message letting you know the contact has chosen to opt-in.
- Your contact will see a message letting them know they've opted-in.
- You'll see a confirmation message letting you know the contact has chosen to opt-in.
- Contact rejects Opt-In request
- If your contact rejects the Opt-In, you'll see a message letting you know. The message templates and send message field will be disabled for the contact.
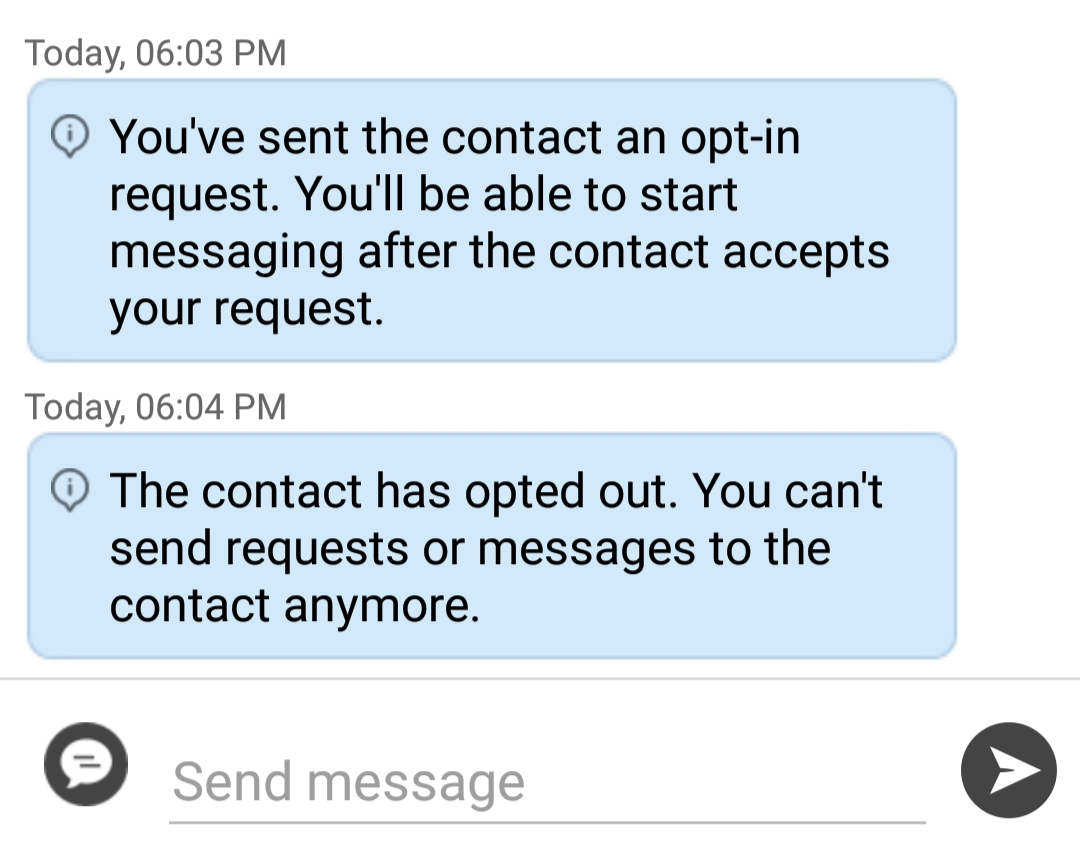
- The customer will be informed of their Opt-Out status, and that it is possible to Opt-In at any time by replying "yes".

- If your contact rejects the Opt-In, you'll see a message letting you know. The message templates and send message field will be disabled for the contact.
- Contact doesn't respond to Opt-In request
- If your contact doesn't respond to the Opt-In, you'll be able to send a new one every 24 hours.
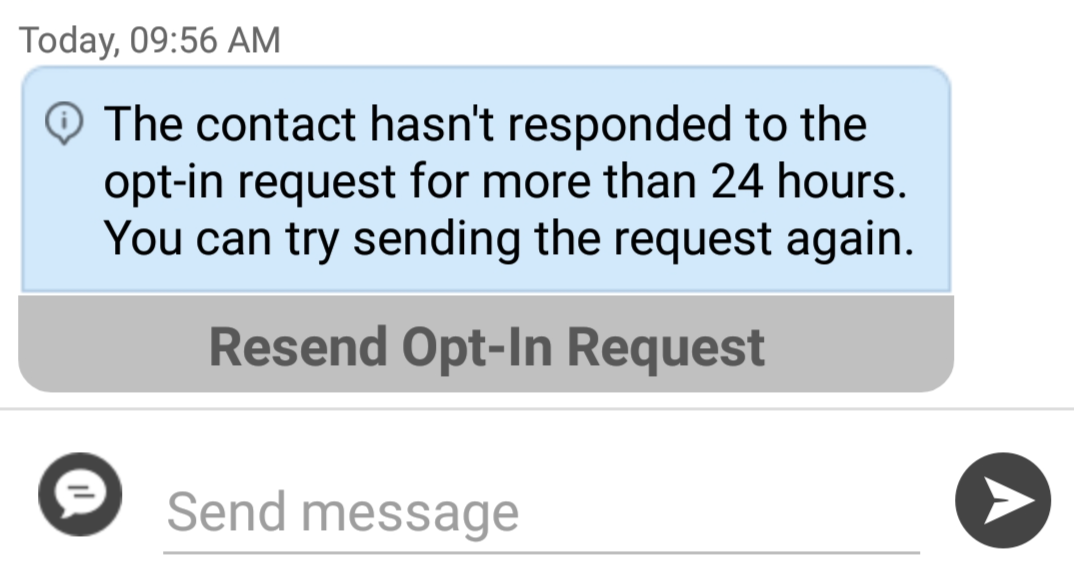
- If your contact doesn't respond to the Opt-In, you'll be able to send a new one every 24 hours.
- Contact accepts Opt-In request
- Contact doesn't have WhatsApp


